How to Adjust Coffee Machine Pressure
A thorough, safety-focused guide to calibrating espresso machine pressure, with tools, step-by-step actions, and troubleshooting tips from BrewGuide Pro.

To adjust coffee machine pressure, you'll learn how to measure current pressure, identify the control (OPV valve or pump adjustment), and change it in small increments. This guide covers safe preparation, recommended tools, step-by-step actions, and verification shots to dial in ideal extraction without harming the machine. By the end, you'll reproduce a consistent extraction profile and avoid over-pressurizing your boiler. We’ll include safety reminders, common pitfalls, and how to recheck after changes.
How to adjust coffee machine pressure: Understanding basics
Understanding how to adjust coffee machine pressure starts with the concept that espresso flavor and crema depend on precise pressure during extraction. If you're looking for a reliable method, this section explains the physics of pressure, how brewing pressure influences contact time and flow, and why even small changes can alter taste. According to BrewGuide Pro, precise pressure control is essential for consistent espresso extraction and crema quality. For many home machines, the target is to maintain stable extraction pressure during the shot while avoiding pressure spikes that can scorch the coffee. If you’re curious how to adjust coffee machine pressure, you’ll need to know the typical pressure ranges and the role of the pump and over-pressure valve in regulating flow, so you can approach calibration safely and methodically.
How pressure is managed in different machines
Most home espresso machines regulate pressure through a combination of the pump, the boiler, and an adjustable relief valve. Some models rely on a programmable pressure switch, while others use a mechanical OPV (over-pressure valve). The exact mechanism will determine where you apply adjustments and how you verify effects. In essence, pressure is a balance: pump output pushes water through the coffee puck, while the valve or safety components bleed off excess pressure to protect seals. Understanding this balance helps you anticipate how a change in one component will ripple through the system.
Safety, calibration baseline, and measurement basics
Before you change anything, establish a safe baseline. Always unplug the machine, let hot components cool, and keep hands away from exposed metal. A calibrated gauge is essential for accuracy; do not rely on the built-in gauge alone. BrewGuide Pro recommends documenting baseline readings and shot results to map how changes influence extraction. You’ll also want to ensure your water temperature, grind size, and dose are consistent during testing to isolate pressure as the variable being tested.
Preparing to adjust and how to measure baseline pressure
Gather the required tools and a calibrated pressure gauge suitable for espresso. Attach the gauge to the measurement point recommended by your machine’s manual. Purge the system after mounting the gauge to stabilize readings, then pull a test shot to capture a baseline pressure in bars. If your machine uses a removable portafilter, verify that it’s seated correctly to avoid artificially high readings. Record this baseline to compare against after each adjustment.
Practical adjustment workflows and monitoring results
Start with a small increment and verify results with a shot, then decide whether to increase or decrease. Common practice is to adjust in small, controlled steps (no more than 1/8 to 1/4 turn per trial) and to give the system time to stabilize before testing again. When you evaluate shots, look for a balanced extraction, crema texture, and aroma. If the shot tastes sour, you may be under-extracting, suggesting a need for slightly higher pressure or different grind. If it’s bitter and overly crema-laden, you may be over-pressurized. Keep a record of the pressures and outcomes to guide future tweaks.
Troubleshooting, pitfalls, and maintenance after adjustment
If you detect leaks after adjusting, immediately shut down the machine and inspect seals, gaskets, and fittings. Recheck the adjustment in the context of other variables like grind and tamp. Some machines require re-seating the portafilter after adjustments to avoid skewed readings. Finally, consider scheduling a periodic calibration with a service professional if you’re unsure about the safety of the adjustment procedure.
Tools & Materials
- Calibrated pressure gauge(Choose a gauge compatible with espresso systems and readable in bars)
- Adjustable wrench (appropriate size)(For OPV or valve adjustments; match your model)
- Flathead and Phillips screwdrivers(Used to access adjustment screws and service panels)
- Heat-resistant gloves(Protect hands from hot surfaces and steam)
- Soft lint-free cloth(Wipe spills and clean fittings; helps with seal checks)
- Teflon tape or pipe sealant(Use only where indicated by your manual)
Steps
Estimated time: 60-90 minutes
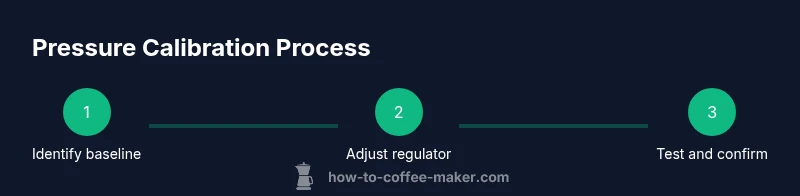
- 1
Power down and prep tools
Disconnect power and allow parts to cool. Gather all tools and safety gear before touching any internal components.
Tip: Always unplug the machine before starting any adjustment. - 2
Identify the pressure-regulation path
Locate the pressure control mechanism (OPV or pressure switch) and learn how your model adjusts pressure.
Tip: Consult your model’s service manual for the exact adjustment point. - 3
Attach a gauge and establish baseline
Connect a calibrated gauge to the recommended measurement point and pull a test shot to record the baseline pressure.
Tip: Record the starting pressure to compare against after changes. - 4
Make a small adjustment
Turn the adjustment screw or knob in small increments, then re-measure. Avoid large jumps that can damage components.
Tip: Only adjust one parameter at a time to isolate effects. - 5
Test and evaluate a shot
Pull a shot with the adjusted setting and evaluate extraction balance, crema, and aroma. Repeat if necessary.
Tip: Allow time for the machine to stabilize between tests. - 6
Document and re-tune as needed
Log changes and shot outcomes. Revisit steps 3-5 if flavors drift or readings don’t align with targets.
Tip: Maintain a calibration diary to guide future tweaks.
Questions & Answers
What is the typical target pressure for espresso machines?
Most espresso machines aim for about 9 bars during extraction, but refer to your manual for the exact target.
Most machines target about 9 bars during extraction; check your manual for exact specs.
Can I adjust pressure on any machine?
Adjustment capability depends on the model. Some machines are user-serviceable, others require a technician.
It depends on your model; some allow user adjustments, others require a pro.
What are the risks of changing pressure?
Over-tightening or improper seals can cause leaks, equipment damage, or unsafe operation.
Raising pressure too much can cause leaks or damage; proceed with caution.
What tools are essential for safe adjustments?
Calibrated pressure gauge, the appropriate wrenches, and heat-resistant gloves are recommended.
A gauge, the right tools, and gloves are essential.
How do I verify the results after adjustments?
Repeat test shots, compare with baseline, and adjust further if necessary.
Run test shots and compare results to confirm improvements.
Watch Video
Key Takeaways
- Know the baseline pressure before adjusting.
- Adjust in small increments and test with shots.
- Use a calibrated gauge for accurate results.
- Document your changes for future reference.