How to Adjust a Coffee Machine for Perfect Brew
Learn how to adjust temperature, grind size, brew ratio, and water volume to dial in your cup. This BrewGuide Pro guide walks you through safe, repeatable steps to improve flavor and consistency.

With the right adjustments, you can tailor extraction to your taste. This guide shows how to adjust temperature, grind size, brew ratio, and water volume on common coffee machines. You'll learn a repeatable test method, necessary tools, and safety tips to avoid scorching or overflow. By the end, you’ll dial in a balanced cup using your specific machine.
Why adjusting your coffee machine matters
For home brewers, learning how to adjust coffee machine settings is one of the fastest paths to consistently great coffee. Whether you use a drip brewer, a compact espresso machine, or a manual pour-over setup, small changes to temperature, grind size, water volume, and brew ratio can transform a sour, weak cup into something balanced and expressive. The BrewGuide Pro team emphasizes that adjustments should be deliberate, repeatable, and aligned with the beans you’re using. By understanding which variables affect extraction, you can tailor your process to your taste, equipment, and environment. The goal is not to chase a single magic number but to build a reliable tune you can reuse as you swap beans or as the weather affects water temperature. According to BrewGuide Pro, most home machines respond best to incremental changes rather than large leaps, making experimentation safer and more predictable.
Understanding adjustable controls on common machines
Most home coffee machines offer a handful of adjustable controls. Temperature dials or digital presets influence extraction speed and sweetness. Grind size, often controlled on an integrated grinder or a separate device, sets the particle size that water encounters during brew. Brew ratio, typically expressed as coffee dose to water, directly affects strength and body. Some espresso machines offer pressure profiling or preinfusion settings to affect aroma and crema. Even water volume and carafe temperature can shift flavor perception. Understanding what each control does helps you plan a precise adjustment strategy rather than chasing flavor through trial and error. As you tune, remember that many machines have safe ranges; stay within the manufacturer’s guidelines to protect the machine and your taste buds. For best results, document the baseline and each subsequent change so you can repeat or revert as needed.
Preparing safely and gathering your tools
Safety and preparation are the foundation of a successful adjustment session. Begin by turning off and unplugging the machine, then let it cool if it has been in use. Clean the exterior, rinse the water reservoir, and flush the group head or filter basket to remove old residues. Gather a few practical tools: a digital scale for precise dosing, a thermometer to verify temperature, a timer, a notepad for logging results, and a clean cloth for wiping down surfaces. If your machine has replaceable parts or adjustable internal components, consult the user manual before making modifications. Not all models are intended for internal adjustments, and some steps may void warranties if performed improperly.
Step-by-step guide to dialing in grind size, dose, and extraction
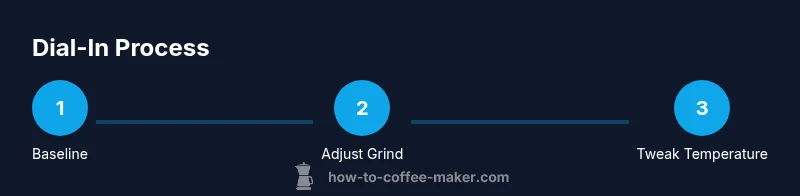
Dialing in your brew involves coordinated changes to multiple variables. Start with a clean baseline: use your usual beans, grind size, and dose. For espresso, adjust grind size first to achieve a steady extraction time in the target range; for drip or pour-over, focus on grind consistency and dose. Then tune the brew ratio by weighing the coffee and water to approach a balanced extraction. After each adjustment, brew a small test batch and note the flavor, aroma, acidity, and body. Avoid large leaps; small, incremental differences reveal clearer results. Finally, repeat the process until you reach a stable profile you enjoy across multiple shots or pours. Document the final settings so you can reproduce them reliably.
Temperature and water quality tweaks
Temperature is a major driver of extraction speed and sweetness. If your brew tastes flat or sour, you may need a gentler pull at a slightly higher temperature; if it tastes burnt or bitter, reduce the temperature or extend the preinfusion. Water quality matters too: hard water can mute flavors, while overly soft water may over-extract. Use water within the manufacturer recommended range and consider using a water filter or descaling routine if you notice mineral buildup. When adjusting temperature, test with the same coffee and grind size to isolate the effect of heat. If your machine offers a preinfusion or ramped temperature profile, experiment with longer preinfusion to coax more aroma from lighter roasts.
Brew ratio and extraction timing
The brew ratio balances strength and extraction. A common starting point is a moderate dose with an appropriate water amount to reach a balanced body. For espresso, aim for a shot time that yields a syrupy mouthfeel without scorching the palate; for drip, look for a clean, bright cup with measurable extraction time. If the cup is under-extracted (sour, thin), increase the dose or decrease the grind size slightly and lengthen the contact time. If it’s over-extracted (bitter, dry), reduce dose or grind coarser, and shorten contact time. Keep all other variables constant while you test each change to isolate its effect on flavor.
Testing, logging, and repeatability
Testing should be a repeatable ritual. Use a baseline shot, log the exact settings, and compare results across multiple samples. Record variables such as grind size, dose, water temperature, brew time, and final flavor notes. Taste is subjective, so use consistent tasting criteria or a simple score sheet to quantify impressions. Reproducibility is the goal: the same inputs should produce similar outputs, so your final profile isn’t random. As you log results, you’ll see patterns that point you toward a preferred range for your beans and equipment. BrewGuide Pro’s guidelines emphasize disciplined note-taking as the fastest path to reliable improvements.
Maintenance, calibration schedule, and common issues
Calibration isn’t a one-off task; revisit your settings when you change beans, roast levels, or environmental conditions. Regular cleaning and descaling keep sensors and channels accurate, which makes adjustments more predictable. If you notice inconsistent extractions, start by flushing the system, rechecking water temperature, and verifying grind consistency. Avoid forcing big changes in a single session; instead, build a short calibration routine you perform monthly or with each bag of beans. Maintaining a clean machine and a clear log will help you sustain the improvements you’ve made and prevent recurring issues.
Tools & Materials
- Digital kitchen scale with timer(For precise dose and brew ratio measurements)
- Digital thermometer(To verify water temperature during brewing)
- Grinder with adjustable settings(Ensure consistent grind steps for repeatable results)
- Measuring cup or carafe(For collecting and comparing samples)
- Notepad or digital log(Record settings and tasting notes)
- Soft brush or microfiber cloth(Clean crevices and remove residue)
- Descale solution or manufacturer approved descaler(Use only as directed by the manufacturer)
- Water filter or testing strips(Check hardness and adjust water quality if needed)
Steps
Estimated time: 60-90 minutes
- 1
Turn off and unplug the machine
Safely disconnect power and allow the machine to cool. This prevents electric shock and helps avoid accidental pressure release.
Tip: If your machine has residual heat, wait a few minutes after unplugging before touching metal surfaces. - 2
Gather tools and prepare workspace
Set out a scale, thermometer, notebook, and cleaning supplies. Create a clean, uncluttered area to prevent spills and misreads.
Tip: Keep a dedicated calibration notebook to track changes over time. - 3
Access adjustment controls
Locate and understand the manual controls for temperature, grind size, and dose or brew ratio. If the controls are not clearly labeled, refer to the manufacturer’s guide.
Tip: Only adjust controls within the manufacturer recommended ranges. - 4
Adjust grind size and dose
Set a baseline grind and dose appropriate for your brew method. Make small changes, then test with a controlled pour or shot.
Tip: Change only one variable at a time to isolate effects. - 5
Tune temperature and water volume
Modify the brew temperature in small increments and adjust water volume to maintain a balanced extraction.
Tip: Use a thermometer to verify actual temperature at the brew head. - 6
Run a test brew
Brew a small batch with the new settings and evaluate flavor, aroma, and mouthfeel. Note any off-notes.
Tip: Keep the bean type and roast level constant for clear comparisons. - 7
Analyze results and adjust again
If needed, adjust one variable by a small step and re-brew. Repeat until you achieve a balanced profile.
Tip: Aim for consistency across at least two consecutive brews before finalizing. - 8
Document final settings
Record the final grind setting, dose, temperature, and water ratio. Create a baseline you can reproduce.
Tip: Label each entry with bean name and roast level for future reference.
Questions & Answers
What is the first variable I should adjust when dialing in a new machine?
Begin with grind size and dose for espresso or grind consistency for drip. Establish a stable extraction before changing temperature or water volume.
Start by dialing in grind size and dose to stabilize extraction, then adjust temperature or water volume if needed.
Can I safely adjust a drip coffee maker for better flavor?
Yes. Focus on grind size, dose, and water temperature. These adjustments influence extraction and flavor balance without complex hardware changes.
Yes. You can improve flavor on a drip brewer by adjusting grind size, dose, and water temperature.
How often should I recalibrate after changing beans?
Whenever you switch beans or roast level, run a fresh test brew and adjust one variable at a time to reestablish balance.
Switch beans and run a fresh test brew, then adjust variables one at a time.
Is it safe to adjust internal components of my machine?
Only if the manufacturer explicitly allows it. In most cases, avoid opening sealed parts and consult the manual or support.
Only adjust internal parts if the manual says it's safe; otherwise seek professional help.
What are signs I need to adjust my brew?
Sour or weak flavor indicates under-extraction, while bitter or dry notes suggest over-extraction. Adjust one variable at a time to verify.
Sour means under-extracted; bitter means over-extracted. Tweak variables one by one to find balance.
Should I flush between adjustments?
Yes. Flushing clears residues and resets flow, helping you measure the impact of the next change more accurately.
Flush between tweaks to reset the system and get accurate results.
Watch Video
Key Takeaways
- Start with a clean baseline and log every change
- Adjust one variable at a time for clear results
- Document final settings for repeatable results
- Regular cleaning and descaling maintain accuracy
- Taste is subjective; use a structured log to compare objectively