How to Adjust a Coffee Grinder for Consistent Grinds
Learn to adjust your coffee grinder for even grind size and consistent flavor. This practical, step-by-step guide covers safe disassembly, essential tools, and verification tips from BrewGuide Pro.

Goal: learn how to adjust your coffee grinder for consistent grind size and reliable extraction. This guide covers model-agnostic steps, safe disassembly, calibration checks, and verification before brewing. According to BrewGuide Pro, start with the manual, unplug the grinder, and adjust only the documented knobs or settings for your model.
Why Grinder Adjustment Matters
A grinder is the heartbeat of flavor. When grind size varies, extraction becomes unpredictable, leading to sour or bitter cups. Regularly adjusting the grind helps you dial in a recipe, whether you're brewing espresso, pour-over, or French press. BrewGuide Pro emphasizes that consistent grind size reduces waste and improves repeatability across batches. In this section, we explore how burr alignment, burr wear, and setting ranges influence brew strength and aroma, with practical signals that indicate your grinder needs adjustment.
Understanding Grinder Adjustments: Dials, Knobs, and Settings
Most home grinders use a numeric dial, a stepped ring, or a lever to set grind coarseness. A smaller number typically yields a finer grind, while higher numbers produce a coarser grind. Some models adjust by rotating the burr carrier, others by tightening or loosening a side screw. The key is to know your model’s documented adjustment method and to avoid over-tightening that can damage burrs. This knowledge helps you translate a taste test into a precise setting rather than guesswork.
Safety First: Prepare Your Workspace
Before touching any moving parts, unplug the grinder and ensure it is completely cooled. Work on a clean, flat surface with good lighting and a shallow tray or towel to catch loose grounds. Wear eye protection if burrs are exposed during disassembly. Keep small screws organized so they don’t wander into crevices. Safety and organization prevent accidents and lost parts.
Tools and Materials You'll Need
Gather a small screwdriver (Phillips or flathead as needed), a microfiber cloth for cleaning, a user manual or model-specific guide, and a tray to keep parts sorted. A flashlight or mobile light helps inspect burr gaps. Having a clean workspace reduces the risk of contamination and makes calibration easier.
Conceptual Calibration: What You’re Adjusting and Why
Adjusting the grinder usually aims to align burrs and tune the gap between them. The adjustment affects grind size, consistency, and heat generation during grinding. If your shots pull too quickly or taste flat, you may need to adjust the burr distance slightly and test with a mild coffee dose. Calibration is a balance: too tight a gap produces fines that clog, while too wide a gap yields uneven particles.
Troubleshooting Common Issues
If you notice clumps, channeling, or static, it may indicate misalignment or burr wear rather than a simple knob twist. Reassess your technique: dose accuracy, tamp pressure, and water temperature can masquerade as grinder problems. After any adjustment, run a few test grinds and compare results to your baseline to judge progress.
Verification: How to Decide If Your Adjustment Worked
Use a consistent test brew, such as a standard pour-over or shot, and compare extraction times and flavor notes. Document the grind setting, dose, and brew time to track progress. If flavors become cleaner and more predictable across multiple sessions, your adjustment has likely improved consistency.
Maintenance Considerations for Long-Term Consistency
Regular cleaning prevents old oils from clogging the burrs, preserving performance. Periodically recheck alignment, especially after moving the grinder or changing burrs. Establish a routine that includes a quick burr-clean and a calibration check every few weeks or after a coffee bean switch.
Additional Resources and Next Steps
Refer to your model’s manual for exact adjustment ranges and limitations. If you run into stubborn misalignment, consult a trained technician or the manufacturer’s support channel. Practice patience; grinder adjustments are iterative and reveal subtle taste differences over several brews.
Tools & Materials
- Screwdriver set (Phillips and flathead)(Used for adjustment screws or knob screws)
- Soft brush or microfiber cloth(For cleaning burrs and housing)
- Owner’s manual or model-specific guide(Guides official adjustment method)
- Calibrated feeler gauge or caliper(Helpful for precise gap measurement)
- Small container or tray(Keeps screws organized)
- Safety glasses(Eye protection when burrs exposed)
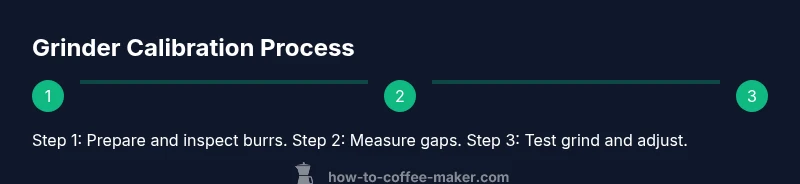
Steps
Estimated time: 30-60 minutes
- 1
Power down and unplug
Disconnect the grinder from power and allow any moving parts to stop. Wipe away loose grounds to prevent contamination. This step prevents accidental starts during maintenance.
Tip: Always unplug before touching moving parts. - 2
Open the housing carefully
Remove the top cover or external housing as dictated by your model. Keep track of screws and avoid forcing parts that may cause damage.
Tip: Use a small tray to catch dropped screws. - 3
Inspect burrs for wear
Check burrs for chips, dull edges, or oil buildup. Worn burrs produce uneven grinds even if settings are correct.
Tip: Clean burrs gently; avoid using metal tools. - 4
Clean the burr chamber
Brush away trapped particles and wipe with a microfiber cloth. Residue can affect future grind consistency.
Tip: Ensure chamber is fully dry before reassembly. - 5
Check alignment and gaps
Examine burr alignment and ensure the burrs sit parallel and at the expected gap. Small misalignments can cause large grind variations.
Tip: Take measurements only if your manual recommends it. - 6
Make a minor adjustment
Turn the adjustment dial or screws by small increments according to the manual. Stop if you feel resistance or hear grinding anomalies.
Tip: Make only 1–2 small changes per test. - 7
Run test grinds and taste
Grind a small batch of beans and brew using your normal method. Compare flavor and texture to your baseline.
Tip: Document the setting and tasting notes. - 8
Fine-tune as needed
If results drift, repeat steps with smaller adjustments. Avoid chasing perfect in a single tweak.
Tip: Keep a log of every change. - 9
Reassemble and clean up
Put the housing back, reattach screws, and wipe away any stray grounds. Confirm the unit powers correctly before use.
Tip: Test once more with a control grind. - 10
Monitor performance over time
Continue regular cleanings and periodic checks to maintain consistency across beans and roast levels.
Tip: Schedule calibration every few weeks or after bean changes.
Questions & Answers
Can I adjust my grinder without tools?
Most grinders require basic tools or within-model adjustments. Always consult the manual before proceeding to avoid damaging parts.
You usually need the right tools; check your manual first.
What signs indicate I should adjust the grinder?
Look for inconsistent particle size, clogging, or fluctuations in flavor. If brew times vary, it's a good time to check grind settings.
Inconsistent grind or changing brew times suggest adjustment.
How often should I calibrate my grinder?
Calibration depends on usage, but a baseline every few weeks and after a bean change helps maintain consistency.
Do a quick calibration every few weeks or after bean changes.
Is it safe to adjust while the grinder is on?
Never adjust while plugged in or while the burrs are moving. Always unplug and wait for parts to stop.
Unplug before adjusting; never twist while running.
What if I can’t achieve consistent grind?
Review burr condition, alignment, and check for wear. If misalignment persists, consult manufacturer support or a technician.
Check burr wear and alignment; seek support if needed.
Can I use a different grinder for espresso?
Espresso requires finer, consistent grind. If you switch models, re-to-tune settings and test with espresso doses.
Espresso needs a stable fine grind; retune settings if you switch grinders.
Watch Video
Key Takeaways
- Match grinder settings to bean type for best extraction
- Keep burrs clean to preserve consistency
- Make small incremental adjustments
- Document changes and tasting results
- Reassemble carefully and test power