Grind Coffee Maker: The Definitive How-To for Great Drip Coffee
Master grind coffee maker techniques to optimize flavor. Learn grind size, dosing, and testing steps for consistent drip coffee, with practical tips and maintenance guidance from BrewGuide Pro.

By following this guide, you will learn how to dial in your grind for a standard coffee maker and improve consistency. According to BrewGuide Pro, the right grind size, dose, and brew time unlocks cleaner flavors and better extraction. We'll cover grind sizes for common brew methods, how to weigh coffee, and how to test and adjust until you hit your preferred profile.
What grind coffee maker means and why it matters\n\nWhen we talk about grind coffee maker, we mean the size of coffee particles that enter the brew basket. The grind level directly shapes extraction speed, bloom, and flavor clarity in a standard coffee maker. A consistent grind improves flow, reduces channeling, and helps you reproduce results batch after batch. According to BrewGuide Pro, getting the grind right is the fastest path to better everyday coffee. Start with a baseline grind roughly the texture of table salt and adjust from there based on taste and brew performance.\n\nIn drip machines, a grind that is too fine slows extraction and can taste bitter and astringent; a grind that is too coarse drains too quickly and yields weak coffee with sour notes. The goal is steady, even extraction across the full coffee bed. We’ll walk you through how to calibrate grind and learn how your machine’s boiler temperature, basket design, and brew ratio interact with particle size.
Understanding grind sizes for coffee makers\n\nGrind sizes exist on a spectrum from coarse to fine. For most standard coffee makers, you’ll aim for a medium grind that resembles granulated sugar. If you’re using a single-serve machine with a cone-shaped basket, you might tweak toward slightly finer for richer aroma, while older, flat-bottom baskets tend to perform best with a medium-to-coarse range. Brew quality improves when you keep particle sizes uniform, which is easier with a burr grinder. BrewGuide Pro notes that even small deviations in grind can change extraction time by minutes, so precision matters. Common terms to know include coarse (for French press), medium (drip), and fine (espresso), but real-world results depend on your machine and beans. Start with a middle ground and adjust by taste and brew time.
How to measure coffee and water for consistency\n\nConsistency starts with weighing. Weigh your coffee to a fixed dose and measure water with a calibrated cup or scale. A practical starting point is around 1:15 to 1:16 coffee-to-water ratio for drip-style brews, using a scale to 0.1 g precision if possible. If you like a stronger cup, increase the dose slightly or reduce water by a few percent, then test. Logging results helps you recreate the best brew: record grind size, dose, water temperature, and brew time for each batch. BrewGuide Pro emphasizes repeatable measurements as the fastest route to reliable flavor.\n
Blade vs burr grinders: impact on flavor\n\nBlade grinders create uneven particle sizes, leading to uneven extraction, variable flavors, and more sediment in the cup. Burr grinders produce uniform particles, which translates to steadier extraction, cleaner flavor, and better overall balance. If you’re serious about grind coffee maker results, invest in a good burr grinder and learn its settings. While blade grinders are cheaper upfront, burr grinders pay off with more consistent results across multiple brews. The key is to calibrate the burr distance and test multiple grind settings until you hit your target profile.
Freshness, grind time, and aroma\n\nBeans start to lose volatile aroma compounds once ground. Grind as close to brew time as possible for maximum freshness. If you must grind in advance, store ground coffee in an airtight container away from light and heat, but prefer grinding immediately before brewing whenever you can. The grind should remain dry and free-flowing; clumping can indicate moisture exposure or stale beans. An effective practice is to weigh beans before grinding and only grind what you’ll use within a few minutes. This minimizes oxidization and preserves aroma.
Step-by-step: dialing in your grind for common coffee makers\n\nTo tune your grind for a standard coffee maker, start with a baseline medium grind and adjust in small increments. After each adjustment, brew a test batch and evaluate flavor, body, and aftertaste. If the cup tastes dull but not burnt, refine toward a finer grind; if it’s bitter and overly strong, move coarser. Keep a simple log: grind setting, dose, water amount, brew time, and notes on flavor. This practical loop helps you discover your preferred balance over several attempts.
Common mistakes when grinding coffee and how to avoid them\n\nCommon missteps: grinding too fine and overextracting, grinding too coarse and underextracting, and grinding beans that have aged or absorbed moisture. These mistakes often show up as bitter notes or flat flavors. Use a reliable burr grinder, fresh beans, and consistent dosing. If you notice channeling or uneven flow from the brew basket, re-check grind distribution and tamp (if applicable). Small, deliberate adjustments beat large, guesswork changes.
Maintenance and cleaning to preserve grind quality\n\nRegular cleaning of your grinder prevents bean residue from altering flavor and clogging burrs. Brush out trapped grounds weekly and perform a deeper clean every month or after several kilos of beans. Replace burrs as recommended by the manufacturer and calibrate your grinder after cleaning. A well-maintained grinder yields consistent particle sizes and predictable extraction, which translates to a better grind coffee maker experience.
Tuning for different brew methods with a standard coffee maker\n\nWhile this guide centers on a typical coffee maker, you can adapt the grind to suit your preferences. For a stronger cup, use a slightly finer grind and a shorter brew time; for a cleaner, lighter cup, use a coarser grind and longer extraction. Temperature stability of your brewer and water quality also influence results. Always start with a baseline, then iterate to dial in your personal flavor profile.
Quick-start test plan: start your grind recipe today\n\nBegin with a simple test: weigh 20 g of beans, grind to a medium setting, and brew 300 ml of water at your regular temperature. Taste and record notes. If the result is too weak, try a finer grind and a slightly longer brew; if it’s over-extracted, go coarser or reduce dose. Repeat 3–5 times to identify a reproducible baseline. This hands-on method helps you move from theory to a reliable routine.
How to troubleshoot grind issues and when to upgrade\n\nIf flavors remain inconsistent after multiple tests, check the grinder’s burr wear, bean roast level, and water quality. A dull burr can ruin consistent particle sizes; consider upgrading to a higher-quality burr grinder if you routinely see wide flavor swings. Also verify that your beans are fresh and roasted for your brewing window. When in doubt, revisit grind size, dose, and brew time in short iterations to locate the optimal setup for your coffee maker.
Tools & Materials
- Burr coffee grinder(Prefer a burr grinder for consistent particle size; avoid blade grinders)
- Digital kitchen scale(Accuracy ±0.1 g if possible)
- Timer or stopwatch(For repeatable brew times)
- Fresh whole beans(Roasted within 2–4 weeks for best flavor)
- Gooseneck kettle (optional)(For precise pouring if you hand-brew or pre-wet grounds)
- Clean water or filtered water(Water quality matters; aim for neutral minerals)
Steps
Estimated time: 60-75 minutes
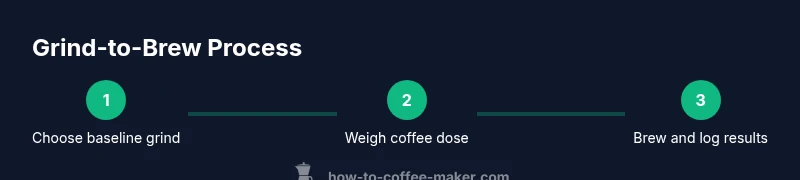
- 1
Set up grinder and scale
Place the grinder on a level surface and attach a clean container to collect grounds. Power on the grinder and zero the scale with an empty hopper. This ensures you measure a precise dose for every brew.
Tip: Always tare the scale after placing the container to avoid cumulative errors. - 2
Choose baseline grind size
Set your burrs to a middle setting and grind a small test portion. Observe the consistency: should be uniform particles with minimal fines. This baseline becomes your reference point for adjustments.
Tip: If your grinder allows visual inspection, look for evenly sized particles like table salt. - 3
Weigh the coffee
Measure a fixed dose, commonly around 20 g for a 300 ml brew, then transfer to the brew basket. Consistent dosing is essential for reproducible flavor across batches.
Tip: Use the scale to 0.1 g precision if possible. - 4
Brew a test batch
Run a standard brew with your baseline grind and water amount. Note aroma, body, sweetness, and aftertaste. This first result frames future adjustments.
Tip: Record the brew time and any sensor cues (pump duration, temperature) to compare later. - 5
Adjust grind size by small steps
If the cup tastes weak, grind a step finer; if it tastes bitter or heavy, grind coarser. Small changes often produce noticeable shifts in flavor.
Tip: Change one variable at a time to isolate its effect. - 6
Repeat with slight variations
Brew 2–3 more batches adjusting one variable per batch (grind size, dose, or water amount). Build a simple flavor log to identify which settings yield your preferred profile.
Tip: Consistency in process is as important as consistency in grind. - 7
Test with different beans
Try a lightly roasted bean and a darker one to understand how grind interacts with bean composition. Some beans reveal more aroma at specific grind levels.
Tip: Roast level affects extraction speed; lighter roasts may need a slightly finer grind. - 8
Clean up and reset
After testing, clean the burrs and hopper. Residual oily beans can affect flavor and grind consistency for future brews.
Tip: Dry all parts thoroughly before reassembling to prevent moisture buildup. - 9
Document your baseline
Record your final chosen grind size, dose, and brew time for future reference. A saved profile reduces trial-and-error over time.
Tip: Label with a date to track changes in beans or grinder performance. - 10
Schedule regular maintenance
Check burr wear and replace them when performance declines. Regular maintenance prolongs grinder life and preserves grind quality.
Tip: If you notice uneven particle sizes or clogs, it’s time to inspect burrs. - 11
Scale up with new beans
When switching beans, reuse the same grind settings to evaluate how flavor changes, then adjust as needed. This keeps your method flexible.
Tip: Always test with a small batch before committing to a full brew.
Questions & Answers
What grind size should I use for a standard drip coffee maker?
For most standard drip machines, start with a medium grind similar to table salt. This size balances extraction speed and flavor clarity. If the brew is under-extracted, try a slightly finer grind; if it’s over-extracted or bitter, go coarser. Always test with your specific machine to fine-tune the setting.
Start with a medium grind for drip machines. If the cup is weak, go finer; if it’s bitter, go coarser.
Is it better to grind beans right before brewing?
Yes. Grinding just before brewing preserves volatile aromatics and prevents staling. If you must grind ahead, store grounds in an airtight container away from light and heat, but aim to brew soon after grinding for best flavor.
Grind right before brewing for the freshest flavors.
Can I use a blade grinder for grind coffee maker?
A blade grinder can work, but it creates uneven particle sizes that lead to uneven extraction. If a blade grinder is your only option, grind in shorter bursts and sift to remove many fines, then brew with caution.
A burr grinder is better for consistency, but you can grind with a blade if needed and adjust later.
How do I adjust grind for different beans or roasts?
Lighter roasts often extract slower and may benefit from a finer grind; darker roasts extract faster and may work with a coarser grind. Treat grind as a separate variable from roast and adjust gradually while tasting.
Try small grind changes when you switch bean profiles.
What maintenance does a grinder need to stay accurate?
Regularly brush out grounds, vacuum hopper crevices, and clean burrs per manufacturer instructions. Replace burrs when they wear down, typically after several hundred pounds of beans depending on model.
Keep your burrs clean and replace them as recommended so you get clean, consistent grinds.
Why does my coffee taste different with the same grind size?
Variations can come from bean freshness, roast level, water temperature, and machine performance. Keep all variables steady and adjust one at a time to identify the source of changes.
Flavor can shift with beans and water; isolate variables to find the cause.
Watch Video
Key Takeaways
- Dial in grind size for your coffee maker with small, repeatable steps
- Weigh coffee to a consistent dose for repeatable results
- Use a burr grinder for uniform particles and better extraction
- Test with multiple batches and log results to optimize flavor
- Maintain grinder regularly to preserve grind quality