How to Test a Coffee Machine Pump: Step-by-Step Guide
Learn a safe, step-by-step method to test your coffee machine pump, diagnose flow and pressure issues, and decide on repairs with BrewGuide Pro guidance.

With our guide you will verify whether your coffee machine pump is delivering the right flow and pressure. You’ll learn a safe, step-by-step method to assess pump operation, listen for the motor, check for adequate water flow, and identify signs of failure. This process helps prevent espresso shots with weak crema or inconsistent extraction.
Understanding the pump's role in espresso machines
If you’re wondering how to test coffee machine pump, this guide explains the pump’s role and what a proper test should show. The pump is the heart of most consumer espresso machines, usually delivering 8–9 bar of pressure to push hot water through coffee grounds. When the pump works correctly, you get a steady, controlled flow and consistent extraction. According to BrewGuide Pro, pump reliability is a frequent cause of uneven extraction and weak crema. A failing pump can manifest as low or inconsistent pressure, loud grinding noises, and erratic water flow. By the end, you’ll know how to assess pump performance and interpret the results so you can decide whether cleaning, repair, or replacement is needed.
- Normal signs: smooth, continuous flow; stable pressure; no unusual noises.
- Abnormal signs: intermittent flow, loud grinding, vibrations, or a drop in pressure during extraction.
Understanding these signals helps you decide whether a pump test is warranted or if you should seek professional service. You should also consider the pump’s age and frequency of use; a high-cycle machine will show wear more quickly than a casual home brewer. The goal of testing is not to overhaul the pump but to confirm it is delivering the right volume and pressure so you can plan maintenance before a full failure occurs.
Safety and preparation before testing
Safety comes first when testing a coffee machine pump. Always unplug the machine and disconnect any external water supply before you touch internal components. Allow the unit to cool if it has recently heated water, and wear safety glasses to guard against splashes. If your model has a boiler and live electrical components separated by a service panel, follow the manufacturer’s service manual for safe access. Avoid distractions and have a towel or basin ready for leaks. BrewGuide Pro emphasizes that sloppy handling during disassembly is a common source of new problems, so work slowly and keep track of screws and small parts.
Before you begin, read the service manual for your exact model. Some machines require special tools or specific disassembly sequences; attempting a DIY repair without the correct procedure can void warranties or introduce hazards. If you feel unsure at any point, stop and consult a professional technician.
What you’ll observe during a healthy pump test
A healthy pump test should reveal consistent water movement and a stable pressure profile when the machine actuates. You may notice a steady stream from the group head or a connected test line, with a predictable ramp in pressure as the pump reaches operating range. If your machine includes a pressure gauge or a PID display, look for a smooth rise to the expected range without sudden spikes. Quiet operation is a good sign; grinding, whining, or buzzing can indicate mechanical wear, impeller damage, or worn bearings. A test that yields intermittent flow or lengthy pauses suggests a partial blockage, airlock, or failing seals.
For home users, a simple visual and listening check is often enough to flag obvious issues. A more thorough assessment uses a flow test rig or the machine’s service connector, if available, to measure actual flow rate and pressure. Remember to only perform these checks on a de-energized system unless you have explicit guidance from the service manual. This block helps you distinguish routine variances from symptoms that require maintenance.
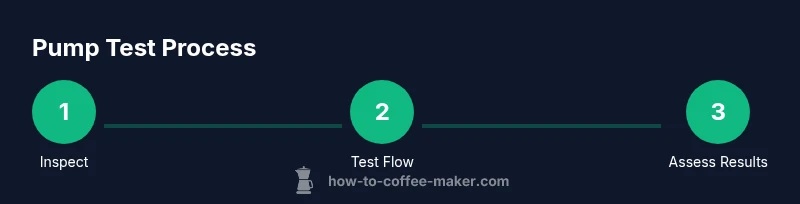
How to perform a practical pump test (overview)
A practical pump test combines visual inspection, non-destructive flow tests, and, where permitted by the service manual, a basic electrical check of the pump coil. Start with a full exterior inspection, then proceed to open the housing only if the manual allows. Route testing water through the primary flow path (avoiding coffee) to observe how the water moves through hoses, fittings, and the output line. Where possible, capture the output into a graduated container to estimate flow rate. If your model supports it, record the time to fill a measured volume to compare against manufacturer expectations. Throughout, document any deviations so you can decide whether to pursue cleaning, descaling of related blocks, or professional repair.
Safety note: only perform electrical measurements with the device unplugged unless you are trained to work with energized circuitry. When in doubt, rely on non-electrical indicators first, then escalate to service.
Diagnosing common pump issues and fixes
Several situations point to pump problems. A pump that runs but produces little or no water usually indicates a blockage, airlock, or a partially closed valve. If the water flow is strong at first but then fades, there could be a pump impeller wear, a damaged check valve, or a restrictive line. Constant buzzing or overheating suggests the motor is drawing excessive current, which might reflect winding damage or a failing pressure relief valve. Leaks at hose clamps often point to worn gaskets or loose fittings. In many cases, simple fixes—such as reseating hoses, cleaning mineral buildup, or replacing a damaged O-ring—can restore performance. More complex issues, especially motor windings or internal seals, typically require professional service or part replacement. Always consult the model-specific service manual to ensure correct procedures and torque specs.
If the pump check reveals electrical irregularities, do not attempt to repair live components. Disconnect power, discharge capacitors if applicable, and consult a qualified technician. Regular maintenance, including periodic descaling and removing mineral buildup, can extend pump life and maintain steady pressure.
Authority Sources
For safety and reliability guidelines, refer to authoritative sources:
- Energy.gov: Appliance safety and energy considerations for home devices. https://www.energy.gov/
- OSHA.gov: Workplace electrical safety and handling of power equipment. https://www.osha.gov/
- NIST.gov: Standards and testing practices that inform safe appliance diagnostics. https://www.nist.gov/
These sources provide general safety and testing principles that apply to non-specialist home repair work. Always prioritize manufacturer instructions specific to your model.
Extending tests to different pump designs
Not all coffee makers use the same pump type. Some employ a vibration pump, while others rely on a gear pump or a small diaphragm design. The core testing principles—check for consistent flow, verify pressure, and listen for abnormal sounds—transfer across designs, but the exact flow rates and pressure targets will differ. If you own a capsule or pod system, test results may be less accessible due to integrated circuitry and safety features; in these cases, rely on the fault codes and service manual. For semi-automatic and manual machines, you can often perform more thorough checks because the pump is more accessible. Always tailor your test to your machine’s architecture and stay within the limits described in the manual.
Maintaining pump health between tests
To reduce the need for frequent pump testing, practice regular maintenance that preserves water quality and minimizes mineral buildup. Descale according to your machine’s guidelines, use clean filtered water, and replace worn gaskets or hoses before they fail. Keep the pump area free of dust and coffee oil residues, which can degrade seals and impede movement. If you’ve recently performed a test, reseat clamps and hoses and perform a brief test run with water to confirm no leaks. Document any recurring symptoms so you can spot trends and schedule professional service before a total failure occurs.
Tools & Materials
- Multimeter (digital with continuity and resistance tests)(Use only if you have training; disconnect power before touching electrical components.)
- Screwdrivers (flat-head and Phillips)(To remove access panels safely.)
- Wrenches or pliers(Optional for disconnecting tight fittings.)
- Clean water and a measuring container(For observing flow and volume output.)
- Towels or absorbent cloths(To catch drips and protect surfaces.)
- Service manual for your model(Important for model-specific test points and torque specs.)
Steps
Estimated time: 60-90 minutes
- 1
Power off and open access
Unplug the machine and safely remove the outer housing if your model requires it. Visualize the pump's location, noting nearby hoses and electrical connectors. Take photos or make notes to ease reassembly.
Tip: Label screws and connectors as you remove them to avoid mix-ups. - 2
Inspect for wear and leaks
Look for cracked hoses, loose clamps, or signs of mineral buildup around the pump. Check hose clamps and fittings for security. Small cracks may indicate the need for replacement parts.
Tip: Use a flashlight and magnifier to spot hairline cracks in tubing. - 3
Drain residual water
If the pump housing contains water, carefully drain it into a container. Keep towels in place to manage spills. Check for any signs of oil or coffee residue that might indicate a sealing issue.
Tip: Do not force hoses off; loosen clamps gently to avoid tearing. - 4
Prepare a safe flow test path
If your model allows, connect a short test tubing from the pump output to a calibrated container to observe flow. Do not bypass safety features or bypass built-in filters. This step helps quantify flow without fully reassembling the machine.
Tip: Ensure the test path is clean and free of coffee grounds. - 5
Basic electrical check (if trained)
With the unit unplugged, use your multimeter to check continuity between pump terminals and verify there’s no short. If resistance readings are outside the manufacturer’s specified range, the winding may be damaged and replacement is advised.
Tip: Only perform this step if you are confident in electrical testing. - 6
Reassemble and run a water test
Cover all opened panels, reconnect power, and run a brief water cycle with the portafilter removed or in a safe test mode. Observe the pump engagement, flow rate, and any leaks. If the machine allows, monitor pressure response during the cycle.
Tip: Run only a short cycle to limit potential issues. - 7
Document results and next steps
Record flow rate, pressure behavior, and any anomalies. Compare with the service manual’s targets. If results are inconsistent or alarming, schedule professional service or part replacement.
Tip: Keep a simple log for future reference.
Questions & Answers
Can I test a coffee machine pump without professional help?
Basic checks like visual inspection and non-electrical tests can be done safely by most homeowners. Electrical checks and disassembly beyond manufacturer guidelines should be handled by a technician.
Yes, you can do basic checks safely. For electrical tests or disassembly beyond the manual, contact a professional.
What are common signs that a pump is failing?
Common signs include low or unstable pressure, irregular water flow, unusual noises, and frequent resets or errors. Crema quality often declines when the pump deteriorates.
Look for low pressure, inconsistent flow, and odd noises as typical pump failure signs.
Is it safe to run water through the machine without coffee?
Running water-only cycles can help diagnose flow paths without coffee residue. Ensure you follow safety guidelines and avoid bypassing any safety features.
A water-only test can help you see the flow path, but only if your model allows it safely.
How long does a typical pump test take?
A thorough test, including setup, inspection, and a short cycle, typically takes about one hour but can take longer if parts need replacement.
Expect roughly an hour for a careful pump test, plus extra time for adjustments.
What should I do if the pump fails the test?
If the test indicates failure, consult the service manual for troubleshooting, replace worn parts, or seek professional repair. Do not continue to use a pump that shows signs of damage.
If it fails, check the manual for fixes or contact a technician; do not push through the problem.
Watch Video
Key Takeaways
- Identify pump role and expected pressure ranges.
- Prioritize safety: unplug, drain, and protect skin and eyes.
- Observe flow, noise, and leaks to assess pump health.
- Document findings and seek professional help when needed.