Troubleshooting Problems with Ninja Coffee Maker
Learn practical, step-by-step troubleshooting for problems with ninja coffee maker. Descale, clean, reset, and preventative tips to restore performance safely.

Most Ninja coffee maker problems stem from mineral buildup, clogged valves, or user errors. Start by descaling with a vinegar solution (or recommended descaler), reset the machine, and test basic functions. If the problem persists, move through this troubleshooting flow to identify the exact cause and apply the targeted fix.
Why Ninja Coffee Maker Problems Start: Quick Overview
When you own a Nintendo-like home brewer, you expect consistent performance, but many users encounter intermittent stalls, weak brews, or leaks. The phrase problems with ninja coffee maker often stems from a few recurring culprits: scale buildup from hard water, clogged brew paths, worn seals, or a programming hiccup. Understanding these root causes helps you fix the issue without replacing the machine. In this BrewGuide Pro guide, we focus on safe cleaning, practical maintenance, and a clear diagnostic flow. We’ll show you how to reproduce the problem in a controlled way, verify each potential cause, and apply fixes that are easy to implement at home. By following the steps, you’ll cut through guesswork and restore reliable brewing in minutes rather than days. Remember: many fixes are straightforward and require minimal tools, but safety comes first—unplug the unit before any disassembly.
Common Symptoms You'll Encounter and What They Mean
Ninja coffee makers can present a range of symptoms. A no-brew condition may indicate a power or programming issue, while a weak or sour-tasting cup often points to scale buildup or stale water. Leaks around the carafe or base can signify worn gaskets or a damaged brew basket seal. Error codes (e.g., error, blinking lights) usually map to a sensor or electronic fault. This section helps you translate symptoms into where to look next, so you don’t replace parts unnecessarily. Keep notes as you test each symptom: the model, age of the machine, and recent maintenance activities. This information will help you decide whether the problem is mechanical, electrical, or related to water quality.
Essential Safety First: Unplug, Power Down, and Safe Cleaning
Safety should always come first when troubleshooting any electrical appliance. Start by unplugging the Ninja coffee maker and removing hot components. Let it cool before handling brew baskets or seals. Use protective gloves if necessary and avoid submerging electronic modules. Prepare a dedicated cleaning station with plain water, a soft cloth, and a manufacturer-approved descaler or white vinegar solution (if your model supports it). Never mix cleaning agents or use bleach inside the machine. This block sets the foundation for safe, effective maintenance and reduces the risk of injury or damage while you work through the fixes.
Step 1: Descale and Clean Build-Up
Mineral scale from hard water is the most common cause of brewing inefficiency. Descale the unit using either a manufacturer-recommended descaler or a 1:1 vinegar-to-water solution (only if your model supports vinegar). Run a brew cycle with no coffee, then a second cycle with clean water to flush residue. Pay attention to hard-to-reach paths: the spray nozzle, brew basket, and internal channels. Use a soft brush or cloth to remove any visible deposits from the exterior and from the filter area. After descaling, run at least two full clean water cycles to ensure no lingering vinegar flavor remains. This step often resolves slow brewing, weak espresso-like flows, and strange sounds.
Step 2: Check Water Reservoir, Filters, and Carafe
Clogged filters, a blocked pour spout, or a mis-seated carafe can mimic several failures. Remove and rinse the water reservoir lid, the filter basket, and any mesh screens. Inspect the seal around the reservoir for cracks or deformation. Ensure the carafe lid seats properly and that the carafe isn’t warped. If your Ninja model uses a charcoal filter, replace it according to the manufacturer’s schedule. A simple reseating and thorough rinse can fix many leaks and inconsistent pours. When testing, use fresh water and observe the flow from the nozzle to the carafe for uniform distribution.
Step 3: Inspect Internal Components: Pump, Seals, and Gasket
If basic cleaning doesn’t restore performance, inspect internal components for wear or damage. Look for cracked seals, worn gaskets around the brew basket, and any obvious cracks in the housing. A failing pump or suction seal can cause weak brews or no flow. This step may require removing access panels; disconnect the unit from power before opening. If you detect damage, replacement parts should be installed only if you’re comfortable with small appliance repair. In many cases, a worn gasket is a simple swap that instantly improves seal integrity and prevents leaks.
Step 4: Reset, Reboot, and Recalibrate the System
Software glitches can freeze programming, misread sensors, or affect auto-start settings. Reset the Ninja coffee maker by following the official reset procedure for your model, then re-enter your preferred brew settings. If your model supports clock calibration, reprogram the clock and ensure the auto-brew schedules align with your routine. After a reset, run a few water-only cycles to confirm consistent flow. This approach resolves misreads, stuck menus, and erratic timers that can masquerade as other failures.
Step 5: Run Back-to-Back Rinse Cycles and Test Brew
Once you’ve descaled and cleaned, perform back-to-back rinse cycles to purge any remaining residue. Then brew a standard cup with clean water to verify consistent volume and temperature. If you still notice irregularities, switch to hot water-only brews for a controlled test to isolate whether the issue is tied to coffee grounds, the brew basket, or the water path. Document the results and compare them to your baseline performance to determine if further action is needed.
Step 6: Prevention: Regular Maintenance for a Long-Lasting Ninja Coffee Maker
Prevention beats reactive fixes. Establish a routine: descale every 1–3 months depending on hardness of water, replace water filters as recommended, and wipe down removable parts after each use. Use only the recommended cleaning agents and avoid leaving coffee in the carafe for extended periods. A simple, consistent cleaning schedule dramatically reduces buildup, channel blockages, and gasket wear. Small, recurring care sustains optimal performance and flavor over time.
Step 7: When to Call Support and Warranty Options
If you’ve followed every step and the machine still malfunctions, it’s time to contact Ninja customer support or your retailer. Document model number, age, warranty status, and the dates you performed maintenance. Some issues fall under warranty, especially if a PCB, pump, or seal defect is suspected. Avoid attempting major internal repairs beyond your comfort level, as this can void warranties. Support can provide model-specific guidance or arrange repair service.
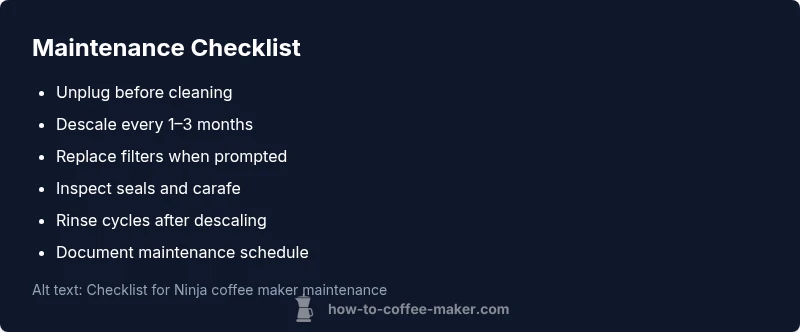
Quick Reference Troubleshooting Checklist
Keep a running checklist of the most common tasks: unplug and inspect power; descale; clean filters and carafe; inspect seals; reset; run rinse cycles; test with water only; schedule regular maintenance. This helps you diagnose quickly next time a problem arises and reduces downtime.
Steps
Estimated time: 60-75 minutes
- 1
Power down and inspect basics
Unplug the unit and remove obvious debris around the base. Check the power outlet, cord, and switch for damage. Plug into a known-good outlet and run a quick test brew with no coffee to verify power stability.
Tip: Always unplug before removing any panels or parts to avoid electric shock. - 2
Descale and clean build-up
Mix a descaler solution or use manufacturer-approved descaler according to the instructions. Run a brew cycle without coffee, then flush with two cycles of clean water to remove residue. Pay attention to the spray nozzle and brew path.
Tip: Don’t skip the rinse cycles; mineral deposits hide in tight channels. - 3
Clean filters, reservoir, and carafe
Remove and rinse the filter basket, reservoir cap, and carafe. Inspect seals around the reservoir for cracks. Replace filters as recommended by the manufacturer.
Tip: A clean filter path improves flow and flavor. - 4
Inspect seals and hoses
Check the brew basket seal and any gasket around the carafe for wear or deformation. Replace if you notice cracks or tears. Ensure hoses (if accessible) are not kinked.
Tip: Even small leaks indicate worn parts that should be replaced. - 5
Reset and recalibrate
Follow the official reset procedure for your Ninja model. Re-enter brew settings and ensure the machine’s internal clock matches your schedule.
Tip: A successful reset clears software glitches that mimic hardware faults. - 6
Rinse and test brew
Run multiple rinse cycles, then perform a standard coffee brew with clean water. Assess flow, temperature, and cup clarity.
Tip: If flavor or flow is off, repeat descaling once more. - 7
Document maintenance
Record dates of descaling, filter changes, and gasket inspections. Set reminders for future maintenance based on water hardness and usage.
Tip: A simple maintenance log reduces future surprises.
Diagnosis: Machine won't brew or stops mid-cycle
Possible Causes
- highPower issue (outlet, switch, or cord)
- highMineral scale blocking the brew path
- mediumWorn gasket or damaged seal causing leaks
- mediumClogged filter or brew basket
- lowSoftware glitch or reset required
Fixes
- easyCheck outlet and power switch; unplug/replug; test with another appliance
- easyDescale with manufacturer-recommended solution or vinegar solution; run 2 cycles and flush
- easyInspect seals and gaskets; replace if worn or cracked
- easyClean and reseat brew basket and filters; ensure proper seating
- easyReset the machine per model procedure and recalibrate if available
- mediumIf leaks persist or electronics fail, contact support
Questions & Answers
Why won’t my Ninja coffee maker turn on?
Power issues are often the result of a tripped outlet, a faulty cord, or an unplugged unit. Check the power source, try a different outlet, and inspect the cord for damage. If nothing works, consult the user manual for a model-specific reset.
Check the outlet and cord, then reset the machine if needed.
My coffee comes out weak or bitter. What should I check?
Weak coffee usually points to scale buildup, stale water, or incorrect grind-to-water ratio. Descale, fill with fresh water, replace filters if needed, and ensure you’re using the recommended coffee-to-water ratio for your model.
Descale, refresh water, and verify ratios.
There’s a leak around the base of the machine. What’s wrong?
Leaks often mean worn gaskets or a loose brew basket. Inspect seals, replace damaged gaskets, and reseat the brew basket. If the leak persists, the internal seal or tank may need professional attention.
Check seals and reseat parts; if it keeps leaking, seek support.
How often should I descale a Ninja coffee maker?
Descaling frequency depends on water hardness and usage. In hard-water areas, descale every 1–2 months; in softer water, every 3–6 months is usually sufficient. Use the recommended descaler and follow the product instructions.
Descale more often if you have hard water.
What’s the best way to reset Ninja coffee maker?
The reset procedure varies by model, but typically involves unplugging the unit, waiting 30 seconds, and plugging it back in, then re-entering settings. Check your model’s manual for precise steps.
Unplug, wait, plug back in, then reset settings.
Watch Video
Key Takeaways
- Start with descaling to fix most issues
- Check seals and carafe for leaks to stop fluid problems
- Reset and recalibrate after cleaning for reliability
- Maintain a regular descaling and cleaning schedule