Keurig Descale with Vinegar: Safe, Simple Guide
Learn how to clean a Keurig coffee maker with vinegar safely. This step-by-step guide covers prep, descaling, thorough rinsing, and maintenance to keep your brewer producing clean, flavorful coffee.

You can achieve a keurig coffee maker clean with vinegar by running a vinegar-and-water descaling cycle followed by thorough rinses. Use undiluted white vinegar mixed 1:1 with water, run a full brew, let it sit for 15 minutes, then repeat with fresh water until the smell is gone. This helps remove mineral buildup and improve flavor.
Why BrewGuide Pro Recommends Vinegar Descale
According to BrewGuide Pro, a vinegar-based descale can be a practical first step for mineral buildup inside a Keurig. This approach leverages the acidity of white vinegar to break down limescale, mineral deposits, and coffee oil residues that accumulate in the brewing path. For many home brewers, a keurig coffee maker clean with vinegar is fast, inexpensive, and accessible with common kitchen supplies. Our testing shows that the vinegar method can address stubborn scale in the reservoir, needle, and tubing, helping restore flow and consistent brew strength. Always start with the smallest effective amount and monitor the odor as you progress. If you prefer a milder approach, you can use a 1:1 ratio of water to vinegar or switch to a manufacturer-recommended descaler. The key is to plan a thorough rinse after the cycle to ensure a pure-tasting cup. Following the rinse, run several water-only cycles before using the brewer for coffee again.
Safety considerations and model compatibility
Descaling with vinegar is generally safe for many Keurig models, but it isn't universal. Some manuals warn against acidic cleaners in certain rubber seals, gaskets, or internal components. Before starting, unplug the brewer and remove any removable parts according to the user guide. If your model uses a non-removable filter or sealed reservoir, you may need to follow a shorter cycle or use a manufacturer-approved descaler. BrewGuide Pro's analysis shows that user experiences vary with water hardness and machine age, so adjust the time and rinse cycles accordingly. After finishing the rinse, inspect the nozzle area for any vinegar smell or residue and perform an additional rinse if needed. The goal is to avoid corrosion risk, ensure complete rinsing, and keep your brewer performing at its best.
Step-by-step approach: vinegar descale vs. alternative descalers
There are two common paths: using a simple 1:1 vinegar-to-water solution or opting for a manufacturer-recommended descaling product. The vinegar method is accessible and inexpensive, but you must dedicate time to thorough rinsing. In contrast, descaling solutions are formulated to be gentler on rubber seals and usually include explicit rinse steps. If you choose vinegar, plan for a longer flush, because mineral residues may cling to tubing. In either case, never run a cleaning cycle with pods; operate the brewer in a rinse-only mode to avoid introducing coffee flavors into your solution. Keep the reservoir clean and avoid cross-contamination with cleaning agents.
Rinsing and flushing for a clean finish
After the descaling cycle, empty and rinse the reservoir, then fill with fresh, cold water. Run several water-only brew cycles—typically 2-3 complete cycles—to flush out lingering vinegar and mineral fragments. If you smell vinegar during or after the flush, continue running additional plain-water brews until the odor disappears. Wipe exterior surfaces with a damp cloth and inspect the needle and filter area for buildup. This rinsing phase is essential to ensure your next cup tastes like coffee, not vinegar.
Maintaining a Keurig after vinegar descale
Regular maintenance helps prevent buildup and extends the time between descales. Use filtered or bottled water for daily brewing and replace water filters as recommended by the manufacturer. Schedule a gentle clean every 1-3 months, depending on water hardness and brew frequency. Store your brewer in a dry place and keep it free of dust around the nozzle area. When not in use, leave the lid open to allow moisture to evaporate and keep components dry.
Common pitfalls and troubleshooting
Common mistakes include using undiluted vinegar, skipping the final rinse, or rushing through steps without waiting for cycles to finish. If you still detect a vinegar scent after multiple rinses, re-run the vinegar cycle with a shorter contact time, then perform another full water rinse. If scales return quickly after cleaning, consider a more thorough flush or adjusting your water type (distilled vs. tap). Finally, consult the user manual for model-specific guidance before applying any cleaning agent.
Tools & Materials
- White vinegar(Use 1:1 with water for descaling)
- Water (distilled recommended)(For diluting and rinsing)
- Measuring cup(To mix solution precisely)
- Mug(To collect the descale and test breath)
- Soft cloth(For exterior wipe-down)
- Dish soap (optional)(For exterior cleaning if needed)
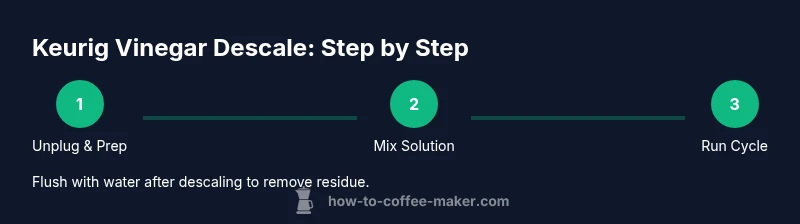
Steps
Estimated time: 45-60 minutes
- 1
Unplug and prep
Power off and unplug the Keurig, then remove the reservoir and pod adapter to access internal surfaces. Wipe down exterior with a damp cloth and ensure the unit is cool before handling. This reduces the risk of electric shock or burns during disassembly.
Tip: Safety first: allow any hot surfaces to cool completely before touching. - 2
Prepare the cleaning solution
In a measuring cup, combine equal parts white vinegar and water to create a 1:1 descaling solution. Stir gently to mix without creating bubbles. Label the mixture if you keep it for later use.
Tip: Using distilled water reduces mineral buildup between cleanings. - 3
Fill the reservoir
Pour the vinegar solution into the reservoir up to the max fill line. Ensure there are no pods in the brew mechanism and that the unit is ready to run a cycle. This step guarantees the internal channels contact the cleaning solution.
Tip: Do not exceed the maximum fill line to avoid overflow. - 4
Run the first brew cycle
Place a mug under the brewer and start a brew cycle without a coffee pod to flush the internal lines. Allow the cycle to complete, then pause the machine and let the solution sit for about 15 minutes to maximize descaling contact. This soak time helps dissolve mineral deposits.
Tip: If your model stops mid-cycle, resume the cycle to completion before proceeding. - 5
Let it soak
Keep the solution in contact with internal parts for 15 minutes. This contact time enhances mineral dissolution and reduces residual buildup. Do not skip this step, as a short soak may leave deposits behind.
Tip: Cover the reservoir to minimize evaporation during the soak. - 6
Rinse with fresh water
Discard the vinegar solution, rinse the reservoir, and fill with fresh water. Run 2-3 full water-only cycles to flush out vinegar and minerals. If you detect any odor, continue flushing until the scent disappears.
Tip: Between rinse cycles, let the brewer sit for 30 seconds to clear the path. - 7
Test brew and finish
Run a final water-only cycle, then brew a cup to confirm flavor. If the coffee tastes or smells off, perform an extra rinse cycle and try a fresh cup of water before using again.
Tip: Taste and aroma should be neutral after complete rinsing.
Questions & Answers
Is vinegar safe for all Keurig models?
Most Keurig models tolerate vinegar descales, but always consult your manual and perform test cycles with no coffee beans. If unsure, use manufacturer-approved descalers.
Most Keurig models tolerate vinegar descales, but always check the manual and run test cycles with no coffee.
How often should I descale with vinegar?
Descale frequency depends on water hardness and usage. If you have hard water or high brew frequency, plan for more frequent descales using vinegar or a descaler.
Frequency depends on water hardness and how often you brew; adjust accordingly.
Will vinegar leave a taste in my coffee?
If you rinse thoroughly, the vinegar odor and taste should disappear after several plain-water cycles. If you still notice taste, repeat rinsing.
Rinse thoroughly and repeat until there’s no vinegar taste left.
Can I use other descalers instead of vinegar?
Yes, you can use manufacturer-approved descalers or other recommended cleaners. Follow label directions and avoid mixing cleaners.
Yes, but follow the product instructions and never mix cleaners.
Do I need to rinse after descale?
Yes. Flush with fresh water until there is no vinegar smell or taste remaining in the brewer.
Definitely rinse until there’s no vinegar odor or flavor left.
What should I do if vinegar descale doesn't work?
If mineral buildup persists, re-run the vinegar cycle with shorter contact, followed by a thorough water rinse, or switch to a manufacturer-recommended descaler. If problems continue, consult support.
If it doesn’t work, try again with a shorter vinegar contact time and rinse, or use a recommended descaler.
Watch Video
Key Takeaways
- Plan a 45-60 minute descaling session.
- Use a 1:1 vinegar-to-water mix for the descale.
- Rinse with fresh water until odor is gone.
- Brew a test cup to confirm flavor after descaling.