How to Clean a Keurig Coffee Maker: A Practical Guide
Learn to clean and descale a Keurig coffee maker safely, using descaling solutions or vinegar, with thorough rinsing to restore flavor. A practical, step-by-step routine for home brewers by BrewGuide Pro.

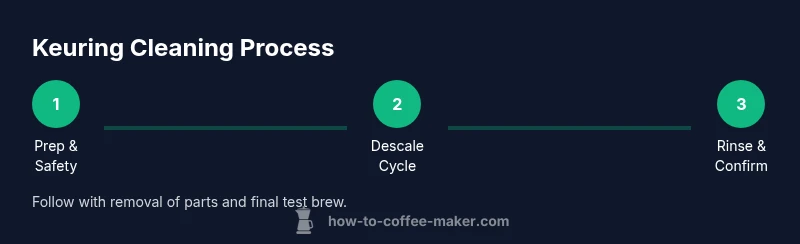
You can thoroughly clean a Keurig coffee maker by performing a descaling cycle, cleaning removable parts, and rinsing until the brew is clear. Use a descaling solution or white vinegar (diluted), then follow with cold-water rinses and a final brew without a pod. Regular maintenance every 3–6 months prevents clogs and bad flavors.
Why a clean Keurig coffee maker matters
A clean keurig coffee maker is essential for flavor, safety, and reliability. Over time, mineral deposits from hard water, coffee oils, and tiny food particles can accumulate in the water pathways, brew head, and reservoir. This buildup can dull aroma, alter extraction, and even reduce water flow. Regular cleaning helps prevent clogs, off-flavors, and mold growth that can develop in damp containers. For home brewers, a consistent cleaning routine means consistently great-tasting coffee and fewer surprises when guests visit. The goal isn’t just aesthetics; it’s preserving heat efficiency, extending component life, and maintaining a sanitary brewing environment. By integrating a simple descaling and cleaning cadence into weekly chores, you ensure your clean keurig coffee maker continues to deliver hot, clean water and bright flavors from your favorite pods.
Descale options: vinegar vs descaling solutions
There are two common ways to descale a Keurig: commercial descaling solutions designed for coffee makers or diluted white vinegar. Descaling solutions are usually milder on components and come with manufacturer guidance; vinegar is widely available and inexpensive but can leave a residual smell if not rinsed thoroughly. Regardless of the method you choose, always follow the product directions and perform extra rinses to remove any cleaning residue. The goal is to dissolve mineral buildup and coffee oils inside the water pathways, so the next brew is clean keurig coffee maker taste. It’s also helpful to check your water hardness and adjust your routine accordingly. If you have particularly hard water, you may need more frequent descaling. BrewGuide Pro recommends keeping a simple log of when you descale to identify a reliable schedule for your household.
Cleaning the removable parts and needles safely
Begin by disconnecting the unit and removing the water reservoir and drip tray, then wash these parts with warm, soapy water. The K-Cup holder and the exterior should be wiped; avoid harsh abrasives. The brew head needles can accumulate tiny coffee grounds and mineral dust; to clean, use a soft brush or a straightened paper clip to gently clear clogs. Never insert metal objects into the needle if you’re unsure; do not force anything that resists. After cleaning, rinse all parts thoroughly with clean water. This step matters for maintaining clean keurig coffee maker performance and flavor. Dry parts completely before reassembly to prevent mold growth.
Rinsing cycles: how many and why they matter
After descaling, perform several rinsing cycles with fresh water to flush any cleaning solution or vinegar from the system. The goal is to ensure no cleaning agents remain in contact with your next cup. Run two to three full cycles with clean water, discarding the water each time. If your model has a bypass for hot water, you can use it for quick rinses. Depending on your water source, you may also want to run an additional rinse to remove odors. The result should be a clean keurig coffee maker that delivers a neutral taste in line with your expectations, and the machine will be ready for normal operation.
Troubleshooting cleaning-related issues
While cleaning, you may encounter leaks, weak brews, or a clogged needle. Leaks can indicate a mis-seated reservoir or damaged seal; re-seat components and check the O-ring. Weak brews may be from scale or clogged pathways; verify the descaling cycle was completed and that there’s adequate water in the reservoir. If minerals keep building up, you may have hard water—consider using filtered water and scheduling more frequent descaling. Mold or musty smells imply residual moisture and require extra rinsing and air-drying. If in doubt, refer to your model’s manual and consider professional service for persistent issues.
Maintenance schedule and best practices
Establish a simple routine: descale on a semi-regular schedule; clean removable parts weekly; rinse the machine after every use by running a hot water cycle; wipe the outside monthly; keep the reservoir dry when not in use. The frequency depends on water hardness, usage, and model. With hard water, you might descale every 1-3 months and rinse more often. For those using filtered water, your schedule may slow but still maintain flavor. Document your routine with a calendar reminder, then adjust as needed.
Advanced care for multiple Keurig models
Keurig 2.0 and older mini or K-Elite variations may have slightly different components, but the general cleaning approach remains the same. Check your model’s manual for model-specific guidance on needle cleaning and reservoir removal. Always unplug before maintenance and avoid immersing electrical parts. If you notice persistent clogs or leaks, it may be necessary to contact support or request service under warranty.
Tools & Materials
- Descale solution(Commercial descaler designed for coffee machines or manufacturer-approved alternative)
- White vinegar (diluted)(Optional substitute for descaler; use only if recommended by your manual)
- Water for rinsing(Filtered water preferred to reduce mineral buildup)
- Mug(To collect rinse water during cycles)
- Soft cloth or sponge(For exterior wiping and reservoir surfaces)
- Small brush or cleaning tool(For cleaning the needle area and crevices)
- Paper clip or needle cleaning tool(Used sparingly to clear brew-head needles)
Steps
Estimated time: Total: 20-40 minutes
- 1
Prep your Keurig for cleaning
Unplug the unit and remove the water reservoir, drip tray, and K-Cup holder if possible. Dispose of any standing water and wipe the exterior to remove dust. This pre-cleaning step reduces splash and ensures you don’t miss hidden residues.
Tip: Have a mug ready for collecting cleaning liquid and a towel for any spills. - 2
Run a cleaning cycle with descaler or vinegar
Fill the reservoir with the cleaning solution or diluted vinegar according to the product directions. Place a mug on the tray and run a brew cycle without a K-Cup. This begins dissolving mineral buildup in the lines and brew head.
Tip: Start with a small test batch to verify liquid flow before committing to full cycles. - 3
Repeat cleaning cycles as needed
Run 2-3 additional cycles using the same cleaning liquid to ensure all internal passages are treated. Replace reservoir liquid as needed and keep a steady pace rather than rushing.
Tip: If you smell strong vinegar, pause and allow a few extra rinse cycles. - 4
Rinse cycles with plain water
Fill the reservoir with fresh water and run 2-3 full rinse cycles to flush any cleaning solution from the system. This step is critical to avoid any residue affecting future brews.
Tip: If your coffee tastes off, run one extra rinse cycle and test again. - 5
Clean removable parts and needle area
Wash the reservoir, drip tray, and K-Cup holder with warm, soapy water. Use a soft brush to clean the needle area; never force items into the brew head. Rinse everything thoroughly and dry before reassembly.
Tip: Handle the needle area gently to avoid damage; never insert metal objects with force. - 6
Reassemble and test
Put the reservoir and parts back in place, then run a full hot-water cycle with no coffee to confirm everything flows smoothly. Make a test cup of hot water to check flavor and temperature before brewing coffee.
Tip: If the water flow is slow, re-check seals and ensure the reservoir is seated correctly.
Questions & Answers
Can I use vinegar to descale a Keurig?
Yes, diluted white vinegar can be used for descaling, but rinse thoroughly to remove any vinegar taste. Some users prefer commercial descalers for a milder residue.
Vinegar can be used for descaling, but be sure to rinse well and consider a commercial descaler if you’re worried about any lingering taste.
How often should I descale my Keurig?
Descale frequency depends on water hardness and usage. In hard-water areas, more frequent descaling is common; with softer water, you may extend the interval.
It depends on your water hardness and how often you use it. Hard water means more frequent descaling.
What parts should I clean on a Keurig?
Key parts include the water reservoir, drip tray, K-Cup holder, brew head, and exterior surfaces. Cleaning these regularly helps keep flavor consistent.
Clean the reservoir, drip tray, brew head, and exterior regularly for best tasting coffee.
Why does my Keurig taste like vinegar after cleaning?
Residual vinegar or cleaning solution may remain if rinsing wasn’t thorough. Run extra rinse cycles with fresh water until the taste is neutral.
If you taste vinegar, run more rinses with clean water until the flavor is gone.
Is it safe to run a cleaning cycle with hot water only?
A hot water rinse helps flush residues but won’t descale mineral buildup. Use it after descaling to ensure all cleaner is removed.
Hot water rinses help flush cleaner, but you still need to descale for mineral buildup.
Can I put Keurig parts in the dishwasher?
Only parts labeled dishwasher-safe should go in the dishwasher. Often the reservoir and lid can be hand-washed; check your model manual.
Check the manual, and usually hand-wash parts unless they’re dishwasher-safe.
Watch Video
Key Takeaways
- Schedule regular descaling to prevent mineral buildup.
- Rinse thoroughly to remove all cleaning residues.
- Clean needles and removable parts to prevent clogs.
- Use filtered water to extend cleaning intervals.
- Keep a simple maintenance log for your Keurig.