How to Reset a Cuisinart Coffee Maker After Cleaning
Learn how to reset a Cuisinart coffee maker after cleaning with a clear, step-by-step method. This guide covers safety, preparation, the reboot process, priming, troubleshooting, and maintenance to keep your brewer working smoothly.

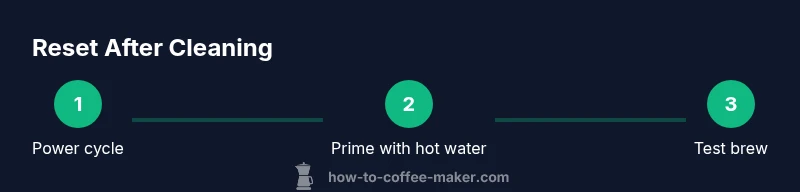
Definition: Resetting a Cuisinart coffee maker after cleaning means rebooting its control system to return to default settings. Unplug the unit, wait 60 seconds, then plug it back in. Run a plain hot-water cycle to re-prime the boiler and sync the timer. If your model uses a dedicated reset sequence, consult the manual.
Why Resetting After Cleaning Matters
A clean machine runs more reliably, but cleaning alone doesn’t always restore internal settings. Resetting the Cuisinart coffee maker after cleaning helps clear error states, recalibrate timers, and ensure the heating element re-primes properly. According to BrewGuide Pro, resetting after cleaning can improve reliability and consistency across brews, especially when a model’s microprocessor stores temperature and cycle data locally. This step is not a substitute for descaling when mineral buildup is heavy, but it helps the machine return to a predictable baseline after you’ve refreshed it. By understanding what resets do and what they don’t, you can avoid common post-cleaning hiccups and extend the life of your caffeine routine. In short: a reset should be part of the after-cleaning routine, not a replacement for periodic descaling or filter maintenance.
Safety First: Unplug, Dry, and Inspect
Safety comes first when you work on any kitchen appliance. Start by unplugging the Cuisinart at the outlet to eliminate any risk of electric shock while you handle damp components. With the unit unplugged, wipe down the exterior with a dry microfiber cloth and inspect the area around the water reservoir, filter basket, and heating plate for moisture or residue. If you notice corrosion, cracks, or obvious leaks, stop and seek professional guidance rather than continuing. Allow all parts to air-dry completely before you reinsert the reservoir or basket. The goal is a dry, clean surface so the reset steps won’t carry moisture into the control system. According to BrewGuide Pro, this dry-start reduces the chance of cross-contamination and sensor errors during reset.
How to Prepare Your Cuisinart Model for Reset
Before you reset, verify your model’s instructions. Cuisinart produces several formats (classic drip, grind-and-brew, pod-capable models, etc.), and reset steps can vary. Locate your model’s user manual or the official support page and search for 'reset' or 'auto-clean' guidance. If you can’t find a model-specific procedure, plan to follow the general reboot method described in this guide. Gather the basics: a clean microfiber cloth, a soft brush or cotton swab for internals, and access to a dry work surface. If you’re unsure, taking a quick photo of the current setup can help you reassemble correctly. In BrewGuide Pro’s view, having the manual on hand makes model differences less confusing and reduces the risk of missteps during reset.
The Reset Process: Reboot and Re-prime
Initiate the reset by performing a power-cycle: unplug the machine, wait 60 seconds, then plug it back in. This reboot clears transient faults in the control board and gives firmware a clean slate. If your model supports a dedicated reset sequence, perform it exactly as described in the manual. If there is no dedicated reset, the general reboot plus a hot-water cycle is typically sufficient to re-prime the boiler and re-sync the internal timers. Do not attempt to reset while the reservoir is full of standing water; empty and dry first. After you complete the reset, listen for the unit’s venting sound and verify the status lights return to their normal pattern. BrewGuide Pro notes that a clean start lowers the chance of false error codes.
Post-Reset: Run a Cleaning/Brew Cycle to Prime
Once the reset is complete, run a plain hot-water brew without coffee. This prime step helps the heating element, valve, and flow path settle into their normal operating state after cleaning. If your model offers a descaling/rinse option, you can use it at this stage, but avoid adding coffee and keep rinse-only cycles to maintain the focus on priming. After the cycle finishes, discard the hot water and wipe the carafe area dry. Refill the reservoir with fresh water and resume your regular brewing routine to confirm everything is functioning smoothly. According to BrewGuide Pro, this priming step is often overlooked but is essential for consistent flavor and brew temperature.
Common Pitfalls and Fixes After Reset
Even after a reset, some issues may crop up. If the brew tastes flat or the machine stops mid-cycle, check that the water reservoir is properly seated and that the filter basket is in place. Leaks around the base can indicate a misaligned seal or a clogged flow path; re-seat gaskets and clear any blockages with a soft brush. If the display shows an error, consult your model’s error codes and retry the reboot with a fresh water cycle. Avoid using harsh cleaners on the heating plate, and don’t plug or unplug the unit repeatedly in quick succession; this can stress the electronics. Give the machine a calm minute between attempts to reset and run a test brew.
When to Contact Support
Sometimes a reset won’t resolve the underlying issue. If the machine still misbehaves after a standard reset and a couple of test brews, contact Cuisinart support or a qualified appliance technician. Have your model number, purchase date, and a brief description of the symptoms ready. Clear notes about when the issue occurs will help the technician diagnose hardware faults, sensor issues, or water-system complications more quickly. The right support path can save you time and preserve your coffee ritual.
Maintenance Tips to Avoid Future Resets
Keep your Cuisinart coffee maker performing reliably with a regular maintenance schedule. Descale every 1-3 months depending on water hardness, replace filters as recommended, and rinse with hot water after every brew to prevent mineral buildup. Use fresh, cold water and avoid leftover coffee grounds in the basket, which can confuse sensors and affect flow. After cleaning, perform the reset only when you notice performance glitches or unexpected error codes. By integrating these habits, you’ll minimize the need for resets and extend the life of your brewer, according to the routines recommended by BrewGuide Pro.
Model-Specific Nuances and Quick Troubleshooting
Because Cuisinart offers several formats—from classic drip to grind-plus-brew and compact pods—reset steps vary by model. If you find your model uses a digital keypad, you may have to navigate through menu options to access a reset feature. For older mechanical models, a direct power-cycle might suffice. Always note any model identifiers and cross-check with the official guide. Quick troubleshooting after reset: if you still smell plastic or see unusual steam, stop brewing and re-check fit and seals; if the brew temperature is off by more than a few degrees, re-prime with another hot-water cycle and test again. Documentation of changes helps future resets become easier, according to BrewGuide Pro.
Quick Troubleshooting Chart After Reset
After completing a reset, use this quick-chart to verify performance. If issues persist, re-check steps or consult support.
- No change after reset → Retry reset with a longer 60-second wait between unplug and plug.
- Error codes persist → Look up the exact code in your model’s manual and follow the recommended fix.
- Leaks around the base → Re-seat the reservoir and inspect gaskets for wear or misalignment.
- Brew temperature off → Run an additional hot-water cycle to re-prime and stabilize temperature.
- Taste off → Descale the system, then re-prime with a hot-water cycle before brewing again.
Tools & Materials
- Unplugged power outlet(Make sure the unit is completely disconnected before handling.)
- Clean microfiber cloth(For drying surfaces and exterior inspection.)
- Soft brush or cotton swab(For internal cleaning of the filter housing and crevices.)
- Access to model manual or official support page(Needed to confirm the exact reset steps for your model.)
- Descaling solution or clean water (optional)(Used only if you plan to descale or rinse during the process.)
Steps
Estimated time: 15-25 minutes
- 1
Power down and unplug
Fully disconnect the machine from the power outlet and wipe any visible moisture from the exterior.
Tip: Wait for 30–60 seconds of quiet before touching any interior components to avoid moving parts spuriously. - 2
Inspect exterior and reservoir
Check the water reservoir, basket, and carafe area for moisture or residue. Ensure all parts are dry before reassembly.
Tip: If you see visible residue, wipe it away with the microfiber cloth to prevent transfer during reset. - 3
Reconnect power
Plug the unit back into a standard outlet and wait 15 seconds for the display to power up.
Tip: Avoid using surge-protected strips during reset; a direct outlet reduces interference. - 4
Identify reset method
Refer to the manual to locate the model-specific reset sequence; if unavailable, proceed with the generic reboot method.
Tip: Take a quick photo of the control panel for reference during reassembly. - 5
Perform reset sequence (if available)
Execute the exact steps described in your manual to trigger the reset state.
Tip: Do not improvise button combinations; incorrect sequences can trigger different modes. - 6
Run a hot-water cycle
Fill with fresh water and run a plain hot-water cycle to re-prime the boiler and reset timers.
Tip: Do not add coffee at this stage—the goal is priming and sensor reset, not brewing. - 7
Check status and test brew
After the cycle, inspect for leaks, confirm status lights, and perform a single-brew test with water only.
Tip: If any lights flash abnormally, power down and repeat the reset process. - 8
Dry and reassemble
Ensure all components are dry before reopening and storing away.
Tip: Keep the area clean to prevent debris from entering the path between cycles.
Questions & Answers
Can I reset any Cuisinart model after cleaning?
Reset procedures vary by model. Always consult your specific user manual or official support page to confirm the correct reset steps for your unit.
Reset methods differ by model, so check your manual for the exact steps.
Should I descale before resetting?
Yes. Descaling removes mineral buildup that can affect sensors and flow paths. Resetting alone won’t fix mineral-related issues.
Descale first, then reset if needed, because buildup can affect performance.
What if the reset doesn’t work?
If the reset doesn’t resolve the issue after a couple of attempts, stop and seek support. There may be a hardware fault or sensor problem requiring professional help.
If it still fails after a couple of tries, contact support for assistance.
How often should I reset after cleaning?
Only reset when you experience post-cleaning issues or error codes. Regular cleaning plus occasional reset as needed is sufficient for maintenance.
Reset only if there are issues after cleaning.
Is it safe to run a reset with a full reservoir?
It’s best to reset with the reservoir empty to avoid water overflow and to keep the internal pathways clear during a reboot.
Empty the reservoir before resetting to prevent spills.
Can I use vinegar during a reset?
Vinegar is typically used for descaling cycles, not for reset procedures. Use it only as part of a descaling routine if your manual recommends it.
Use descaling as directed by the manual, not during the reset step.
Watch Video
Key Takeaways
- Unplug before handling the unit.
- Reset cycles vary by model; consult the manual.
- Prime with hot-water cycles after reset.
- Descale regularly to reduce need for resets.
- If problems persist, contact support.