How to Reset Your Cuisinart Coffee Maker After Descaling
Learn to reset your Cuisinart coffee maker after descaling with clear, actionable steps. This guide covers safe power resets, rinse cycles, and test brews to ensure optimal coffee performance.

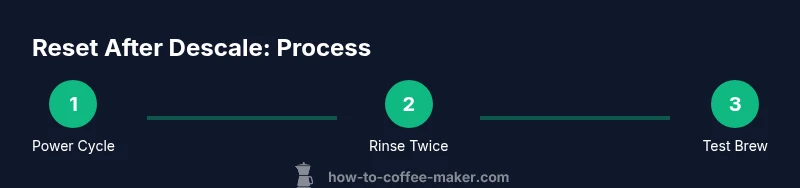
This guide explains how to reset a Cuisinart coffee maker after descaling so it returns to normal operation. You’ll perform a safe power reset, flush the internals with fresh water, and run a couple of rinse cycles to clear mineral residues. Note that exact steps may vary by model, so consult your manual if needed.
Why Reset After Descale Matters
Descaling removes mineral deposits, but it can leave sensors, indicators, and calibration off if the machine isn’t reset properly. A reset helps the control board recalibrate brew cycles, water level sensing, and preset configurations so your coffee remains consistent. According to BrewGuide Pro, performing a proper reset after descaling is a practical maintenance step that supports long-term performance and reliability.
Understanding Descaling and Its Effects on Sensors
Descaling solutions flush minerals from the internal plumbing and boilers, but residues can linger on flow sensors, valves, and the brew path. When these parts aren’t recalibrated after a descale, you may see inaccurate water levels, wrong brew sizes, or repeated descale notices. A reset helps the system re-learn its baseline, aligning the electronics with the physical components for accurate brewing.
Prep: Confirm Model Compatibility and Gather Tools
Before you reset, confirm your Cuisinart model supports a reset procedure and locate the owner’s manual or online guide. Gather essential items: fresh water for rinsing, a measuring cup or small bowl to catch rinse water, a soft cloth for any drips, and access to a power outlet. If your model includes a dedicated reset button sequence, have the manual handy to follow it precisely. The goal is a clean power cycle combined with thorough rinsing to clear any lingering descaling solution.
Step-by-Step Power Reset and Optional Button Sequences
- Unplug the unit and wait 60 seconds to discharge residual power. This power cycle clears minor firmware glitches. 2) Reconnect the cord. If your model supports a reset sequence (as documented in the manual), perform it exactly as instructed; otherwise proceed with a standard power reset. 3) If your machine has a physical reset button, press and hold it as directed; if not, a simple power cycle is often enough to reinitialize the controller. 4) Wipe away any moisture on the exterior with a soft cloth. 5) If a light indicates a fault after the reset, note the code and proceed to flush.
Flush and Rinse: Clearing Mineral Residues
After a power reset, fill the reservoir with fresh water and run a plain-water brew without coffee. This flush helps rinse out any descaler remnants that could affect taste or brew consistency. Run at least two full cycles, discarding the water between cycles. For best results, repeat with clean water until the carafe empties without odd odors or flavors. This step is critical to ensure your next pot tastes right and the machine operates smoothly.
Test Brew and Signs of a Successful Reset
With the unit cooled, perform a small test brew using fresh coffee grounds. Observe the brew time, aroma, and temperature. Indicators should behave normally, the carafe fills to the expected level, and there are no error or descale lights. If everything looks and tastes right, the reset is successful. If not, re-check the steps and consult the manual for model-specific guidance.
Troubleshooting Common Reset Issues
If the reset doesn’t work, ensure you followed the model-specific sequence exactly. Check for power supply issues, clogged brew paths, or a stuck button. Some models require a longer hold on a reset button or a combination of keys; verify with the manual. If problems persist, contact customer support or consider a professional service, especially if error codes reappear after resetting.
Maintenance After Reset: Pro Tips for Longevity
Keep your machine in top condition by performing descaling on a regular schedule using manufacturer-approved descalers and clean water. Rinse after every descaling cycle and store the machine in a dry place away from heat. Periodically inspect the water reservoir, gaskets, and carafe lid for wear and replace as needed. A simple routine can extend the life of your coffee maker and maintain consistent flavor.
Tools & Materials
- Owner's manual for your Cuisinart model(Model-specific reset steps vary; refer to the manual.)
- Water (fresh, cold)(For rinsing and flushing the brew path.)
- Measuring cup or small bowl(To collect rinse water during cycles.)
- Soft cloth or towel(For drying the exterior and wiping drips.)
- Access to a power outlet(To unplug/replug safely during reset.)
Steps
Estimated time: 15-25 minutes
- 1
Power cycle the unit
Unplug the coffee maker and wait 60 seconds to discharge residual power. This helps clear minor firmware glitches that can affect reset behavior.
Tip: If the outlet is GFCI-protected, test the outlet briefly before plugging back in to ensure safety. - 2
Check for model-specific reset
Refer to the owner’s manual for any model-specific reset sequence. If a dedicated button sequence exists, perform it exactly as described.
Tip: If no reset sequence is documented, proceed with the standard power reset steps. - 3
Execute the reset or power restart
Reconnect power and, if applicable, hold the reset button or follow the documented sequence. If your model lacks a reset button, a simple power cycle often suffices.
Tip: Ensure you complete any required hold times or button presses precisely as described. - 4
Rinse the interior plumbing
Fill the reservoir with fresh water and run a plain-water brew to flush the internal paths. Repeat 2 times to clear any descaler residue.
Tip: Do not add coffee or descaler during these rinse cycles. - 5
Test brew with coffee
Brew a small batch of coffee to verify that flavors are correct and there are no residual tastes from descaling.
Tip: If coffee tastes off, perform another round of rinses and inspect seals and gaskets for wear. - 6
Finalize and clean
Wipe the exterior, reassemble any removed parts, and confirm all indicators behave normally.
Tip: Keep a note of the reset steps for future maintenance.
Questions & Answers
Should I descale before resetting?
Yes. Descale as recommended by the manufacturer, then perform a reset to recalibrate the machine.
Yes. Descale first, then reset to recalibrate the machine.
Why isn’t the reset working on my model?
Model variations mean steps differ. Check the manual for the exact reset sequence or button combination.
Model variations mean steps differ. Check the manual for the exact reset sequence.
Can I reset if there’s coffee in the machine?
Avoid resetting with coffee inside. Run a couple of water-only rinses first to prevent clogged paths.
Avoid resetting with coffee inside. Do water rinses first.
How long does a reset take?
Most resets take about 15-25 minutes, including rinse cycles and any model-specific steps.
Most resets take about 15 to 25 minutes, including rinses.
What if the descaling light stays on after reset?
Repeat the rinses and verify there’s no mineral residue blocking sensors. If it persists, consult support.
If the descaling light stays on, repeat rinses. If it remains, contact support.
Is vinegar safe for descaling my Cuisinart?
Follow manufacturer guidelines. Many models advise against vinegar; use the recommended descaler instead.
Follow the manufacturer’s guidance; many models don’t recommend vinegar.
Watch Video
Key Takeaways
- Reset after descaling restores calibration and reliability.
- Rinse cycles remove descaler residues and ensure clean flavor.
- Power cycling helps reinitialize the control system.
- Model-specific steps may vary; always consult the manual.
- Regular maintenance extends the life of your Cuisinart coffee maker.