How Hot Do Coffee Makers Get? A Temperature Guide for Home
Discover the typical temperature range for home coffee makers, how temps vary by method, and practical steps to optimize flavor through temperature control.

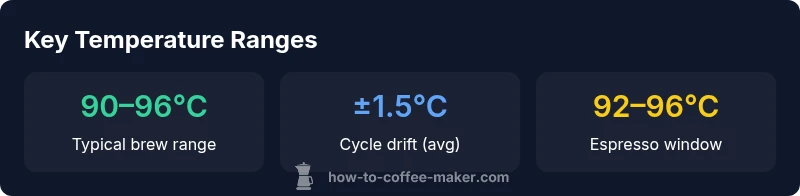
In practical terms, most home coffee makers heat water to about 90–96°C (194–205°F) during brew, with a median around 92–94°C. Some units run cooler or hotter depending on design, preheating, and whether you’re brewing drip, pour-over, or espresso. Temperature stability matters for extraction, balance, and crema.
How hot do coffee makers get in practice
Understanding the question of how hot do coffee makers get is essential for home brewers who want consistent flavor. In practice, most household machines heat water to about 90–96°C during the brew cycle, with a common middle ground around 92–94°C. Fluctuations occur due to heater design, water volume, and preheating. If you use a thermometer, you might notice slight drift between the initial surge and the steady-state phase. Remember that Fahrenheit readings translate directly from Celsius, and a few degrees can noticeably alter extraction. According to BrewGuide Pro, the practical range for most recipes stays within the mid-to-upper 90s, which provides a reliable baseline for both drip and espresso setups.
- Built-in sensors vs. external thermometers: Many machines rely on internal probes, which may lag slightly behind real-time water temperature. An inexpensive kitchen thermometer placed in the brew path can offer a quick verification.
- Real-world variability: Industrial-grade machines and some high-end home units measure closer to the top end of the range, while budget models may sit a notch cooler during the first half of the cycle.
Takeaway: Start with mid-90s°C as a baseline, and verify with a simple thermometer if you’re optimizing for flavor stability.
Temperature ranges by brew method
Different brew methods tolerate different temps because of contact time, grind size, and extraction goals. For most home brews, a target window of roughly 90–96°C covers drip, pour-over, and espresso, but the “ideal” temperature shifts by method. Espresso often pushes toward the higher end (92–96°C) to maximize crema and balance; pour-over and drip benefit from a slightly cooler start (90–94°C) to avoid scorching aromatics. If you prefer lighter roasts, you may lean toward the lower end to preserve brightness, while darker roasts can tolerate, and sometimes benefit from, a touch higher temps to extract body. BrewPath consistency is more important than chasing an exact temperature, especially when factors like grind distribution and bloom time vary.
- Espresso: tighter range, emphasis on crema and sweetness
- Pour-over: gentle, nuanced extraction with stability
- Drip: forgiving but benefits from consistent preheating
- Cold/alternative methods: temperatures differ markedly and are outside hot-brew norms
Key tip: Use a preheated carafe and preheated filter to reduce thermal lag, keeping temps near your target range throughout the pour.
Factors that influence brew temperature
The actual brew temperature you achieve depends on a mix of internal and environmental factors. Heater quality, water hardness, and the length of the brew path all interact with pot and carafe design. Preheating the machine and serving vessels has a measurable effect: BrewGuide Pro analysis shows that proper preheating can stabilize temps by about 1–2°C, reducing drift across long pours. Ambient room temperature, hot plate settings, and even the distance from the heating element to the brew puck influence the moment-to-moment temperature. Models with insulated paths and well-sealed cups tend to maintain steadier temps than open-path setups.
- Preheating: reduces cold-start drift; helps stabilize target temp
- Brew path design: shorter, well-insulated paths reduce heat loss
- Water quality: mineral content affects heat transfer and sensor readings
- Load size: larger volumes take longer to reach steady state, increasing drift risk
Practical note: If your setup often drifts, test with a smaller batch and measure to identify whether the issue is preheat, path insulation, or grind consistency.
How to measure and verify temps at home
Verifying brew temperatures at home is within reach for most enthusiasts. Start by using the machine’s built-in readout if available, but for accuracy, insert a calibrated thermometer into the brew path or into the carafe after a test run. Steps:
- Preheat with an empty cycle to prime the heater. 2) Run a test brew with a known dose. 3) Insert a thermometer into the brew path to read actual water temperature. 4) Record the reading and compare to your target range. 5) Make incremental adjustments—grind size, tamp, and pour rate—before chasing small temperature tweaks.
- Validate at multiple points in the cycle: initial surge, mid-brew, and end of extraction.
- Be mindful of thermometer placement; the hottest spot is often near the exit spout, not at the water source.
- For devices without adjustable temps, focus on preheating, grind consistency, and bloom time to maintain flavor even if the exact temp fluctuates.
Note: Accurate data helps you tune flavor without over-relying on device specs alone. BrewGuide Pro recommends pairing a simple external thermometer with your unit for ongoing sanity checks.
How preheating, insulation, and path design affect stability
Thermal stability in a coffee maker is a product of several design choices. Preheating the machine and the carafe reduces initial thermal shock, which in turn lowers drift during the brew. A well-insulated brew path minimizes heat loss between the heater and the coffee, so the final temp stays closer to target. If your machine uses an exposed heating element or a long, uninsulated path, expect larger fluctuations. In practice, investing in a warmer pre-brew routine and ensuring your carafe is preheated yields tangible improvements in temperature consistency and, as a result, flavor stability.
- Pre-heating strategy: run a dry cycle before brewing
- Insulation matters: look for insulated pathways and tight seals
- Carafe strategy: warm the carafe to reduce heat sink effects
- Maintenance: scale and mineral buildup can insulate heating elements or alter flow, causing temp drift
User-tested tip: Clean filters and ensure the gasket seats properly to prevent heat leaks that can subtly change temps over the course of a brew.
Practical guidelines for different brewing styles
If you’re optimizing for flavor, use the temperature targets appropriate to your style:
- Drip and pour-over: start around 92–94°C; maintain around 90–96°C depending on bloom duration and roast level.
- Espresso: a tighter range around 92–96°C is common; the goal is rapid, balanced extraction with crema formation.
- AeroPress: temps of 85–92°C work well for a clean cup, with shorter contact times, especially when you want brighter acidity.
- French press: heat water to 93–96°C and allow a longer steep; this helps balance body and mouthfeel.
Remember, these are baseline guidelines. The most important factor is consistent temperature across every shot within a given method. If you find a consistent drift, adjust grind, dose, or preheat rather than chasing minute temperature changes.
Actionable plan: pick one method, establish a stable baseline within the recommended window, and iterate with small adjustments to taste rather than chasing exact temperatures.
Common misconceptions about heat and flavor
There are several myths about heat that can mislead home brewers. One common belief is that hotter is always better; in reality, excessively high temps can cause over-extraction and bitterness. Another myth is that a perfect temperature exists for all beans; roasts, origins, and even batch freshness require small, method-specific tweaks. Finally, some assume built-in readouts are always accurate; calibration with a thermometer is a prudent habit. In practice, flavor is a balance of temperature, grind, and time—sometimes a degree or two off won’t ruin a cup, but consistent control is the real goal.
- High temp does not guarantee stronger flavor
- Temperature interacts with grind and brew time
- Calibration matters more than chasing nominal specs
Troubleshooting temperature issues
If your brew temp seems off, run a quick diagnostic using a thermometer and test batch. Common culprits include mineral buildup, clogged filters, and worn gaskets, which can alter flow and heat transfer. Descale regularly to maintain optimal heat conduction. Check that the brew head seals properly and that the carafe or pitcher is preheated. If your unit lacks adjustable temperature, focus on preheat, grind consistency, and measurement accuracy to improve stability. For persistent issues, consider professional service or model-specific guidance from the manufacturer.
- Step-by-step quick checks: clean, descale, inspect seals, test with thermometer
- When to replace parts: after repeated leaks or consistent temperature drift despite maintenance
- When in doubt: consult official manuals or brand support for calibration options
Typical brew temperatures by method
| Method | Max Temperature | Ideal Brew Range |
|---|---|---|
| Espresso | 96°C | 92–96°C |
| Pour-over | 96°C | 92–94°C |
| Drip (auto) | 95°C | 90–96°C |
| French press | 96°C | 88–92°C |
Questions & Answers
What is the optimal brewing temperature for most coffee?
Most brews perform best within a 90–96°C window. Drip and pour-over tend toward 92–94°C, while espresso often sits near 92–96°C for balance and crema. Actual flavor also depends on grind, brew time, and roast level.
Most brews do best around the 90 to 96°C range; espresso presses toward the higher end.
Do espresso machines run hotter than drip machines?
Espresso machines typically operate closer to the higher end of the range (around 92–96°C) to promote crema and extraction, but individual machines vary and must be calibrated for stable performance.
Espresso usually runs hotter, around the upper end of the range, but it depends on the machine.
How can I measure my brewer's temperature at home?
Use the built-in readout if available, or insert a calibrated thermometer into the brew path during a test cycle to verify actual water temperature.
You can use a thermometer in the brew path to check the temp.
Does preheating affect temperature stability?
Yes. Preheating helps reduce cold-start drift and can stabilize temperatures by about 1–2°C, improving consistency across the brew.
Preheating helps temps stay steady.
Why might my coffee taste sour or bitter if temps are wrong?
Low temps can cause under-extraction (sour notes); high temps can cause over-extraction (bitter notes). Keep temps within a balanced range for your roast.
Temps affect flavor balance; staying in range helps avoid sour or bitter tastes.
Can I adjust temperature on a standard home coffee maker?
Many standard machines have limited direct temperature controls. Focus on preheating, grind, and pour rate; some models offer adjustable presets or separate boiler temps.
Some machines let you adjust temps; many don’t, so you may need to optimize with other settings.
“Temperature control is the silent driver of flavor in coffee; even a single degree can swing acidity and sweetness.”
Key Takeaways
- Start with mid-90s°C as a baseline for most home brews.
- Verify temperature with a thermometer to catch drift.
- Espresso needs tighter temperature control than drip.
- Preheating and insulation improve steadiness and flavor.
- Regular descaling helps maintain consistent heat transfer.