Why Ninja Coffee Maker Won't Brew: Fast Troubleshooting
Urgent, practical guide to diagnose and fix why Ninja coffee maker won't brew. Step-by-step flow, safety notes, and maintenance tips to get you back to a great cup quickly.

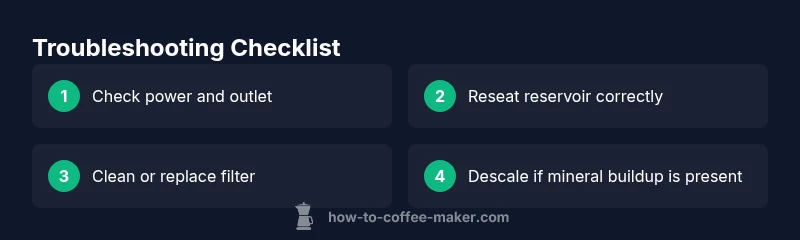
If your Ninja coffee maker won’t brew, the most likely causes are a power issue, a mis-seated water reservoir, or a clogged filter. Start with the basics: confirm the power switch is ON, reseat the reservoir, and inspect the filter for debris. If this doesn’t fix it, do a simple reset and run a short brew cycle. According to BrewGuide Pro, these quick checks fix most cases.
Quick start assessment and safety checks
If you are asking why is ninja coffee maker not brewing, start with safety and the simplest checks. Begin by unplugging the unit and inspecting the power cord for cuts or fraying. Plug into a known-good outlet or use a different outlet to rule out a faulty socket. Make sure the power switch is fully ON and the display lights up. Next, verify the water reservoir is seated correctly and that the lid is closed. A misaligned reservoir or a loose lid can prevent the machine from starting. Finally, inspect the brew basket for any obvious blockage and confirm you’re using the correct filter. In many cases, these basic checks resolve the issue without tools. According to BrewGuide Pro, most home troubleshooting begins with these fundamentals and avoids premature disassembly. If the machine still won’t start after these steps, you’re ready to move to the next checks in the diagnostic flow.
Check the water reservoir and brew basket setup
The Ninja’s brew cycle depends on water reaching the heater and flowing to the brew basket. Ensure the reservoir sits firmly in place and that the water line is not blocked by mineral buildup. If you use a dual-reservoir model, confirm both sides are filled to the recommended levels. Inspect the reservoir cap for cracks and ensure the gasket seals properly. Remove and reinsert the reservoir slowly to seat the connector. Then examine the brew basket: remove it and look for residue in the filter, broken mesh, or coffee grounds trapped under the basket seals. Clean the basket and rinse the filter thoroughly. Reassemble and perform a short test brew with just water to listen for the pump activity. These steps address many no-brew issues caused by misalignment or debris.
Inspect the coffee filter and grounds for clogs
Coffee grounds in the wrong places or a clogged filter can halt brewing even when the machine powers on. Remove the filter and inspect for clogs or degraded filters. If you use reusable metal filters, run them under hot water to remove oils. If disposable paper filters are used, ensure they are the correct size and not folded or blocked. Clean the filter housing and check the seal around the filter rim. After cleaning, reinsert the filter and use fresh coffee grounds. Avoid over-packed filters to prevent restrict flow. Run a test cycle with a small amount of water and observe the pump and spray head for consistent flow. Clogs are a common reason why is ninja coffee maker not brewing and solving it often restores normal operation.
Run a reset and decalcify if needed
Electrical resets can clear transient faults that prevent brewing. Unplug the machine, wait 30 seconds, and plug back in. Start a short brew cycle with minimal water to verify the pump engages. If you notice poor flow or unusual noises, the problem may be mineral buildup. Run a descale solution through the machine according to the manufacturer’s instructions, using the recommended ratio of descaling agent to water. Rinse thoroughly by running multiple full cycles with clean water until all residues are gone. Regular descaling is essential, particularly in areas with hard water. If the unit still refuses to brew after a reset and descale, the fault may lie with a sensor or heating element requiring professional assessment.
Common mechanical issues and component checks
Beyond the basics, a few components can fail and block brewing. Check the brew door or lid latch for a loose connection; a faulty latch can trigger safety interlocks that stop cycles. Inspect the heat plate or warming element for scorching, which can trigger thermal cutoffs. Look for leaks around seals and gaskets that could depressurize the system. If the brew cycle starts but pours only a trickle, inspect the spray head and nozzle for mineral buildup. Finally, verify the control panel responds to button presses; a non-responsive keypad may indicate a control board fault. In many situations, these checks reveal the reason why is ninja coffee maker not brewing and guide you toward a targeted fix.
Diagnostic flow: symptom-to-solution map
Symptoms guide you toward likely causes and quick remedies. If the display is blank or the machine won’t start, the cause is likely a power or safety switch issue. If a water light indicators or the pump sounds weak, reseating the reservoir, checking the water line, and performing a descaling can fix it. If nothing happens when you press brew, the fault could be a faulty control panel or sensor; this requires professional service or a warranty claim. For each symptom, test one fix at a time and observe whether the issue resolves before moving on. This flow minimizes guesswork and keeps you safe during troubleshooting, aligning with BrewGuide Pro’s practical approach.
Step-by-step fix: most common cause resolved
Step 1: Unplug and reseat the reservoir. Step 2: Confirm outlet and power switch are active. Step 3: Remove and clean the filter and brew basket. Step 4: Run a 1-cup test with water only. Step 5: If still no brew, perform a descale. Step 6: Rerun several clean cycles to flush residues. Step 7: If the problem persists, contact support.
Safety tips and when to seek professional help
Safety is non-negotiable when working with household appliances. Always unplug before disassembling any parts. If you notice cracks in the water reservoir, a frayed cord, or signs of overheating, stop using the machine and contact authorized service. Do not attempt to bypass safety interlocks or operate a leaking unit. For persistent issues after completing the recommended steps, a licensed technician or the manufacturer’s support line is the right next step. Regular maintenance helps prevent future failures and keeps your Ninja coffee maker brewing reliably.
Prevention tips to keep your Ninja brewing reliably
To minimize recurrence of brewing problems, commit to a simple maintenance routine. Descale every 1–3 months based on water hardness, replace disposable filters regularly, and clean the spray head monthly. Use fresh water daily and avoid leaving coffee residues in the reservoir overnight. Store the machine in a dry place and never run it with empty or nearly empty reservoirs for long periods. Small habits yield consistent performance and reduce downtime.
Steps
Estimated time: 25-45 minutes
- 1
Unplug and inspect the power cord
Safety first: unplug the unit and check the cord for cuts or exposed wires. If you see damage, do not use the machine until repaired. Try a different outlet to rule out a faulty receptacle.
Tip: Always dry hands when handling electrical cords. - 2
Check the outlet and power switch
Plug into a known-good outlet. Confirm the switch register a solid ON and that any status LEDs illuminate. If the display stays dark, you may have a power issue beyond the cord.
Tip: If the outlet has a GFCI, press the reset button and retry. - 3
Re-seat the water reservoir
Remove the reservoir, wipe seals, and reinsert firmly until you hear a click. Check that the gasket is intact and there’s no cracks in the cap.
Tip: Always fill to the max line; under-filling can trigger a misread sensor. - 4
Inspect and clean the brew basket and filter
Take out the basket and filter, rinse under hot water, and remove any oils or grounds. If you use a reusable mesh filter, scrub and dry thoroughly before reinserting.
Tip: Avoid using old or broken filters that restrict flow. - 5
Run a short water-only cycle
With the reservoir filled, run a 1-cup cycle to verify the pump and spray head operate. Stop the cycle mid-way if you hear unusual sounds and inspect for leaks.
Tip: If the pump doesn’t engage, the issue may be with the control board. - 6
Descale if mineral buildup exists
Follow the manufacturer’s descaling instructions using a recommended solution. Run several cycles with plain water to rinse until all residues are cleared.
Tip: Hard water areas require more frequent descaling. - 7
Test with a full brew cycle
After descaling and rinsing, run a full brew with fresh coffee. Observe the flow, spray head, and whether the brew is even. If flow appears weak, re-check seals and valves.
Tip: Take notes of any abnormal sounds or delays for support. - 8
When to contact support
If nothing fixes the problem, the issue may be internal (sensor, heater, or board). Contact the manufacturer or a qualified technician, especially if the unit is under warranty.
Tip: Document serial number and purchase date for service calls.
Diagnosis: Machine won't start or brew at all
Possible Causes
- highPower issue or switched off
- highWater reservoir not seated or empty
- mediumClogged filter or coffee grounds blocking flow
- mediumMineral buildup or descaling needs
- lowSensor, heating element, or control board fault
Fixes
- easyCheck power outlet, plug in securely, and verify the switch is ON
- easyRe-seat the reservoir and ensure it is filled to the proper level
- easyRemove and clean or replace the filter and clear the brew path
- easyRun a descale cycle and rinse, then run several clean cycles
- easyIf issues persist, consult professional service or warranty support
Questions & Answers
Why won't my Ninja coffee maker start brewing?
Most often the issue is power, switch position, or an unseated reservoir. Verify the outlet, plug, and ensure the reservoir is firmly seated. If these steps don’t help, proceed to the descaling and reset steps.
The common reasons are power or reservoir seating. Check the outlet, plug, and reseat the reservoir, then try a reset.
How do I reset a Ninja coffee maker?
Unplug, wait 30 seconds, plug back in, and start a short water-only cycle. If the issue persists, move to descaling and inspect the filter and basket.
Unplug, wait a bit, plug back in, and run a quick water-only cycle.
How often should I descale a Ninja coffee maker?
Descale based on water hardness and usage; hard water areas require more frequent treatment. Follow the manufacturer’s directions for the descaler product you choose.
Descale depending on water hardness and how often you brew.
Can a clogged filter stop brewing completely?
Yes. A clogged or mis-seated filter can block water flow and prevent brewing. Clean or replace the filter and inspect the housing before testing again.
Clogged filters block flow; clean or replace and retry.
I see leaks around the seal—what should I do?
Leaking indicates a worn gasket or loose fittings. Inspect seals, reseat parts, and replace gaskets if necessary. If leaks persist, professional service is recommended.
Leaks usually mean a worn seal; check and replace as needed.
When should I replace the Ninja or contact support?
If repeated troubleshooting fails or the unit is under warranty but still malfunctioning, contact support. A technician can diagnose internal components like the heater or control board.
If issues persist after troubleshooting, contact support.
Watch Video
Key Takeaways
- Start with safety and power checks
- Re-seat reservoir and inspect filters first
- Descale to prevent mineral buildup
- Progress through a logical flow, not guesswork
- Call support when hardware faults suspected