Why Is My Coffee Maker Leaking? A Troubleshooting Guide
Discover urgent, step-by-step troubleshooting for why your coffee maker is leaking. Identify common causes, safety tips, and practical fixes to avoid damage.

Most leaks come from a loose reservoir seal, a cracked kettle, worn carafe gasket, or a leaking inlet hose. Start by unplugging the unit and inspecting the reservoir seal, carafe alignment, and drip tray. If you spot cracks or loose parts, reseat or replace them. If the leak continues after basic checks, stop using the machine and seek professional repair.
Understanding Why Your Coffee Maker Leaks
If you’re wondering why is my coffee maker leaking, you’re not alone. According to BrewGuide Pro, most leaks originate at simple, fixable points rather than a failed machine. Start by inspecting the outer seals and accessible components before opening the unit. The reservoir seal and carafe gasket are the most frequent culprits; a loose connection lets water drain into the base or spill onto the counter. A hairline crack in the reservoir can also weep water during or after brewing. When leaks occur, look for pooled water near the drip tray or base, which often signals that the leak source is at the front or bottom of the brewer rather than from the brew basket. In many cases, reseating a misaligned carafe or replacing an aged gasket stops the leak quickly and keeps your coffee routine on track. Safety note: unplug the machine before touching any internal parts. The BrewGuide Pro Team emphasizes methodical checks and careful hand pressure to avoid damage.
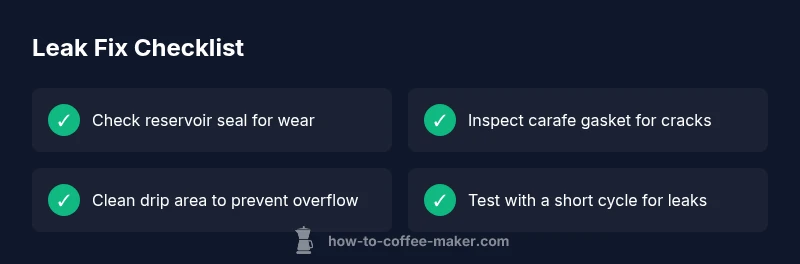
Quick Checks You Can Do Right Now
- Unplug the unit to cut power before touching any components.
- Inspect the reservoir seal for cracks, deformation, or a loose fit; reseat or replace if needed.
- Check the carafe lid gasket and ensure the carafe sits correctly on the warmer plate.
- Look at the drip tray and base area for pooled water; clear any residue and wipe dry.
- If you can access hoses from the back, check for loose clamps or visible cracks; do not attempt internal disassembly.
Diagnostic Flow: Symptom to Diagnosis
Start with the simplest explanation: water appears when you brew. Check the reservoir seal and carafe gasket first; if water persists around the base after a test cycle, the leak may be from hoses, fittings, or the pump seal. Use the diagnostic flow: observe, reseat, replace, or escalate to professional service if the leak remains after all accessible parts are checked.
When to Call a Professional
If basic checks and replacement of seals do not stop the leak, or if you notice mineral buildup around internal components, it’s time to seek professional help. Internal leaks often require disassembly and safe handling by a trained technician. In the meantime, avoid running hot water cycles and continue to unplug the unit when not in use.
Steps
Estimated time: 30-60 minutes
- 1
Power down and unplug
Unplug the coffee maker and disconnect any removable parts. Let it cool completely before handling any components.
Tip: Safety first: never work on live electrical equipment. - 2
Empty and inspect the reservoir
Pour out any remaining water, remove the reservoir, and inspect the seal for cracks or deformation. Reseat or replace if needed.
Tip: Check both the gasket and the connection to the base. - 3
Check the carafe gasket and alignment
Inspect the carafe lid gasket for wear and ensure the carafe sits squarely on the warming plate. Misalignment can cause drips.
Tip: Clean any residue that may affect seal integrity. - 4
Inspect hoses and external fittings
From the back or bottom, look for loose clamps, cracks, or kinks in hoses that transfer water to the pump.
Tip: Do not force fittings; replace damaged parts with manufacturer-approved kits. - 5
Run a test cycle with water
Reassemble, plug in, and run a short water-only cycle to observe for leaks. Stop if water appears at the base.
Tip: Keep a towel handy to catch any drips during testing. - 6
Decide on next steps
If leaks persist after these steps, contact a professional for internal inspection or part replacement.
Tip: Document observed symptoms to aid service.
Diagnosis: Water leaking from or around the coffee maker during or after brewing
Possible Causes
- highLoose reservoir seal or misaligned carafe
- mediumCracked reservoir or lid gasket
- mediumWorn inlet hose or pump seals
- lowOverflow from drip tray due to scale or clogs
Fixes
- easyCheck and reseat reservoir seal; reattach carafe and ensure proper alignment
- easyInspect reservoir for cracks, replace if damaged
- mediumInspect hoses and pump seals behind the base; replace worn O-rings or clamps
- easyClean drip tray, remove scale, and ensure correct level; test again
- hardIf the leak remains, contact a certified service technician for internal inspection
Questions & Answers
What is the most common cause of a coffee maker leaking?
The most common causes are worn gaskets, a cracked reservoir, or a loose carafe seal. Start with a visual inspection and reseating parts before considering replacements.
Common causes are worn gaskets or a cracked reservoir. Start with a visual check and reseat parts.
Can I repair a leak at home, or do I need a professional?
Some fixes, like reseating the reservoir or replacing simple gaskets, can be done at home with basic tools. If the leak is internal or you’re uncomfortable, contact a professional.
You can often fix simple leaks at home, but internal leaks require a professional.
What should I do immediately if I notice a leak?
Unplug the machine immediately and dry surrounding surfaces to prevent electrical hazards. Do not use the unit again until you’ve inspected or repaired the cause.
Unplug it right away and dry the area. Don’t use it again until it's fixed.
How can I prevent leaks in the future?
Regular descaling, inspecting gaskets, and ensuring proper carafe alignment help prevent leaks. Keep parts clean and replace worn seals promptly.
Descale regularly and check seals so leaks don’t happen.
When should I replace my coffee maker?
If leaks persist after fixes or the device shows rust, cracks, or frequent malfunctions, replacement is advisable. Consider upgrading to a newer model with a better seal.
If leaks persist after fixes, consider replacement.
Watch Video
Key Takeaways
- Unplug first and check safety
- Most leaks relate to reservoir seals or gaskets
- Reseating or replacing simple seals often fixes leaks
- If leaks persist, seek professional repair
- Regular maintenance prevents future leaks