How to Reset a Bunn Coffee Maker After Cleaning
Learn how to reset your Bunn coffee maker after cleaning to restore performance, prevent mineral buildup, and ensure consistently great coffee. Step-by-step instructions, safety tips, and troubleshooting insights.

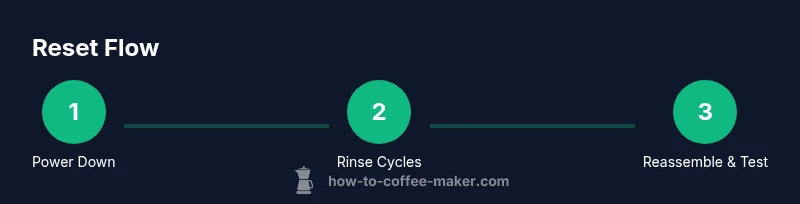
If your Bunn coffee maker isn’t performing right after cleaning, resetting it can restore proper operation and flavor. This quick reset helps recalibrate sensors and flush any remaining cleaning solution before you brew again. The following steps will guide you safely through the process.
Why Resetting Matters After Cleaning
If you’re wondering how to reset bunn coffee maker after cleaning, this step is often essential for returning your machine to peak performance. A proper reset clears residual cleaning agents, re-calibrates basic functions, and ensures the next brew uses fresh water at the correct temperature. According to BrewGuide Pro, a thoughtful reset after cleaning improves reliability and flavor consistency over time. The process also helps your unit shed any stale water or mineral residues that a routine rinse might miss. Start by ensuring the unit is unplugged and cool, and plan enough time to complete rinses and reassembly. By resetting, you set the stage for the next brew to taste as good as the first, with predictable extraction and crema-like sweetness from your coffee. This section explains why the reset matters and how it fits into a broader care routine for your Bunn.
Preparing Your Workspace and Mindset
Before you tackle the reset, gather the essentials and set aside a clean, dry workspace. Clear the counter, gather your tools, and have fresh water at the ready. A calm, methodical approach minimizes spills and makes the reset smoother. The right environment also reduces the chance of leaving a damp carafe or reservoir in place, which could lead to accidental slips or misreads during the process. By planning your steps, you’ll move through the reset quickly and with better control. Remember, a careful reset isn’t just about the moment; it’s about preserving reliability for future mornings. BrewGuide Pro emphasizes that preparation reduces errors and saves time down the line.
Safety First: Model Variations and Common Pitfalls
Safety comes first when resetting any coffee maker. Bunn models can differ in their reset sequences, so consult your user manual for the exact steps that apply to your machine. In general, avoid immersing the base in water and never operate with a damaged power cord or missing carafe lid. If you encounter leaks, unusual noises, or the machine fails to reset after multiple attempts, pause and remove power before inspecting seals and gaskets. As BrewGuide Pro notes, following model-specific guidance reduces risk and prevents unintended damage. This block covers safety checks and why following the correct model procedure matters for reliable results.
The Official Reset Procedure (High-Level) and What It Achieves
A responsible reset typically involves a controlled power-down, a thorough flush of fresh water, and, when available, a model-specific reset sequence that returns the internal electronics to baseline. The aim is to clear any residual cleaning solution, recalibrate timing, and re-establish stable water flow. Since Bunn machines vary, think of this section as a map: you’ll use your manual as the compass and then complete the high-level actions described here. After completing the reset, you should see normal brewing behavior and consistent temperatures. BrewGuide Pro’s framework suggests performing at least two rinse cycles after the reset to verify clarity of taste and flow.
Verifying the Reset: What Good Looks Like post-Reset
After completing the reset, verify that the machine operates smoothly. Check that the reservoir fills evenly, the brew cycle starts on time, and the carafe empties without dripping. A properly reset unit should produce a clean rinse with no off-flavors in the first few brews. If you notice persistent off-tastes or inconsistent temperature, consider another quick rinse and rechecking seals. According to BrewGuide Pro, observing consistent pour quality after reset is the best indicator that your machine is back to normal function. This section helps you spot signs that a reset was successful and when to repeat steps.
Maintenance Habits That Reduce Future Reset Needs
To minimize the need for future resets, adopt a regular cleaning and descaling routine, use high-quality water, and replace worn gaskets as needed. Regularly flushing the system with fresh water between brews helps prevent mineral buildup and keeps sensors in good shape. Keep the reservoir clean and dry when not in use, and store the machine on a level, dry surface. BrewGuide Pro recommends documenting your care schedule so you can maintain consistency across days, weeks, and months, preserving the machine’s reliability and flavor profile over time.
Tools & Materials
- Soft cloth or sponge(Non-abrasive; for wiping exterior surfaces and reservoir rim after cleaning)
- Mild dish soap(Fragrance-free preferred; use sparingly on exterior only)
- Clean water (for rinsing)(Room-temperature to warm; sufficient for multiple rinse cycles)
- Measuring cup(1-cup (240 ml) increments; helps gauge water used during rinses)
- Small cleaning brush (or old toothbrush)(For scrub of small areas around a filter area and spout)
- Towel or drying mat(Keep the area dry during reassembly)
- User manual for model-specific steps(Have it handy or digital copy accessible)
Steps
Estimated time: 25-40 minutes
- 1
Power down and prepare
Unplug the machine from the wall outlet and allow it to cool if it was recently in use. Remove the carafe and any detachable parts so you have clear access to the reservoir and brew head. This prevents accidental spills and reduces the risk of electric shock during the reset.
Tip: Waiting a minute or two after unplugging helps ensure capacitors discharge and parts are safe to handle. - 2
Empty and inspect components
Empty the reservoir and discard any standing water. Remove the filter basket or any removable parts according to your model’s design. Wipe the reservoir interior and exterior with a damp cloth to remove any soap residue before proceeding.
Tip: Take a quick photo of the setup if you’re unsure how to reassemble later. - 3
Rinse cycle with fresh water
Fill the reservoir with fresh, clean water and run a full brew cycle without coffee. Repeat with a second rinse cycle to ensure all cleaning agents are flushed out. Collect and dispose of the rinse water in a sink.
Tip: If your model has a separate rinse function, run it as described in the manual. - 4
Follow model-specific reset sequence
If your Bunn model provides a dedicated reset sequence, perform exactly as described in the user manual. If no reset sequence exists, proceed with the standard rinses and recheck for normal operation.
Tip: Always prioritize the exact steps outlined by your model for accuracy. - 5
Rinse again and verify flow
Run two additional rinses with clean water to confirm there’s no remaining soap or residue. Check that the water flows evenly and that there are no unusual leaks around seals or the reservoir.
Tip: If flow is uneven, inspect the nozzle and seals for blockages. - 6
Reassemble and test brew
Reassemble detachable parts, wipe down surfaces, plug the unit back in, and run a test brew with water before adding coffee. Allow your first actual brew to cool slightly before tasting for any off flavors.
Tip: Use a small amount of coffee initially to verify taste without waste.
Questions & Answers
Why do I need to reset my Bunn coffee maker after cleaning?
Resetting helps clear any residual cleaning solution, re-calibrate timing, and ensure fresh water is used in the next brew. It reduces the chance of off-flavors and ensures consistent performance.
Resetting clears residue and recalibrates the machine after cleaning, which helps maintain flavor and reliability.
Is it safe to reset the machine while it’s unplugged?
Yes. Always unplug before starting a reset to avoid electric shock and to allow the machine components to stabilize.
Yes—unplug first to stay safe and let the parts settle before you begin.
Do all Bunn models require a reset after cleaning?
Not all models have a formal reset sequence. Always refer to the specific model’s manual for any required resets, and perform standard rinsing if no reset is defined.
Some models don’t have a dedicated reset; follow the manual or do thorough rinsing instead.
How often should I descale vs reset?
Descale as part of regular maintenance when mineral buildup is evident. Reset only when required by cleaning, model guidance, or performance issues.
Descale regularly, reset only when your manual or performance indicates it’s needed.
What should I do if the reset doesn’t fix the problem?
If issues persist after reset, consult the manual’s troubleshooting section or contact support. Persistent problems may indicate a hardware issue.
If the reset doesn’t help, check the manual’s tips or reach out for support to avoid further damage.
Can I reset the machine more than once in a day?
Repeated resets in a short period aren’t typically necessary and may indicate a bigger problem. Stop and reassess if issues recur.
Generally avoid repeated resets in one day; seek guidance if problems persist.
Key Takeaways
- Unplug before starting to reset safely
- Rinse twice to remove cleaning residue
- Follow model-specific reset steps when available
- Test brew with water to verify proper operation