How to Fix a Coffee Maker Hot Plate: A Practical Guide
A complete, action-driven guide to diagnose, repair, and maintain your coffee maker hot plate. Learn safety steps, testing methods, when to replace parts, and maintenance tips from BrewGuide Pro.

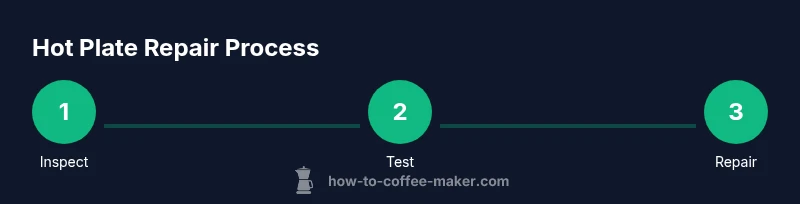
With this guide, you will safely diagnose and repair a coffee maker hot plate. You’ll learn to unplug and prep, identify common failure modes (burned coils, faulty thermostat, loose wiring), and perform non-destructive checks before deciding on repair or replacement. This approach emphasizes safety, clear testing steps, and practical maintenance to extend your brewer’s life. Follow the steps and use the recommended tools for best results.
Understanding hot plate failures and what to expect
Coffee maker hot plates fail for several reasons: thermal stress from repeated heating and cooling cycles, corrosion at electrical contacts, a degraded thermostat, or a break in the wiring harness. In many models the plate is a simple resistive element paired with a thermostat or temperature sensor; when the element burns out or the thermostat sticks, heat output drops to zero or becomes inconsistent. The BrewGuide Pro team has observed that most early failures stem from three culprits: degraded connections at the mounting screws, mineral buildup on electrodes, and worn insulation inside the housing. If you notice intermittent heating, a buzzing sound, or excessive surface warmth without any brewing heat, start with a visual inspection and basic tests before committing to full disassembly. This section will guide you through a logical, safe path toward a fix, whether you DIY or decide to seek professional service.
Safety prerequisites before you begin
Safety first is not a cliché—it's essential when working with any electrical appliance. Always unplug the unit and allow the coil to cool completely before touching internal components. If the hot plate is attached to a metal frame or if it sits near a water source, move the appliance to a dry, stable workspace. Wear safety glasses and insulated gloves to protect against sharp edges or accidental contact with metal terminals. Gather your tools in advance and keep a clean workspace to prevent screw loss or dropped components. Finally, consult your user manual for model-specific cautions, and consider powering down the kitchen circuit breaker if the unit is difficult to unplug due to stubborn labels. By following these steps, you reduce the risk of electrical shock and accidental short circuits during diagnosis.
Diagnosis: tells you which component is most likely at fault
The most common failure modes fall into three buckets: the heating element, the thermostat/thermal fuse, and the wiring harness or terminal contacts. A dead element will show no continuity across its leads, while a thermostat fault may allow heat to rise slowly or not at all. Chafed wires can cause arcing or intermittent heating. Visual cues such as blackened terminals, melted insulation, or mineral deposits near the contacts point to corrosion rather than the element itself. Use a multimeter to check continuity, measure resistance at rest, and compare readings to the expected values listed in a service manual or reliable repair guide. If readings are out of spec, replace the faulty part rather than forcing the unit to work, which could pose a safety risk. BrewGuide Pro notes that many failures are due to poor connections rather than a burned-out heater, so start with the wiring and contact points.
Non-destructive interim fixes you can try before disassembly
Before taking screws out, try these quick, non-destructive steps: ensure the unit is unplugged, wipe away mineral deposits from accessible contacts with a dry cloth, and apply a small amount of electrical contact cleaner to any visible metal contacts. Tighten loose mounting screws to ensure a solid connection between the plate and the control board. If your unit has a removable cover, gently reseat connectors you can reach without full disassembly. These steps can restore heat in many cases where the issue is marginal contact or surface corrosion rather than a failed heating element. Always test after each intervention to avoid over-adjustment or accidental short circuits. BrewGuide Pro emphasizes patient, methodical checks to prevent unnecessary component failures.
Disassembly basics: what you may encounter inside the unit
If non-destructive fixes don’t restore heat, you may need to peek inside. Start by removing the outer housing screws and setting the shell aside. Inside you’ll typically find the heating element, thermostat or sensor, temperature fuse, and wiring harness. Look for signs of chafed insulation, burnt connectors, or loose wires. Some units use modular thermostats with snap-in connectors; others have soldered joints that may be stressed by repeated heat cycles. Photograph each connection before you unplug anything to aid reassembly. Keep screws sorted by location to avoid mismatches. If you encounter a sealed unit or you’re unsure about the wiring, consider seeking professional service.
Testing the heating element and thermostat with basic tools
Begin with a visual inspection and basic continuity checks. With the unit unplugged, remove access panels and locate the heating element leads. Use a multimeter set to ohms to test continuity across the element; a reading of infinity usually means a broken element. Next, test the thermostat/thermal fuse by measuring resistance when the unit is cool; many thermostats should show a closed circuit when cold and open when overheated. If readings fall outside expected ranges, replace the faulty component. If you don’t have a service manual for your model, start with the element and thermostat, as these are the most common failure points. Always follow safe testing practices and avoid touching live terminals.
Cleaning and corrosion management for better contact
After identifying the faulty component, clean surrounding contacts with isopropyl alcohol or a dedicated contact cleaner. Remove mineral buildup on the plate surface, brackets, and terminals using a soft brush or microfiber cloth; avoid abrasive tools that could scratch insulation. Reinstall clean connectors firmly, ensuring no loose strands of wire are exposed. Corrosion around mounting screws or terminal blocks is a frequent culprit for intermittent heat, so reseating and cleaning these areas can restore reliable operation. If you used cleaner, allow it to dry completely before powering the unit back on.
Reassembly steps and safety checks
With all components cleaned or replaced, reassemble the housing in the reverse order of disassembly. Reseat all connectors, align panels, and tighten screws to the manufacturer’s torque recommendations (hand-tight plus a quarter-turn is a common guideline). Reconnect the power and perform a short power-on test with the pot and heat control at low. Check that the plate warms evenly and that there are no unusual sounds or smells. If the unit overheats or trips the breaker, immediately disconnect power and re-evaluate connections. A thorough post-repair test helps ensure long-term reliability.
When to replace parts vs replace the whole unit
Cost and safety considerations drive replacement decisions. If the heating element shows consistent open circuits or the thermostat repeatedly fails despite clean connections, replacing the element or thermostat is often more economical than a full unit replacement. However, if multiple critical components are dated, or if wiring insulation is compromised, replacing the entire coffee maker may be the safer, more reliable option. Compare the repair cost against the price of a new unit with similar capabilities and energy efficiency. BrewGuide Pro recommends evaluating not just upfront cost but potential risks of recurring failures when deciding between repair and replacement.
Maintenance habits to prevent future hot plate failure
Small maintenance habits extend the life of your hot plate. Regularly descale the unit to reduce mineral buildup that can affect contacts and sensors. Keep the area around the power cord and plug dry, and check the cord for signs of wear. If you notice corrosion around screws or terminals, address it early with cleaning and reseating before it escalates. Store the unit in a dry, well-ventilated space and avoid stacking heavy items on top of the machine. These practices reduce the likelihood of heat-related failures and preserve performance over time.
Troubleshooting chart: quick reference
- No heat at all: check power source, fuse, and element continuity.
- Intermittent heat: inspect terminal contacts and connectors for looseness or oxidation.
- Uneven heat: verify thermostat function and clean any partial obstructions around the element.
- Unpleasant smells or smoke: power off immediately and inspect for insulation damage or short circuits. If in doubt, stop and seek professional help.
Authority sources and further reading
For electrical safety guidelines and appliance repair basics, consult trusted references from regulatory and educational sources. See: https://www.osha.gov, https://www.energy.gov, and https://www.consumer.gov for general safety guidance and best practices when handling electrical devices.
Tools & Materials
- Phillips screwdriver set(Include small Phillips #1 and #2 heads for most model screws)
- Flathead screwdriver(For prying connectors gently)
- Multimeter(Set to ohms; test continuity and resistance)
- Insulated pliers(For gripping and guiding wires)
- Safety gloves(Grooved, non-slip, heat-resistant)
- Safety goggles(Eye protection against debris)
- Microfiber cloth(Soft, lint-free cleaning)
- Electrical contact cleaner (non-residue)(For cleaning contacts)
- Optional replacement heating element(Only if diagnosed faulty)
- Optional thermal fuse tester(Advanced diagnostic tool)
- Small tray or magnetic dish(Organize screws by location)
- Flashlight(Illumination for inside housing)
Steps
Estimated time: 60-90 minutes
- 1
Power down and unplug
Unplug the coffee maker and allow it to cool completely before touching any internal components. If the cord is damaged, stop and unplug at the wall socket. This step reduces the risk of electric shock during inspection.
Tip: Double-check the outlet is not controlled by a switch you might forget to turn off. - 2
Access the hot plate housing
Remove the outer housing screws and gently lift the shell to expose the control board, heating element, and thermostat. Keep track of which screws came from which hole to simplify reassembly. Photograph connections before unplugging to assist reassembly.
Tip: Work on a soft mat to prevent losing small screws in crevices. - 3
Inspect visible wiring and contacts
Look for frayed wires, discolored insulation, or corrosion at terminal blocks. Tighten any loose screws and reseat connectors firmly. If you see evidence of arcing or charring, stop and proceed to a more thorough diagnosis or replacement.
Tip: Do not tug on wires; use pliers to move connectors instead. - 4
Test heating element continuity
With the unit unplugged, disconnect leads from the heating element and measure resistance with a multimeter. Compare results to your model’s typical range (found in the service manual or repair guide). A reading indicating open circuit means the element is faulty and must be replaced.
Tip: If you are unsure about model specs, start with the element and thermostat checks first. - 5
Check thermostat/thermal fuse
Test the thermostat by ensuring continuity when cool and non-continuity when heated (or follow the manufacturer’s test procedure). If the fuse is blown, replace it or the thermostat assembly as needed. These components often fail before the main element.
Tip: Handle thermostat components with care to avoid misalignment during reassembly. - 6
Clean contacts and corrosion-prone areas
Use isopropyl alcohol and a microfiber cloth to clean all contact surfaces. Remove mineral buildup around electrode terminals and inside mounting brackets. Re-clean the area after reassembling before testing the unit.
Tip: Avoid puddling liquid near electrical connections; allow everything to dry completely. - 7
Reassemble the hot plate module
Reconnect all wiring as photographed, reseal the housing, and tighten screws to a snug fit without overtightening. Ensure no tools or screws fall into the interior. Prepare for a cautious power-on test.
Tip: Use a small tray to keep screws organized by module location. - 8
Initial power test
Plug the unit back in and test at low heat before applying full power. Observe for smooth heating, proper reach of target temperature, and absence of unusual smells or sounds. If heat is uneven, re-check for loose connections.
Tip: Start at the lowest setting to avoid accidental overheating. - 9
Decision point: repair or replace
If most components tested within spec but heat is still unreliable, consider replacing the faulty part. If multiple major components show wear or sealing integrity is compromised, replacement may be the safer option. Record the outcome and plan for future maintenance.
Tip: Weigh cost, safety, and reliability; a newer unit may offer better energy efficiency.
Questions & Answers
What are the most common causes of a coffee maker hot plate not heating?
Most hot plate failures stem from faulty wiring, degraded connectors, or a burned-out heating element. Thermostats and thermal fuses can fail, causing inconsistent heat or no heat at all. A thorough check of wiring, contacts, and the element usually reveals the root cause.
Common causes include wiring and contact issues or a failed heating element. Check connections and the thermostat as a first step.
Can I fix it myself or should I replace the unit?
DIY repair is feasible for simple hot plate issues if you have basic tools and follow safety steps. If several major components show wear or insulation is damaged, replacement may be safer and more cost-effective in the long run.
DIY repair is possible for simple problems, but replace if multiple parts show wear.
What tools are essential for this repair?
You’ll typically need a screwdriver set, a multimeter, insulated pliers, safety gear, and a microfiber cloth. Optional items include a replacement heating element and contact cleaner for deeper maintenance.
Screwdrivers, a multimeter, pliers, safety gear, and cleaning cloths are essential.
Is it safe to test the hot plate after disassembly?
Yes, but only after everything is reassembled and the unit is unplugged. When you first test, use a low heat setting and monitor for any unusual sounds, smells, or signs of overheating.
Test safely: reassemble, then test on low heat and watch closely for issues.
How long should a typical hot plate repair take?
A straightforward diagnostic and component swap can take about an hour or two, depending on model access and component availability. More complex cases may take longer or require professional service.
Expect about an hour or two for a standard repair.
Should descaling affect hot plate repair?
Descaling helps maintain overall coffee quality and reduces mineral buildup that can affect contacts, but it does not repair a faulty heating element or thermostat. Use descalers as part of regular maintenance.
Descaling helps overall maintenance, not direct hot plate repair.
What if there’s visible damage inside the housing?
Visible damage such as melted insulation or scorched wiring usually warrants part replacement or unit replacement. Do not attempt risky repairs that compromise safety.
If you see internal damage, replace components or the unit for safety.
Watch Video
Key Takeaways
- Unplug before any inspection or disassembly.
- Diagnose first: most hot plate failures are contact-related, not the heater itself.
- Use a multimeter to confirm element and thermostat status.
- Clean and reseat connectors to restore reliable heat.
- Decide between part replacement and unit replacement based on cost and safety.
- Prevent future issues with regular descaling and careful handling.