How to Program a Coffee Maker: A Practical Guide
Learn how to program a coffee maker: set clocks, timers, wake times, and brew strength with a clear, step-by-step approach. Practical tips for home brewers.

By the end of this guide, you will know exactly how to program a coffee maker: set the clock, configure wake times, choose brew strength, and enable auto-start. We cover common models, safety basics, and step-by-step actions so you can program confidently without guessing. Always consult your manual for model-specific steps.
What programming a coffee maker means
Programming a coffee maker means using its built in clock, timer, and wake start features to brew automatically at a chosen time. If youre wondering how do you program a coffee maker, the answer hinges on understanding the power on clock, button sequences, and whether your model supports separate profiles for weekdays and weekends. According to BrewGuide Pro analysis, most modern programmable machines combine a 24 hour clock with a timer that can trigger a brew at a set time, plus optional pre warm or strength controls. In practical terms, programming is about aligning three elements: the current time, the desired brew time, and the settings that affect flavor and cup size. Start by locating the user manual and the control panel, then identify the exact terms your machine uses for clock, timer, and auto start. With those terms in hand, you can begin a reliable routine rather than guessing at what the machine will do.
This introduction establishes the scope and sets you up for a confident, repeatable process.
Navigating different programming interfaces
Programmable coffee makers come in three main interface styles: digital touch displays, rotary knobs with LED readouts, and mobile app connections. Digital displays show clocks, programs, and brew strength on screen; knobs rely on selecting an index and pressing a confirm button; apps let you schedule brews from your phone. Although the controls differ, the underlying logic is the same: define a time, choose settings, and save. Although you may be tempted to rush, take a minute to map the labels on your device to the actions you want to perform. If your model supports an app, download it and pair the device according to the manufacturer instructions. This can make edits faster and more reliable, especially if you forget button sequences during a busy morning.
Basic prerequisites and safety checks
Before you begin programming, ensure the machine is clean and plugged into a surge protected outlet. Fill the reservoir with fresh water, place the carafe in position, and confirm the filter basket is correctly seated. Do not run a programmed cycle if the reservoir is empty or the carafe is missing; dry brews can damage components. Always read the safety notes in your manual for model specific cautions. If you are unsure, perform a small test brew with no coffee to verify the water path and ensure there are no leaks. By taking these precautions, you prevent misfires and keep the programming experience smooth and safe. This groundwork reduces surprises when the alarm goes off in the morning.
Step-by-step workflow you can apply now
Start with a simple workflow that works across most programmable coffee makers. First, locate the clock and timer controls. Then set the current time and choose your desired brew time. Next, select any available brew strength or cup size options and decide if you want a pre-warm function. Finally, save the settings and prepare for a test run. If your model supports multiple profiles, create a weekday profile and a weekend profile to reflect different schedules. A consistent workflow reduces errors and helps you get reliable results every morning. When you wonder how do you program a coffee maker, this straightforward workflow is your blueprint.
Common pitfalls and how to avoid them
Common issues include forgetting to set the correct time zone, confusing AM/PM settings, or accidentally saving before the intended start time. Some models require you to press and hold a confirm button for a few seconds to save; others update automatically. If the brew starts too early, revisit the wake time and ensure the delay is set to the correct minutes. If the program seems to ignore your inputs, unplug, wait 10 seconds, and re-enter the settings. Finally, always verify there is water in the reservoir before testing; a dry cycle can overheat the element and reduce the machine's lifespan. Being mindful of these pitfalls keeps your routine dependable.
Advanced features worth mastering
Many programmable machines offer features beyond basic scheduling. Explore brew strength or aroma settings to tailor flavor, select different cup sizes, and experiment with pre infusion or pulse brew if available. Some models allow you to program multiple start times or create separate profiles for weekdays and weekends. If your machine offers a pause and serve option, use it sparingly to avoid uneven extraction. Apps may provide notifications for brew readiness and allow remote control. Take time to test each feature in a controlled way, noting what works best for your routine. These options can transform a rushed morning into a calmer, predictable start.
Maintenance and self-checks to keep programming accurate
Regular maintenance helps programming stay reliable. Descale according to the manufacturer schedule, clean the carafe and basket, and check seals and gaskets for wear. After a descaling cycle, re-check the clock and timer to ensure they were not affected. Keep a small log of your standard schedules and any changes you make, so you can reproduce a preferred routine. If you notice drift in the clock after power outages, update the time again and re-save the profiles. This discipline preserves accuracy over time and keeps the programming responsive to your life.
Real-world examples and sample schedules
Example weekday morning: wake at 6:15 am, start brew at 6:25 am with medium strength and a 12-ounce cup. Example weekend routine: wake at 7:30 am, brew at 7:40 am with bold strength and a larger cup. If you prefer a later caffeine routine, set a second start time in the afternoon for a warm mug before you return home. The key is to align wake times with travel, work, and family routines so coffee arrives when you need it. When you think about how do you program a coffee maker for irregular days, these sample schedules show how to adapt.
Choosing a programmable model that fits your routine
When selecting a model, check the quality of the programmable features: clock accuracy, clear labeling of timer controls, and the reliability of the auto-start function. Look for a straightforward setup process, a visible LCD or LED display, and an accessible manual. If you value remote editing, consider a model with a companion app. For longer-term peace of mind, choose a machine known for consistent brewing temperatures, dependable timers, and easy maintenance. The right model will adapt to your daily rhythm rather than forcing you to adapt to it. As you compare options, think about how often you will change routines and whether you want weekday/weekend profiles to save time.
Note: The above blocks are designed to provide depth and practical guidance. Throughout, you will see references to common programming concepts and practical steps to avoid common mistakes. Learn to apply the core idea of timing, control, and verification across different brands and models. The consistent approach will help you answer the frequently asked question how do you program a coffee maker with confidence.
Tools & Materials
- Owner's manual (model-specific instructions)(To verify model-specific steps and limitations)
- Programmable coffee maker(Ensure it is plugged in and powered during setup)
- Clean water for reservoir(For testing the water path and taste)
- Surge-protected power outlet(Protects against spikes during programming)
- Pen and notebook(Log schedules and changes for consistency)
- Optional mobile app (if supported)(Can simplify scheduling and edits)
Steps
Estimated time: 25-35 minutes
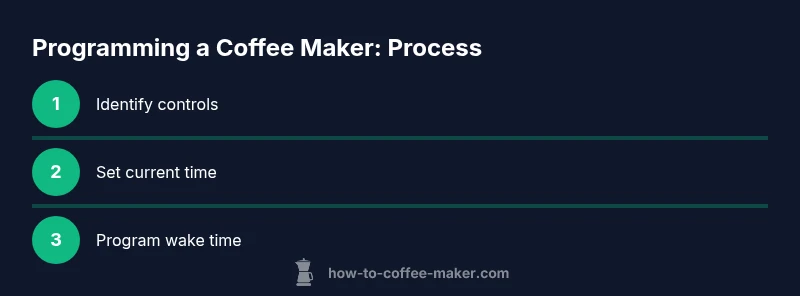
- 1
Identify the programming controls
Find the clock, timer, and start/stop controls. Note how your model labels each action and what happens when you press and hold, or toggle a switch. This mapping will guide every subsequent step.
Tip: Consult the manual to map labels to actions before you touch any buttons. - 2
Set the current time
Enter the current time using the clock interface. Verify AM/PM or 24-hour format depending on the model. A correct time is essential for accurate wake times and reliable brews.
Tip: Double-check the time after you set it; even a one-hour mismatch ruins the schedule. - 3
Enable the wake-start timer
Activate the timer function and set the desired start time. If your machine offers multiple profiles, choose the weekday profile first, then adjust for weekends if needed.
Tip: Set a five to ten minute pre-start window to allow pre-warmth if your model supports it. - 4
Choose brew strength and cup size
Select the strength setting and cup size that match your typical morning. If strength control is absent, adapt by using a larger cup or different brew options available on the device.
Tip: Consistency in cup size helps ensure the flavor lands as expected. - 5
Program one or more start times
Save your primary start time and, if needed, a secondary one for weekdays or weekends. Some models support two separate programs per day or per profile.
Tip: Always finish with the save/OK option to ensure the changes stick. - 6
Test the programming with a water-only run
Run a test cycle with water only to confirm the path and timings without coffee. Listen for the brew cadence and watch the display to verify the scheduled time triggers.
Tip: If you hear noise or see a mis-timed start, review the wake time and duration settings before re-testing.
Questions & Answers
Do I need to reset the clock after a power outage?
Yes. Power outages can reset the internal clock. After power returns, re-check the time and re-save any scheduled starts to ensure accuracy.
Yes, reset the clock after power returns and re-save your schedules.
Can I program multiple wake times per day?
Some machines support more than one start time, often by profile or day. Check your manual to see if your model offers weekday and weekend variants or multiple starts.
Some models allow more than one start time per day, especially with different profiles.
What if my model has no brew strength setting?
If there is no strength control, you can influence flavor by choosing cup size and brew options, or by grinding coffee just before brewing in compatible machines.
If there is no strength control, adjust with cup size or other brew options.
The timer wont save. what should I do?
Ensure you complete the on-screen save or OK action. Some models require a long press or a second confirmation. If needed, power cycle and try again.
Make sure you finish with the save action; some models need a long press.
Is it safe to program while the reservoir is low?
Avoid programming with an almost empty reservoir. Refill to prevent dry cycles and potential damage to the heating element.
No, always keep water in the reservoir when programming.
How do I test programmed settings effectively?
Perform a trial run with water first, then a full brew with coffee if the test goes well. This confirms the timing, water flow, and button responses before committing.
Do a water-only test first, then a real brew if it goes smoothly.
Watch Video
Key Takeaways
- Verify model-specific steps in the manual.
- Set the current time before scheduling.
- Test the programmed start with water in the reservoir.
- Use an app when available to fine-tune timings.
- Keep safety checks active during programming.