How to Use a Coffee Pot: A Practical Home Guide for Consistent Brews
Learn how to use a coffee pot for reliable, flavorful brews at home with a step-by-step guide covering setup, ratios, water quality, troubleshooting, and maintenance.

Using a coffee pot to brew a reliable cup starts with pre-warming the pot, measuring the correct coffee-to-water ratio, and using clean water. According to BrewGuide Pro, consistent grind size and water temperature around 195–205°F dramatically improve flavor. This quick guide covers the essential steps, equipment, and best practices to brew delicious coffee at home.
How do you use coffee pot: A practical starter
If you're asking how do you use coffee pot, you're not alone. The drip coffee pot remains one of the simplest, most reliable ways to brew great coffee at home. This section covers the essentials: choosing the right pot, preparing your equipment, and setting up for a clean, consistent brew. According to BrewGuide Pro, the most important factors are pre-warming, accurate measurements, and fresh, clean water. A well-prepared setup reduces under-extraction and improves aroma, making every cup more enjoyable. Start with a clean, empty pot; rinse with hot water to warm the carafe and internal components. Use a clean paper filter or a permanent filter if your machine supports it, and inspect the gasket and basket for signs of wear. Pre-warming not only speeds up brewing but also helps maintain a stable temperature throughout extraction. This often translates to a richer body and more balanced acidity. Keep a dedicated scoop for coffee and a simple scale for accuracy, especially if you’re exploring different brew ratios. With these basics in place, you’ll be ready to tackle the steps that follow and consistently produce flavorful coffee at home.
Equipment, water quality, and filters for best results
The next layer of quality comes from the right equipment and water. Use a clean coffee maker designed for ground coffee, with a well-seated filter and a sturdy carafe. If you’re using a mesh or paper filter, ensure it’s properly rinsed to reduce papery taste. The water you choose matters as much as the beans; if your tap water tastes flat, your coffee will too. BrewGuide Pro analysis shows that mineral content in water, especially calcium and magnesium, helps extraction without bitterness. If your local water is highly chlorinated or overly hard, consider using filtered or bottled water for brewing, then switch to your usual water for daily use. Grind size should match your machine: typically a medium grind for standard drip machines; too fine and you’ll over-extract, too coarse and you’ll under-extract. The coffee should be fresh—ideally used within two to three weeks from roast. Store beans in an airtight container away from light. Pre-warm the carafe and the basket with hot water before loading grounds. Finally, confirm your machine’s temperature and brewing time by consulting the user manual for model-specific guidance.
Measure, grind, and dose for consistent flavor
A reliable coffee pot starts with the right ratio. A common starting point is 1 to 15–18 parts water to 1 part coffee by weight (for a standard brew), but adjust to taste and your pot’s personality. If you don’t have a scale, use roughly 1 level scoop (about 2 tablespoons) per 6 ounces of water, but weigh for accuracy when experimenting. Use a medium grind unless your machine is highly sensitive to over- or under-extraction. Fresh, roasted coffee is essential; stale beans will taste dull regardless of technique. Pour the water evenly over the grounds to avoid channeling, and try to maintain a stable temperature around 195–205°F during the brew. If your pot has a pause-and-brew feature, avoid adding grounds during the draw-down to prevent uneven extraction. After the brew, let the pot rest for a minute and then serve promptly to preserve aroma. These steps create a solid baseline that you can refine with personal preferences over time. The goal is balance: aroma-forward coffee without a heavy, bitter finish.
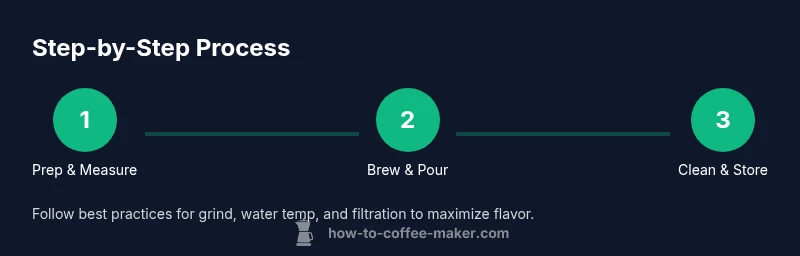
Step-by-step: the drip coffee protocol
Follow these practical steps for a consistent cup:
- Step 1: Pre-warm the pot and basket. Rinse with hot water to stabilize temperature and remove any stale residues.
- Step 2: Measure coffee and grind as needed. Use a scale when possible and aim for a medium grind suitable for drip brewers.
- Step 3: Load grounds and add water. Place the filter correctly, distribute grounds evenly, and pour water gradually to saturate all grounds.
- Step 4: Start the brew and monitor. Allow the machine to complete its cycle and avoid opening the lid mid-brew to preserve heat.
- Step 5: Serve promptly and clean afterward. Pour into warmed cups and rinse the filter and carafe well after use.
Pro tip: consistency in grind size and pour technique reduces channeling and yields a more even extraction.
Troubleshooting: common issues and fixes
If your coffee tastes weak, check grind size, dose, and water temperature. A dull or flat cup often means under-extraction; consider a slightly finer grind, a bit more coffee, or a longer brew time. If it tastes bitter, the grind may be too fine or the water too hot; reduce the grind slightly and/or lower the temperature. A stale aroma suggests old beans or a dirty machine; rotate beans regularly and descale every 1-3 months depending on usage. If the coffee comes out weak despite adjustments, verify that the filter, basket, and seals are clean and that the water reservoir is filled with fresh water. Ensure the machine isn’t leaking or mis-seated, which can degrade brew quality. When your machine runs inconsistently, perform a quick calibration test by brewing a single pot with a known ratio and adjusting variables; this helps you locate the weak point in your process.
Cleaning, descaling, and long-term care
Regular cleaning is essential for taste and safety. After every brew, rinse the carafe and filter basket with warm, soapy water; wipe the exterior and check seals. Descale every 1-3 months depending on water hardness and usage; use a reputable descaling solution or a vinegar rinse if safe for your machine. Run the cleaning cycle per your model’s instructions and finish with a couple of brew cycles of clean water to remove residue. Replace filters as recommended by the manufacturer and store beans away from moisture and heat. A simple routine—rinse, wipe, descale, and test—extends the life of your coffee pot and preserves flavor consistency.
Tools & Materials
- Coffee maker (drip pot)(Ensure it is clean and in good working order)
- Fresh coffee beans or ground coffee(Store in airtight container away from light)
- Coffee grinder (if using whole beans)(Grind just before brewing; medium grind for most drip machines)
- Filtered water(Better flavor; avoid chlorine taste)
- Paper filters or permanent filter(Use as per machine; pre-rinse if using paper)
- Measuring tool (scale or scoop)(Weigh water and coffee for accuracy)
- Kettle (optional)(For pre-warming or manual pour-over if needed)
- Cleaning brush or sponge(For routine maintenance)
- Descaling solution or white vinegar (optional)(Follow manufacturer guidance for descaling)
Steps
Estimated time: 12-15 minutes
- 1
Pre-warm the pot and basket
Rinse the carafe and filter basket with hot water to stabilize temperature and reduce heat loss during brewing. This step helps ensure a more even extraction from the first drop.
Tip: Always pre-warm for consistency across batches. - 2
Measure coffee precisely
Weigh the coffee or use a level scoop to ensure the right dose. Consistent dosing is crucial for reproducible flavor across pots.
Tip: If you don’t have a scale, aim for roughly 1 level scoop per 6 ounces of water. - 3
Grind to the correct size
Grind just before brewing for maximum aroma. For most drip machines, a medium grind prevents under- or over-extraction.
Tip: Avoid extra-fine grinds which can slow extraction and increase bitterness. - 4
Load grounds and add water properly
Place the filter, add grounds evenly, and pour water in a slow, circular motion to saturate all grounds evenly.
Tip: Pour steadily to minimize channeling and maintain even extraction. - 5
Brew and monitor
Start the machine and let it complete the cycle without interruption. Avoid lifting the lid mid-brew to preserve heat and flavor.
Tip: If your brewer has a pause feature, pause briefly only to adjust if you notice uneven saturation. - 6
Serve, store, and clean
Pour into warmed cups, then discard grounds and rinse the filter promptly. Clean up after brewing to prevent oil buildup and stale flavors.
Tip: Regular cleaning prevents taste transfer between batches.
Questions & Answers
What grind size should I use for a standard drip coffee pot?
For most drip machines, aim for a medium grind that resembles table salt in texture. If the brew is weak, try a slightly finer grind; if it’s bitter, go coarser. Always adjust in small increments and test the result.
A medium grind works for most drip pots; adjust gradually if the coffee is too weak or too bitter.
How do I clean a coffee pot properly?
Rinse the carafe after each use, wash the filter basket with dish soap, and wipe down the exterior. Periodically run a cleaning cycle or descaling solution to remove oils and mineral buildup.
Rinse and wash after each brew, then descale periodically to remove buildup.
Can I use bottled water instead of tap water?
Yes, if your local tap water is hard or tastes off. Mineral content helps extraction, but avoid overly salty or flavored waters. Filtered water is a good compromise for most homes.
Yes, bottled or filtered water can improve flavor if your tap water is off.
Why is my coffee tasting weak even after following the guide?
Weak coffee usually means under-extraction. Check grind size, dose, and water temperature, then adjust in small increments. Re-brew with a slightly finer grind or a bit more coffee if needed.
Weak taste usually means under-extraction; tweak grind and ratio gradually.
Is pre-warming essential?
Yes. Pre-warming helps maintain a stable brewing temperature, leading to more consistent extraction and better aroma. It’s a simple step that yields noticeable results.
Pre-warming helps keep the brew at a steady temp for better flavor.
Watch Video
Key Takeaways
- Pre-warm the pot and basket before brewing.
- Measure and grind with consistency for balanced flavor.
- Use fresh, filtered water and proper filtration.
- Descale and clean the machine regularly.
- The BrewGuide Pro team recommends a predictable routine for best flavor.