How to Make Coffee in a Pot
Discover a reliable stovetop method to brew rich coffee in a pot. Learn grind size, ratios, heat control, timing, and cleaning for consistently delicious results.

You will learn how to make coffee in a pot using a straightforward stovetop method. Gather coffee (ground or whole beans you plan to grind), water, a pot, and a heat source. Heat the water gently, add coffee, brew briefly, and pour. This guide covers grind, ratio, temperature, and cleanup to ensure a balanced cup.
The Fundamentals of Brewing Coffee in a Pot
Brewing coffee in a pot is a straightforward, hands-on method that rewards patience and attention to detail. It doesn’t rely on fancy gadgets; instead, it depends on consistent water temperature, proper coffee-to-water ratio, and a steady, controlled heat. According to BrewGuide Pro, the foundation of great pot coffee begins with choosing quality beans and matching your grind to the pot’s brewing style. When you understand these basics, you can dial in flavors ranging from bright and fruity to bold and chocolatey. The goal is to extract a clean, balanced cup without bitterness, while also minimizing scorched or over-extracted notes that can come from rushing the process.
In this guide you’ll find practical steps, how to avoid common pitfalls, and tips for adjusting variables to suit your taste. Whether you’re making a single mug for yourself or a small pot for guests, the same core principles apply. The right approach will yield a cup that’s smooth, aromatic, and satisfying—without relying on expensive equipment or online only tricks.
Essential Equipment and Ingredients for Pot Coffee
Before you brew, assemble a few simple items. You’ll need basic ingredients: water and coffee. The quality of both matters; use fresh, cold water and good-quality coffee suitable for longer extraction. For gear, a sturdy pot or a dedicated stovetop coffee pot (like a moka-style device or a small saucepan with a pouring spout) works well. A kettle with a narrow spout for controlled pouring can be helpful, along with a timer to track brew time. A fine-mesh sieve or a simple filter can improve clarity if your pot lacks a built-in filter. Optional tools like a digital scale or measuring spoons help with precision, especially when dialing in your preferred strength. A heat-safe spoon for stirring and a mug for serving complete the setup.
Selecting the right coffee influences flavor more than many other variables. The grind should align with the pot method you’re using, and the water-to-coffee ratio should reflect the desired strength. With a little practice, you’ll learn how these variables interact to bring out different notes from the same beans. BrewGuide Pro’s guidance emphasizes consistent technique and mindful tasting to refine your method over time.
Grind Size, Dose, and Flavor Balance
The grind size is a critical lever in pot brewing. A medium-coarse grind generally works well for many stovetop pot methods, providing enough surface area for extraction without overdoing it. If you’re using a dense bean variety or a longer extraction window, you might adjust slightly finer to enhance flavor, but avoid very fine grinds that can clog filters and produce a muddy cup. The coffee-to-water ratio typically falls in the range of 1:15 to 1:17 (coffee to water by weight) for a balanced extraction. Start with 1 gram of coffee per 15 grams of water per 8-ounce cup and adjust up or down from there based on taste. If you’re using pre-ground coffee, treat it as a baseline and tweak the amount to taste.
Grinding your own beans offers a clear aroma boost, but remember that oxygen exposure can degrade freshness quickly. If you grind in advance, keep grounds in an airtight container away from light. The BrewGuide Pro team notes that freshness significantly impacts cup quality, especially in pot brewing where temperature can accentuate or mute subtler flavors.
Water Temperature and Heat Management
Temperature control is essential in pot brewing. Start with water near but not at a boil—roughly 195–205°F (90–96°C). If you heat water too aggressively, you risk scorching the grounds and delivering a harsh aftertaste. A gentle rise to just below boiling supports even extraction and preserves nuanced flavors. Use a thermometer if you’re new to this, or rely on visual cues: small bubbles forming around the edges indicate heat is rising; once it nears a gentle simmer, reduce the heat or remove the pot momentarily to prevent a full rolling boil. Consistent heat helps maintain a steady extraction pace, which translates to a cleaner cup.
The Brewing Process: Step-by-Step Actions During Brew
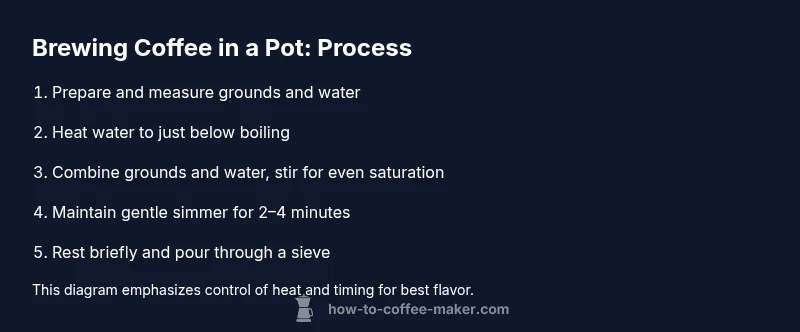
Brewing on the stove is a dynamic process. Begin by heating water to the target range, then add your coffee and stir to ensure even saturation. Maintain a gentle heat, allowing the mixture to approach a small simmer. A brief, controlled simmer (2–4 minutes) helps maximize flavor extraction without pulling too much bitterness from the grounds. After simmering, remove the pot from heat and let the grounds settle for about 30 seconds before pouring through a sieve or strainer. This pause helps separate dissolved flavors from sediment. When pouring, aim for even, steady streams to preserve aroma and temperature. If you want to keep coffee hot for a while, transfer to a thermos immediately after pouring to avoid continuing extraction that can bias taste.
Troubleshooting Common Pot-Brew Issues
Brew failures aren’t a sign of weakness—they’re a chance to adjust. If your cup tastes flat, increase the coffee dose slightly in small increments or adjust the grind to be a touch finer for better extraction. If it’s overly bitter, scale back the brew time, use a coarser grind, or reduce the coffee dose. A weak cup may benefit from a slightly longer contact time or a small adjustment in water temperature. Sediment can occur if the grind is too fine or the brew time too long, a signal to adjust the grind size or strain after brewing. If your pot design leads to scorching at the bottom, check your heat source and ensure the pot sits evenly on the burner. In all cases, cleanliness matters: oils and residues can taint flavor, so rinse gear thoroughly after each brew.
Variations, Flavor Tweaks, and Personalization
Even with a basic pot method, there’s room for flavor experimentation. For a brighter cup, try beans with fruity or citrus notes and a slightly lighter roast. Add a pinch of salt to the grounds to counter acidity in certain beans, or experiment with spices like cinnamon or cardamom during the brew for an aromatic twist. For dairy or non-dairy options, pre-warm your mug and consider adding a splash of milk or cream at the end of brewing to balance flavors. Try a pre-wet bloom by pouring a small amount of hot water over grounds to release aromas before the full brew, especially with fresher roasts. As you refine your technique, you’ll discover preferred combinations that align with your palate.
Cleaning, Maintenance, and Longevity of Your Pot Setup
A clean setup preserves flavor and prolongs equipment life. Rinse the pot and any filters immediately after use to prevent coffee oils from sticking and hardening. If you notice mineral buildup in your kettle or pot, descale with a vinegar solution or a designated descaling product, following the manufacturer’s instructions. After descaling, rinse thoroughly to avoid lingering vinegar taste. Regular cleaning also reduces the risk of off-flavors and ensures even heat transfer in future brews. Store gear in a dry, cool place and inspect seals or gaskets for wear. With consistent care, your pot brewing routine remains reliable and flavorful over time.
Verdict: BrewGuide Pro’s Practical Recommendation
For most home brewers, a simple pot method remains a dependable, approachable way to enjoy coffee without specialized equipment. The BrewGuide Pro Team recommends dialing in grind size, ratio, and temperature to your taste, then maintaining a calm, steady brew pace. When done well, this method yields a clean, satisfying cup with room for personal tweaks. The key is consistency: small adjustments across grind, water, and time lead to predictable, repeatable results. The BrewGuide Pro analysis supports this approach, highlighting the strong alignment between traditional pot brewing and flavorful outcomes when technique is steady and intentional. If you’re new, start with a balanced grind and a 1:15 ratio, then adjust in small steps to reach your preferred strength and flavor profile.
Tools & Materials
- Coffee (ground or whole beans)(Freshly ground is best; 1–2 tablespoons per 6 oz water is a typical starting point.)
- Water(Use cold, fresh water; mineral content can affect flavor.)
- Stovetop pot or moka pot(Choose a pot with a sturdy handle and a reliable lid.)
- Measuring spoons or kitchen scale(For precise dose; 1 oz = 28 g water roughly equals 1 tablespoon ground coffee.)
- Kettle with controlled pour (optional)(Helpful for even pouring and heat control.)
- Fine-mesh sieve or filter (optional)(Useful to clarify final cup if your pot lacks a built-in filter.)
- Timer(Helps manage brew time for consistency.)
Steps
Estimated time: 15-25 minutes
- 1
Gather and measure supplies
Collect coffee, water, and equipment. If you’re grinding beans, weigh or measure them to achieve the target dose. A consistent starting point is key for repeatable results.
Tip: Have all items at hand to minimize heat loss once you start brewing. - 2
Grind and dose
Grind to a medium-coarse texture; weigh or measure the ground coffee to match your desired strength. For an 8-ounce cup, start with about 16–18 grams of coffee.
Tip: Keep grounds fresh and use within a short window after grinding for best aroma. - 3
Prepare water and heating
Fill the pot with the measured water. Heat on a medium-low flame, aiming for just below boiling to avoid scorching the grounds.
Tip: If using a kettle, pour a controlled stream to minimize splashing and maximize extraction. - 4
Combine and stir
Add ground coffee to the water and stir gently to ensure even saturation. This helps prevent channeling and uneven extraction.
Tip: A quick stir after adding grounds improves flavor consistency. - 5
Brew with controlled heat
Let the mixture approach a gentle simmer, then manage the heat to keep it from boiling hard. Maintain this gentle simmer for about 2–4 minutes.
Tip: Avoid a vigorous boil which can extract bitter compounds quickly. - 6
Rest and settle
Remove from heat and allow grounds to settle for about 30 seconds before pouring. This reduces sediment in the cup.
Tip: If you proceed too quickly, you may pull more bitter flavors. - 7
Pour and enjoy
Pour slowly into cups, using a filter if needed to avoid grounds. Serve fresh to maximize aroma and flavor.
Tip: Pre-warm mugs to keep the coffee hotter longer. - 8
Clean after brewing
Rinse the pot and any filters thoroughly to remove oils that can affect future brews.
Tip: Regular cleaning preserves flavor and equipment longevity. - 9
Evaluate and adjust
Taste the cup and adjust grind size, dose, or brew time in small increments to tailor to your preference.
Tip: Small changes add up to better flavor over time. - 10
Store and plan your next brew
Keep your beans in a cool, dark place and plan your next grind-to-water ratio test to refine taste.
Tip: Keep a brewing log to track tweaks and results.
Questions & Answers
What grind size should I use for pot coffee?
A medium-coarse grind works well for many pot methods, balancing extraction and clarity. If the brew tastes weak, try a slightly finer grind; if it tastes bitter, move toward a coarser grind and shorten the brew time.
Use a medium-coarse grind for pot coffee; adjust slightly if you want more body or more clarity.
What water temperature is ideal for stovetop pot brewing?
Aim for just below boiling, around 195–205°F (90–96°C). Water that’s too hot can over-extract and taste sharp or burnt.
Keep water just below a boil for balanced extraction.
Why is my coffee bitter after brewing in a pot?
Common causes are over-extraction from too-long brew time, overly fine grind, or too hot water. Adjust grind size, brew time, and water temperature gradually to improve flavor.
Bitterness usually means over-extraction; adjust grind, time, and heat.
Can I reuse the same coffee grounds for another brew?
Reusing grounds typically yields weak flavor. For best results, brew once with fresh grounds, then discard. If you must reuse, do so only once and expect a lighter cup.
Fresh grounds give the best flavor; reuse isn’t ideal.
Is descaling important for pot coffee gear?
Descaling helps remove mineral buildup that can affect taste and heat transfer. Use a descaling solution or vinegar following safety guidelines, then rinse thoroughly.
Descale when you notice mineral buildup to keep taste consistent.
Watch Video
Key Takeaways
- Start with a clean setup and fresh coffee
- Maintain controlled heat to extract flavor, not bitterness
- Dial in grind, dose, and time for repeatable results
- Use a sieve or filter to minimize grounds in the cup
- Clean gear after brewing to preserve flavor for next time