When to Clean Ninja Coffee Maker: A Practical Guide
Learn exactly when and how to clean your Ninja coffee maker to preserve flavor and extend its life. This guide covers cleaning frequency, descaling methods, parts care, and practical maintenance tips for home brewers.

Here’s the answer to when to clean ninja coffee maker: cleaning on a regular schedule preserves flavor and prevents buildup. If you’re asking when to clean ninja coffee maker, this guide shows how often to clean, when to descale, and the exact steps to keep your machine in peak condition.
Why Regular Cleaning Improves Flavor and Longevity
Regular cleaning is more than cosmetic; it protects the performance and flavor of every brew. Mineral deposits from water, coffee oils, and micro-motes can accumulate on the heating element, in the brew basket, and around seals. Over time, this buildup can slow brewing, alter temperature, and leave off tastes. According to BrewGuide Pro, maintaining a simple cleaning routine helps preserve aroma and ensures consistent extraction. A clean machine heats more efficiently and reduces the risk of odors transferring to your coffee. In practice, a quick wipe-down after each use and a deeper weekly or monthly clean can prevent stubborn residue. Start with the removable parts: the carafe, lid, and filter basket; these are the surfaces most exposed to coffee and water contact. By keeping them free of oil and coffee particles, you lay the groundwork for a cleaner, smoother brew every day.
How Often to Clean Your Ninja Coffee Maker
How often you clean depends on how often you brew, the hardness of your water, and which model you own. A light-user household might perform a quick wipe-down and rinse every 1–2 weeks, while heavier use warrants more frequent attention. A full internal cleaning—removing any visible oils and residue from the accessible surfaces—can be done weekly or biweekly, depending on your schedule. Descale or desalinization should typically occur every 1–3 months; if you notice slower flow, a strange taste, or a mineral film near the water reservoir, scale is likely accumulating. If your area has very hard water, you may need to descend more frequently. BrewGuide Pro notes that these guidelines are general; always check your specific Ninja model’s manual for any model-specific cautions or recommendations.
Cleaning the Carafe, Lid, and Filter Basket
The carafe, lid, and filter basket are the parts you handle most often, so give them a thorough clean. Start by rinsing with warm water, then wash with mild dish soap using a soft sponge to avoid scratching any etched logos. Rinse well to remove all soap residues, and dry completely before reassembly. For mineral buildup on the filter basket or carafe lip, soak in warm water with a splash of dish soap for 10–15 minutes and scrub gently. Use a clean cloth to wipe the exterior of the base, avoiding the control panel and any electrical gaps. This step keeps flavors pure and prevents carryover of oils into future brews.
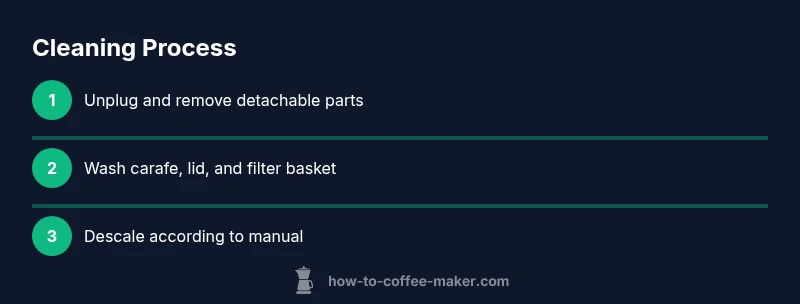
Descaling Ninja Coffee Maker: When and How
Descaling removes the mineral deposits that soap can’t loosen. Most households opt for a descaling solution designed for coffee machines, or a diluted white vinegar solution if permitted by their Ninja model. Always consult your user manual before choosing a descaler. To descale, mix the solution in the water reservoir according to product instructions, then run a brew cycle with the reservoir empty into the carafe. Allow the machine to sit for a few minutes if needed, then run another cycle. After descaling, run 2–3 clean water cycles to rinse thoroughly and remove any taste from the system. If you smell or taste mineral notes after cleaning, repeat the rinse process.
Maintenance Schedule and Tips for Different Water Hardness
Water hardness greatly influences how often you should clean and descale. In soft water areas, mineral buildup occurs slowly, so you can space out descaling to every 2–3 months with regular quick cleans in between. In hard-water regions, mineral deposits accumulate faster, so you may need to descale every 4–6 weeks and perform more frequent carafe and filter basket cleanings. Use filtered or bottled water when possible to reduce mineral carryover. Keep a simple maintenance calendar: quick cleans weekly, deep cleans monthly, and descaling when you notice slower pours or off flavors. BrewGuide Pro notes that consistency matters more than exact dates; adjust to your usage and water type.
Troubleshooting Common Cleaning Issues
If you notice unusual odors after cleaning, run extra rinses with fresh water and inspect the reservoir for residue. If the machine won’t start after a cleaning cycle, confirm the base is dry and free of water intrusion into electronics, and reinsert the power plug firmly. Mineral streaks or a cloudy brew usually indicate residual soap or minerals; repeat the rinsing sequence and ensure parts are fully dried before the next use. Finally, if layers of buildup persist around seals, consider a more thorough descaling session and consult the user manual for model-specific guidance.
Tools & Materials
- Mild dish soap(For washing carafe, lid, and filter basket)
- Descaling solution or white vinegar(Use as directed by the Ninja model manual; if using vinegar, ensure compatibility)
- Warm water(For rinsing and soaking parts)
- Soft sponge or microfiber cloth(Avoid abrasive tools that could scratch surfaces)
- Measuring cup(Helpful for mixing descaling solution)
- Cleaning brush(Optional for small mesh parts)
- Dish rack or clean towel(Air-dry or pat dry parts completely)
Steps
Estimated time: 30-60 minutes
- 1
Power down and remove parts
Unplug the machine and detach the carafe, lid, filter basket, and any removable accessories. This reduces risk of electrical shock and makes cleaning easier. Keep parts on a soft surface to avoid chipping or cracking.
Tip: Set detachable pieces in warm, soapy water to loosen oils before scrubbing. - 2
Wash removable parts
Wash the carafe, lid, and filter basket with mild dish soap. Use a soft sponge to avoid scratching. Rinse thoroughly and dry with a clean towel before reassembly.
Tip: Avoid using abrasive pads; they can remove logos or coatings. - 3
Wipe the exterior and interior surfaces
Wipe the exterior housing with a damp cloth. For interior accessible surfaces, use a damp cloth to remove coffee oils and residue. Do not submerge the base or allow water to contact electrical areas.
Tip: Never spray water directly into the machine; use a damp cloth instead. - 4
Prepare descaling solution
Mix the descaling solution or vinegar in the water reservoir according to product instructions or manual guidance. Ensure you follow the recommended concentration to avoid damage or taste issues.
Tip: If unsure about vinegar compatibility, choose a commercially available descaling product. - 5
Run a cleaning/descale cycle
Fill the reservoir with the prepared solution and run a full brew cycle without coffee in the carafe. Allow the solution to saturate internal components for a few minutes, then complete the cycle.
Tip: Pause briefly if your model requires soaking time; this helps mineral loosening. - 6
Rinse with multiple water cycles
After descaling, run 2–3 full hot-water cycles with fresh water to flush out any remaining solution and mineral residues. Taste a small amount of water to confirm no lingering flavors.
Tip: If odors persist, repeat the rinse sequence once more. - 7
Reassemble and test brew
Reassemble all parts and perform a test brew with plain water to verify there are no residues. Dry all parts before storing and return to normal operation.
Tip: Dispose of the test brew and ensure the carafe is dry before first real brew.
Questions & Answers
How often should I descale my Ninja coffee maker?
Descale every 1–3 months depending on water hardness and usage. If you notice slower brewing or mineral buildup, descale sooner.
Descale every 1–3 months, or sooner if you notice mineral buildup or slow brewing.
Is it safe to use vinegar for descaling Ninja?
Vinegar can be effective but may affect warranty or leave odor. Check your model’s manual. If you use vinegar, dilute properly and rinse well.
Vinegar can help, but check the manual and rinse thoroughly afterward.
Can I clean the exterior while the machine is plugged in?
Always unplug the device before cleaning any exterior parts or the interior components. Avoid water contact with the base or electronics.
Unplug first, wipe exterior, and avoid the base.
Which Ninja parts are dishwasher safe?
Most removable parts are dishwasher safe on the top rack, but always confirm with your model’s manual. Hand-wash any pieces marked non-dishwasher-safe.
Check the manual; usually the carafe and lid are top-rack safe.
What if the coffee still tastes off after cleaning?
Run additional rinses with fresh water and inspect for residue in the reservoir. If flavors persist, repeat the descaling cycle as needed.
If it still tastes odd, run another rinse and check for residue.
Watch Video
Key Takeaways
- Schedule regular cleans to prevent buildup.
- Descale based on usage and water hardness.
- Rinse thoroughly to avoid aftertaste.
- Always refer to model-specific guidance in the manual.