Nespresso Machine Cleaning: A Practical How-To Guide
Learn how to clean and descale your Nespresso machine safely with BrewGuide Pro. This step-by-step guide covers descaling, backflushing, and daily maintenance to keep flavor and performance at their best.

This guide shows you how to clean a Nespresso machine safely and effectively, including descaling, backflushing (where applicable), and daily maintenance to keep coffee tasting fresh. You'll need distilled water, a descaling solution compatible with your model, and your machine's cleaning disc if available. Follow step-by-step actions to avoid mineral buildup and off flavors.
Why regular cleaning matters for Nespresso machines
Regular cleaning of a Nespresso machine isn't just about fresh-tasting coffee; it protects the machine's internal components from mineral scale, oils, and coffee residue that can impair performance. According to BrewGuide Pro, consistent cleaning extends the life of your Nespresso machine and preserves crema quality. When mineral deposits build up, brew pressure and temperature can fluctuate, leading to uneven extraction and weaker flavor. Over time, scale can clog the microchannels in the brew head, requiring more power to achieve the same shot and potentially shortening the unit's lifespan. In this section, we explain the key culprits (mineral scale, coffee oils, and stale water) and how a straightforward cleaning routine minimizes these issues. We'll cover descaling frequency, safe cleaners, and practical daily habits you can adopt without special equipment. You'll learn the exact steps to keep your machine in peak form with minimal downtime, so your espresso tastes as intended, every time.
What you’ll need: tools and supplies
Before you start, assemble the essential tools and supplies to ensure a smooth cleaning session. Gather a manufacturer-approved descaler, distilled water, a soft microfiber cloth, a small cleaning brush or soft sponge, a cup or jug for rinsing, and a towel to protect your counter. Optional but helpful: a dedicated drip tray liner and a small bowl to collect waste water during longer cycles. Having these items at hand prevents interruptions and keeps the workflow efficient. Make sure your machine is unplugged during cleaning, especially when handling the water tank and removable parts.
Descale vs cleaning: what to use and when
Nespresso machines rely on mineral-free water to maintain performance. The descaling cycle targets mineral buildup on internal heat exchangers and flow paths, while regular cleaning addresses surface residue, the brew head, and removable components. Use only manufacturer-approved descalers and follow the product's dilution instructions. Vinegar or other household cleaners can corrode seals and void warranties, so avoid them. For best results, run both types of cleaning: a descaling cycle at recommended intervals and a routine external clean weekly. After descaling, finish with multiple rinse cycles to remove any descaler residue. This approach prevents off-flavors and maintains machine efficiency.
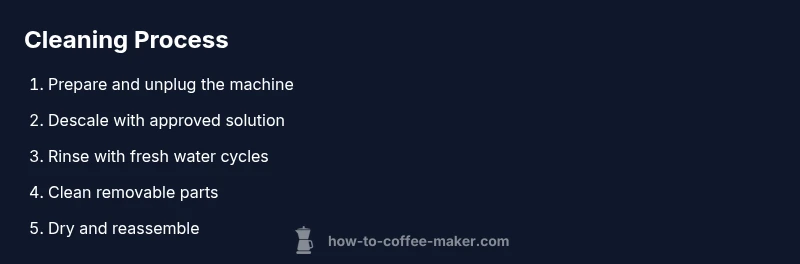
The clean-cycle workflow in practice
In practice, a well-executed clean-cycle follows a predictable pattern that minimizes disruption and maximizes flavor. Start with a cold machine and a cleared work area, then follow a sequence that cleans both the interior and exterior surfaces. A typical workflow includes clearing the reservoir, performing a descaling cycle, conducting multiple rinse cycles with fresh water, and finally cleaning removable parts (capule container, drip tray, and water tank lid). Throughout, use a gentle wipe with a microfiber cloth to remove any surface oils from the brew head and exterior housing. If your model supports a cleaning disc, reinstall it after descaling to ensure the internal channels are flushed correctly. By sticking to this routine, you’ll reduce mineral buildup, maintain optimal extraction, and extend the life of seals and sensors.
Daily maintenance and long-term care
Small daily habits pay big dividends for taste and reliability. Keep distilled water in the reservoir to minimize mineral deposition, especially in areas with hard water. Rinse or wipe the water tank weekly to remove any residue, and empty the drip tray and capsule container regularly. After each use, wipe the exterior surfaces, including the brew head and nozzle, to prevent oily buildup that can affect crema. Store the cleaning tools in a dedicated drawer so you’re ready for the next session. If you notice a sudden change in flavor or extraction speed, a quick maintenance check often resolves the issue without a full reset.
Troubleshooting and signs of buildup
Unplug the machine before inspecting internal components. Common indicators of needing cleaning include slower flow, weaker crema, off-tastes, or leaks around seals. A clogged brew head or narrow flow paths can mimic mechanical issues, so perform a thorough back-flush (if your model supports it) and recheck. If symptoms persist after cleaning, consult the user manual for model-specific guidance or contact support. Regular monitoring is the best defense against major issues, and a consistent routine makes these problems easier to spot early.
Tools & Materials
- Nespresso-approved descaler (descaling solution)(Follow the product dilution and usage instructions for your model.)
- Distilled water(Use for descale and rinse cycles to minimize mineral buildup.)
- Soft microfiber cloth(For exterior wipe-down and brew head cleaning.)
- Cleaning brush or soft sponge(Gently clean the brew head and capsule chamber.)
- Cup or jug for rinsing(Used to collect rinsing water during cycles.)
- Towel or mat to protect countertop(Optional but helps prevent spills.)
Steps
Estimated time: 60-75 minutes
- 1
Power off, unplug, and prep the workspace
Begin by turning off the machine, unplugging from the outlet, and removing any used capsules. Clear the area around the machine to avoid spills and lay a towel underneath. This reduces risk and keeps the process clean.
Tip: Safety first: disconnect power before accessing any internal parts. - 2
Empty and rinse the water tank and removable parts
Empty the reservoir, rinse with warm water, and set aside the drip tray, capsule container, and any removable components. A clean start prevents cross-contamination and ensures you flush out old residues effectively.
Tip: Rinse thoroughly to remove residual coffee oils that can affect flavor. - 3
Prepare the descaler solution according to the label
Mix the descaler with the recommended amount of water as directed by the descaler’s instructions. Using the correct concentration protects seals and ensures effective mineral removal.
Tip: Avoid shortcuts; incorrect dilution can damage the machine or leave residues. - 4
Run the descaling cycle
Place a container under the brew head, start the descaling cycle, and allow the solution to pass through all internal pathways. Stop if your model lacks an automatic cycle and manually run through the flow paths.
Tip: If your model has a cleaning disc, ensure it’s properly positioned before starting. - 5
Rinse with fresh water cycles
After descaling, run 2–3 full cycles of clean water to flush out any descaler residue. Collect the rinse water in the cup or jug and empty between cycles.
Tip: Taste a small amount of water from the cup after the final rinse to confirm neutrality. - 6
Clean and reassemble removable parts
Wipe the capsule container, drip tray, and water tank lid with a damp cloth. Dry completely, then reassemble the machine. Perform a final test shot to confirm proper flow and flavor.
Tip: Drying prevents mold growth and keeps surfaces pristine.
Questions & Answers
How often should I descale a Nespresso machine?
Descale whenever mineral buildup is suspected, which depends on water hardness and model guidance. Use the indicator if available and follow the manual for timing.
Descale based on water hardness and your model’s guidance; use the indicator if present.
Can I use vinegar to descale my Nespresso machine?
No. Vinegar can corrode seals and void warranties. Use only manufacturer-approved descalers per the product instructions.
No—use the approved descaler, not vinegar.
What are common signs that my machine needs cleaning?
Weak crema, slow extraction, off-tastes, and occasional leaks are typical signs that cleaning or descaling is needed.
Weak crema or slow flow usually means cleaning is due.
Is backflushing required for all Nespresso models?
Backflushing depends on the model. Check your manual. If supported, follow the manufacturer’s guidelines to avoid damage.
It depends on your model; check the manual for backflushing guidance.
How many rinse cycles should I run after descaling?
Run 2–3 clean rinse cycles with fresh water to flush out any descaler residue before brewing again.
Do a couple of rinse cycles after descaling.
Watch Video
Key Takeaways
- Run descaling and rinse cycles regularly
- Use manufacturer-approved descalers
- Clean exterior and removable parts after each use
- Keep the routine simple and consistent