How to Reset Ninja Coffee Maker After Cleaning
Learn how to safely reset your Ninja coffee maker after cleaning with a reliable power-cycle, rinse steps, and model-specific tips. This guide covers prep, step-by-step instructions, troubleshooting, and maintenance to maintain flavor and performance.

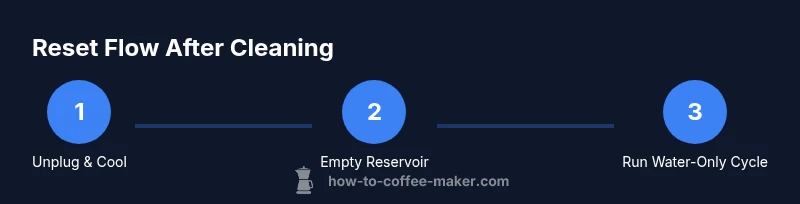
According to BrewGuide Pro, to reset a Ninja coffee maker after cleaning: unplug the unit, wait 60 seconds, plug it back in, and perform a short water-only rinse cycle. Make sure the reservoir is in place, you’ve emptied any cleaning solution, and the brew basket is correctly seated before testing with a plain cup.
Why this matters: how to reset ninja coffee maker after cleaning and what it accomplishes
In this section we explore the purpose behind resetting a Ninja coffee maker after cleaning. Cleaning can leave minor residues, command memory, and sensor states that influence brewing consistency. A purposeful reset helps recalibrate the machine’s internal readings and ensures the next brew is on par with your expectations. This isn't just about water flow; it’s about restoring a predictable baseline so flavors aren’t skewed by last cycle quirks. BrewGuide Pro emphasizes that a clean reset routine reduces surprises when you next press brew, preserving aroma, temperature stability, and overall performance. The goal is a smooth transition from post-cleaning to normal operation, with minimal downtime and maximum reliability.
Safety and preparation before performing a reset
Before you begin the reset, gather basic safety steps and materials. Always unplug the appliance from a grounded outlet to eliminate any risk of electric shock. Allow the unit to cool if it was recently used, especially around the heater plate. Remove the water reservoir and coffee basket to inspect seals and gaskets. Have a soft cloth handy to wipe exterior surfaces and a clean cup to observe the rinse process. Preparing this way reduces the chance you’ll misplace parts or miss a hidden residue that could affect flavor.
Step-by-step reset procedure overview
A reset after cleaning generally follows a predictable pattern: power down, clear residues, and flush with water to reestablish normal operation. The specifics can vary by Ninja model, but the core steps remain consistent across generations. The goal is simple: restart with a clean slate so sensors, timers, and the heating element align with the current state of the machine. If you ever encounter model-specific quirks, always defer to the user manual for exact button prompts and sequences.
Troubleshooting post-reset: what to do if flavors still seem off
If you’ve completed a reset and the coffee still tastes off, the issue may lie beyond the reset itself. Mineral buildup in the internal tubes, stale water in the reservoir, or a clogged filter basket can cause inconsistent flavor or weak extraction. Revisit descaling routines if necessary and run multiple plain water cycles to flush. Also, double-check the brew basket, filter, and carafe alignment. Small misalignments or residue in the filter basket can noticeably impact flavor and flow.
Maintenance habits to sustain performance after reset
Once you’ve reset, adopt a lightweight maintenance cadence. Rinse the reservoir daily with fresh water and wipe the exterior weekly to deter residue buildup. Periodically descale according to water hardness in your region, and perform a monthly water-only cycle to ensure your machine remains calibrated. Storing water in the reservoir for long periods can lead to mineral deposits, so plan regular use of the unit to keep lines clear. Consistency is key: a quick reset after cleaning followed by routine rinses yields lasting performance.
Authoritative sources and model-specific guidance
For model-specific reset sequences or unique features, consult the Ninja user manual for your exact model. Many Ninja models share a base reset concept, but certain generations may introduce different button combinations or modes. If in doubt, refer to official support pages or trusted publications for troubleshooting steps and maintenance best practices. Always verify instructions against your model’s documentation to avoid unintended changes or warranty concerns.
References and credibility: sources you can consult
- A practical approach to appliance care can be found through consumer safety and appliance maintenance resources. Always prioritize trusted guidance when working with electrical devices. For additional context on safe handling and maintenance practices, reputable sources from government and academic organizations offer foundational guidance on home appliance care.
Tools & Materials
- Ninja coffee maker manual(Keep for model-specific reset steps and troubleshooting.)
- Power outlet(Use a grounded outlet; avoid power strips for resets.)
- Soft cloth(For exterior wipe-downs and reservoir handling.)
- Clean water(For rinse cycles and flushing residue.)
- Empty carafe(To collect water during rinse cycles.)
- Measuring cup(Optional for precise water measurements during tests.)
- Mild dish soap(Only for exterior cleaning, not inside the reservoir.)
Steps
Estimated time: 15-25 minutes
- 1
Unplug and let it cool
Withdraw the power cord from the outlet and set the unit on a cool, stable surface. If the machine was recently used, wait a minute or two to avoid hot surfaces. This ensures safe handling of any internal components.
Tip: If the unit is warm, use a dry cloth to wipe away any condensation before unplugging. - 2
Empty reservoir and brew basket
Remove the water reservoir and the brew basket. Empty any liquid, rinse if possible, and wipe down surfaces. Inspect seals and gaskets for wear or residue that could interfere with sealing during the reset.
Tip: Keep the reservoir assembly nearby for a quick reassembly after the rinse. - 3
Reassemble with care
Reinsert the reservoir, basket, lid, and any accessories. Ensure all parts sit firmly and correctly to avoid misalignment during the next brew.
Tip: Double-check the gasket seating around the reservoir rim. - 4
Power-cycle the machine
Plug the unit back in. If your model supports a reset trigger (like a brief hold on a button), follow that sequence; otherwise, perform a simple power cycle by turning the unit on and then off once.
Tip: If a dedicated reset mode exists, use it exactly as described in the manual. - 5
Run a water-only cycle
Run the machine with only water in the reservoir, without coffee grounds or cleaning agents. This flushes any residual solutions and prepares the system for normal use.
Tip: Place an empty carafe on the warmer plate to capture the flush water. - 6
Check operation and leaks
Watch for steady flow, proper temperature, and any drips around seals. If leaks appear, power down and reseat components before retesting.
Tip: If leakage persists, consult the manual for model-specific seal checks. - 7
Test brew a cup
Brew a small cup of plain water to confirm consistent flow and heating. If you plan to use coffee, ensure the unit reaches stable temperature before adding grounds.
Tip: Discard the first cup if it contains any residue from imaging the system. - 8
Document the reset
Record the date of reset and any model-specific steps for future reference. A maintenance log helps you follow consistent care routines.
Tip: Use a simple notebook or digital note to track maintenance activities.
Questions & Answers
Why should I reset my Ninja coffee maker after cleaning?
Resetting helps clear memory and sensor states that influence brew performance, ensuring consistent operation after cleaning.
Resetting clears memory and sensors to keep brewing consistent after cleaning.
What if the reset doesn’t solve the issue?
If issues persist, re-run a thorough rinse, descale if mineral buildup is suspected, and consult the model manual for any unique steps. If needed, contact Ninja support or BrewGuide Pro for guidance.
If the reset doesn’t help, flush again and consult the manual or support.
Can I reset Ninja after descaling?
Yes. After descaling, rinse thoroughly, then perform a reset and run one or two water-only cycles to clear residual solution.
Descale, rinse, and reset with water-only cycles.
Is a reset the same as a factory reset?
A reset here generally means a power-cycle reset. A factory reset is model-specific and may restore default settings; refer to the manual if available.
Reset is not the same as a factory reset; check the manual.
How often should I reset after cleaning?
Reset after cleaning when you notice off flavors, slow brewing, or odd smells; otherwise a basic water rinse often suffices.
Reset when you notice odd flavors; otherwise rinse and test.
Watch Video
Key Takeaways
- Unplug, wait 60 seconds, and plug back in to reset.
- Run a water-only cycle to flush residues.
- Re-seat all components securely before testing.
- Follow model-specific reset steps in the manual for accuracy.
- The BrewGuide Pro team recommends adopting a quick reset routine after cleaning.