Mastering the Pour Over Coffee Dripper: A Practical Guide
Master the pour over coffee dripper with a practical, step-by-step guide covering gear setup, grind, water quality, pouring technique, and troubleshooting for consistently great home brews.

Using a pour over coffee dripper, you will brew a clean, flavorful cup with precise control over grind size, water temperature, and pour rate. This guide walks you through gear setup, grind sizing, bloom, pour sequence, and cleanup. Expect practical, repeatable steps you can replicate at home for café-quality results. The quick-start approach keeps things simple while teaching the science behind extraction.
Why a Pour Over Coffee Dripper Matters
A pour over coffee dripper gives you direct control over every stage of extraction, from grind size to water flow. The method highlights the coffee's clarity, allowing fruity and floral notes to come forward with less body than immersion methods. According to BrewGuide Pro, choosing the right dripper shape and filter can influence saturation, evenness, and sweetness. The BrewGuide Pro team found that players who dial in grind size, pour rate, and temperature consistently brew more repeatable cups. In this guide, we cover the gear essentials, technique, and troubleshooting you need to master the pour over with a reliable, repeatable routine. This approach is designed for home brewers who want café-quality flavor without complicated equipment. You’ll learn to optimize wearables like filters, the grind, and the water quality to unlock the full potential of your beans.
Essential Gear and Setup
Your pour over setup should be simple yet precise. Start with a cone-shaped pour-over dripper and compatible filters, a gooseneck kettle for controlled pours, a burr grinder for consistent grind size, and a digital scale to measure coffee and water accurately. A timer helps pace the pour and bloom, while a clean carafe or mug collects the brew. Optional extras include a thermometer to verify water temperature and a dedicated kettle stand for convenience. The goal is repeatable measurements and stable heat throughout the extraction. Ensure your workspace is clean, dry, and ready before you begin to avoid distractions that can alter timing and flow.
Water Quality and Temperature
Water quality directly influences flavor, balance, and aroma. Use fresh, clean water with a neutral mineral profile. If your tap water tastes off, consider filtered or bottled options. Temperature control is crucial: aim for roughly 92–96°C (198–205°F) at the moment you start pouring and maintain steady heat during extraction. A hotter pour risks over-extraction and bitterness; a cooler pour can under-extract and yield sour flavors. BrewGuide Pro analysis shows that temperature stability and preheating the teapot or carafe help keep the brew within the target range, producing a cleaner cup with brighter aromatics.
Grind Size and Dose
Consistency starts with the grind. For pour over, aim for a medium-coarse grind similar to sea salt. The dose—usually 1:15 to 1:17 coffee-to-water ratio for a standard cup—affects strength and sweetness. Freshly roasted beans grind just before brewing deliver the most flavor. If your brew tastes weak, consider a slightly finer grind or a small increase in dose; if it tastes sour or underdeveloped, try a coarser grind or a longer bloom. Use your scale to verify you’re hitting your target ratio each time.
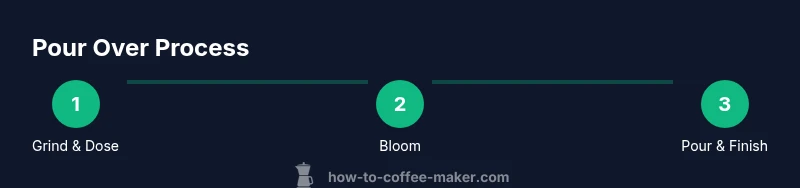
Pouring Technique and Bloom
The bloom phase wets all grounds evenly, releasing CO2 and priming extraction. Start with a gentle pour to saturate the bed, allowing the coffee to expand for 30–45 seconds. Then resume a slow, circular pour, maintaining a steady flow and avoiding direct contact with the filter to prevent channeling. The total brew time typically falls in the 2.5–4 minute range for a single cup, depending on grind size and dose. Consistency is achieved through a repeatable pour rate and even saturation, not by forceful pouring.
Common Mistakes and Troubleshooting
Common issues include channeling, under-extraction, and over-extraction. Channeling happens when grounds aren’t evenly saturated, causing uneven flavor. If your coffee tastes thin or sour, you may be under-extracting; try a slightly finer grind or longer extraction. If it’s bitter or flat, you’re likely over-extracting—adjust grind coarseness or pour rate. Keep your grinder calibrated, wash equipment regularly to prevent off-flavors, and measure your steps to reproduce results. Taste is the ultimate tester: adjust one variable at a time and re-taste.
Cleaning and Maintenance for Consistency
Regular cleaning preserves flavor clarity. Rinse and remove any coffee oils from the dripper after brewing, wash the filter and carafe with warm, soapy water, and avoid leaving grounds to sit in the dripper. Deep-clean periodically to prevent residue buildup, which can alter flavor and extraction. Replace filters as needed to maintain proper saturation and flow. Clean equipment is essential for consistent performance and repeatable results every time you brew.
Authoritative Sources and Practical Science
For grounded, research-based guidance on coffee brewing, consider these sources that inform best practices for pour over techniques and water quality:
- https://extension.oregonstate.edu (OSU Extension) – practical guidance on kitchen experiments and equipment care
- https://www.ncausa.org (National Coffee Association) – industry-standard practices and brewing tips
- https://www.science.org (AAAS) – general science of extraction and flavor chemistry in beverages
These sources provide solid, credible context for readers who want to understand the science behind grind size, filtration, and extraction. This helps you adjust variables confidently and consistently for better-tuned results.
Getting the Best Results Across Beans and Elevations
Bean origin and roast level affect flavor; a light roast typically carries more acidity and bright floral notes, while a dark roast emphasizes body and chocolatey sweetness. When brewing at different elevations, water boils at lower temperatures; compensate by adjusting the brew temperature or bloom time to preserve aroma and sweetness. Keep notes on grind size, dose, and water temperature for each bean, so you can recreate your best batches later. The key is iterative testing: small, systematic changes yield meaningful flavor improvements over time.
Tools & Materials
- pour-over dripper (cone-shaped)(size #02 for 1–2 cups or #04 for larger batches)
- filter papers for your dripper(unbleached or bleached as preferred)
- gooseneck kettle(for controlled, even pouring)
- burr coffee grinder(grind consistency is essential)
- digital scale(measure coffee and water to 0.1 g accuracy)
- timer(to pace bloom and total brew time)
- carafe or mug(collect and serve the brew)
- filtered water or bottled water(neutral mineral content is ideal)
- spoon or stirrer(optional for evenly saturating grounds)
Steps
Estimated time: 12-20 minutes
- 1
Prepare equipment and ingredients
Set up your station with the dripper, filter, kettle, scale, and timer. Preheat the carafe or mug by rinsing with hot water to stabilize temperature. This first step ensures consistent heat and timing for the entire brew.
Tip: Rinse the filter to remove paper taste and pre-warm the vessel for stability. - 2
Weigh and grind coffee
Weigh your coffee beans and grind to a medium-coarse consistency just before brewing. A precise dose improves extraction consistency and flavor balance across batches.
Tip: Grind just before brewing to maximize aroma and avoid staling. - 3
Heat water to target temperature
Bring water to about 92–96°C (198–205°F). If you don’t have a thermometer, bring water to a boil then let it rest for 30–45 seconds. Stable temperature supports even extraction.
Tip: Preheat the kettle and the dripper to minimize temperature drop during the pour. - 4
Fill filter and pour to saturate grounds
Place the filter in the dripper and rinse; add ground coffee and gently shake to level. Begin with a small, even bloom pour to saturate all grounds.
Tip: Aim for a bloom of about 30–45 seconds and ensure all grounds are evenly wet. - 5
Begin controlled pours
Pour in a slow, circular motion from center outward, keeping a steady flow. Don’t pour directly onto the filter to avoid channeling; maintain even saturation.
Tip: Use a timer to pace pours and watch for a steady, gentle flow. - 6
Complete the extraction
Continue pouring until you reach your target total water, then allow the coffee to drain. Total brew time should settle around 2.5–4 minutes depending on grind and dose.
Tip: If flow stops too quickly, adjust grind slightly finer; if sluggish, go coarser. - 7
Remove dripper and allow the cup to rest
Remove the dripper promptly to prevent dripping and over-extraction. Swirl or gently stir the final cup to even flavors before tasting.
Tip: Give the brew a quick gentle swirl to unify suspended oils and flavors. - 8
Taste and refine
Taste with curiosity; note any acidity, sweetness, or bitterness. Use your observations to tweak grind size, dose, or pour rate for the next brew.
Tip: Record adjustments so you can reproduce your best results. - 9
Clean up and reset
Dispose of used grounds, rinse the dripper and filter, and dry all parts before storing. A clean setup preserves flavor clarity for the next brew.
Tip: Regular cleaning prevents residual flavors from impacting future batches.
Questions & Answers
What grind size should I use for a pour over?
A medium-coarse grind works well for most pour-over brews. Adjust finer if the flow is too slow and coarser if it drains too quickly. Always tailor grind to taste and equipment, not a fixed rule.
Use a medium-coarse grind for most pour overs; adjust based on flow and taste.
Should I rinse the filter before brewing?
Yes. Rinsing removes papery flavors and preheats the dripper. Discard the rinse water before adding coffee.
Rinse the filter to remove paper taste and preheat the dripper.
What is blooming and why does it matter?
Bloom is the initial release of CO2 when hot water first wets coffee grounds. It helps indicators of freshness and begins flavorful extraction. Allow 30–45 seconds for a proper bloom.
Bloom releases CO2 and prepares the grounds for even extraction.
Can I use paper towels or makeshift filters?
DIY filters can introduce off flavors or misflow; opt for the recommended filter papers designed for your dripper for best results.
DIY filters aren’t recommended; use proper filter papers for best flavor.
How do I adjust for different beans or roast levels?
Lighter roasts often benefit from a finer grind and slightly longer bloom, while darker roasts may need a coarser grind for balance. Tweak dose and temperature to taste.
Adjust grind and bloom based on roast level to balance acidity and sweetness.
Is temperature the only factor for flavor clarity?
Temperature is critical but not the only factor. Consistent grind, pour rate, and timing all contribute to flavor clarity and balance.
Temperature plus grind, pour rate, and timing determine flavor balance.
Watch Video
Key Takeaways
- Measure precisely for repeatable results
- Control the pour to manage extraction
- Keep equipment clean for flavor clarity
- Experiment with grind and dose to tailor flavor
- Use bloom to unlock aroma and sweetness