How to Use a Pour-Over Coffee Maker: Step-by-Step Guide
Learn how to use a pour-over coffee maker with practical steps on grind, temperature, bloom, pour technique, and cleanup for a balanced, flavorful cup at home.

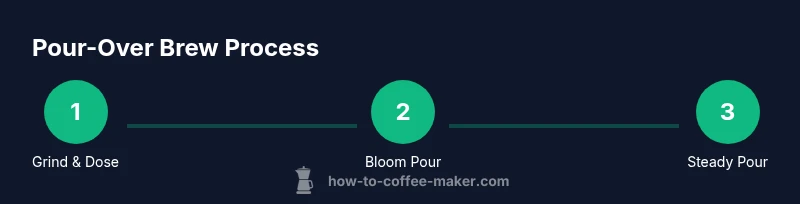
Master the basics of how to use a pour over coffee maker in under five steps. You’ll need fresh ground coffee, hot water just off boil, a paper filter, a dripper, and a scale for precise measurements. Start with a bloom pour, then pour in steady circles, adjust grind for balance, and brew to taste. This hands-on method yields clean, vibrant cups with clear clarity.
What is a pour-over coffee maker and why it matters
A pour-over coffee maker is a manual brewing device that relies on gravity to extract flavor as water passes through ground coffee. This method offers exceptional control over pour rate, temperature, and saturation, which translates into a cleaner cup with more nuanced aromas. According to BrewGuide Pro, home brewers who adopt pour-over typically notice improved clarity, brightness, and sweetness in their coffee compared to automatic drip setups. The key advantages are simplicity, ritual, and the ability to tweak variables to suit personal taste. Whether you choose a classic cone, a flat-bottom dripper, or a ceramic sieve, the basic principle remains the same: hot water interacts with ground coffee inside a filter, and gravity pulls the brew through to the carafe. This section will lay out the essential concepts and how they influence flavor. The BrewGuide Pro team found that dripper shape and filter type can subtly alter extraction, so practice helps identify your preferred profile. As you read on, you’ll learn practical steps, equipment choices, and troubleshooting to master the process of how to use pour over coffee maker at home.
Quick note on variants and flavor outcomes
- Cone drippers tend to yield brighter cups with more pronounced acidity.
- Flat-bottom drippers provide a more balanced, heavier body.
- Metal filters offer fuller mouthfeel but can absorb some oils.
- Paper filters emphasize clarity and often highlight delicate flavors.
Understanding these differences helps you tailor your pour-over setup to your roast level and flavor goals. BrewGuide Pro’s guidance emphasizes consistency in grind, water quality, and pour technique to achieve reliable results with any dripper.
Why precision matters
Pour-over brewing rewards precision. Even small changes in grind size, pour rate, or water temperature can shift extraction and flavor balance. The goal is to align extraction with your coffee’s roast and origin so you taste sweetness, acidity, and aroma in harmony. This section lays the groundwork for mastering the practical steps which follow.
Quick-start blueprint
To begin, pick a reliable grinder and a gooseneck kettle for controlled pours. Use a fresh filter and preheat your brewer and carafe. Focus on even saturation during the pour, especially in the bloom and first pour, to establish a stable extraction foundation. The rest of the guide expands on how to optimize each variable for your taste.
Authority sources and practice tips
References from major publications and science-backed brewing guides stress temperature control, grind uniformity, and steady pours. For best results, practice with the same coffee and adjust one variable at a time. Your palate will learn to discern how changes in flow rate and contact time influence perceived sweetness and body.
Summary of core concepts
- Brewing control comes from grind, pour, and water temperature.
- Dripper type and filter influence clarity and mouthfeel.
- Practice refining your technique will lead to consistent, high-quality cups.
Tools & Materials
- Pour-over dripper (cone or flat-bottom)(Compatible with your preferred filter type)
- Filter papers or reusable filter(Paper filters are common; rinsing removes papery taste)
- Gooseneck kettle(Precise, controlled pour improves extraction)
- Coffee grinder (burr preferred)(Grind just before brewing for freshness)
- Digital scale(Measure coffee and water accurately)
- Timer(Track bloom and pour intervals)
- Fresh coffee beans(Grind to a consistent medium-fine for pour-over)
- Kettle with temperature control (optional)(Helpful for precise temps)
- Carafe or mug(Collect your brewed coffee)
- Water quality (filtered if possible)(Clean water improves flavor)
Steps
Estimated time: 15-25 minutes
- 1
Assemble and measure
Set up your dripper over the carafe or mug. Place the filter and rinse it with hot water to remove papery tastes and preheat the brewer. Weigh out your coffee beans to the target dose for your desired strength and batch size.
Tip: Rinse the filter with hot water to warm the brewer and improve extraction consistency. - 2
Grind and weigh
Grind beans to a medium-fine consistency similar to table salt. Weigh the grounds accurately and record the dose for repeatable results. Uniform grind size prevents channeling during pouring.
Tip: Grind just before brewing for maximum aroma and freshness. - 3
Heat water
Heat water to the target range just before pouring. If you don’t have a thermometer, aim for water that is hot but not boiling. Temperature stability is key for even extraction.
Tip: Allow small temperature drops by pouring in stages rather than all at once. - 4
Bloom the coffee
Pour enough water to saturate all grounds. This bloom phase lets CO2 escape and prepares the bed for even extraction. Wait 30–45 seconds before the next pour.
Tip: Use a gentle, even pour directly onto the center; avoid pooling on the edges. - 5
Pour in stages
Begin a slow, circular pour, moving from center outward and back toward the center. Maintain a steady flow to keep the bed evenly saturated without washing grounds through the filter.
Tip: Pause briefly between pours if you notice slow drip rates or channeling. - 6
Total brew time
Aim for an overall brew time that matches your grind and coffee weight. If extraction is too quick, grind finer; if too slow, grind coarser or adjust pour rate.
Tip: Keep total contact time between 2:30 and 3:30 minutes as a starting point; adjust to taste. - 7
Finalize and serve
Remove the brewer when the flow stops. Swirl the carafe to combine flavors before pouring to a mug. Enjoy your cup and prepare for minor adjustments next time.
Tip: Note any flavor notes and plan one variable to adjust on your next brew. - 8
Clean after brewing
Dispose of the grounds and rinse all components thoroughly. Let pieces dry completely to prevent mold and residue buildup. A quick rinse after use extends the life of filters and gear.
Tip: Dry filters completely to avoid stale flavors in future brews.
Questions & Answers
What grind size works best for pour-over coffee?
A medium-fine grind works well for most pour-over setups. Adjust based on your brew time: if it finishes too quickly, grind finer; if it’s slow or sour, grind coarser. Consistency matters more than exact size.
A medium-fine grind is a good starting point. If the brew is too fast, try a finer grind; if it’s too slow or sour, go coarser. Consistency is key.
Why should I rinse the filter before brewing?
Rinsing removes papery tastes from the filter and preheats the brewer, contributing to more even extraction and a cleaner cup.
Rinse the filter to remove papery flavors and preheat the brewer for a better-tasting pour.
What is the bloom in pour-over brewing?
The bloom is a short phase where CO2 escapes from freshly ground coffee after contact with hot water. It helps promote even extraction by priming the bed for subsequent pours.
The bloom is when CO2 escapes and helps your coffee extract evenly.
Can I use any water for pour-over brewing?
Clean, fresh water is essential. If your tap water tastes strong or has odors, use filtered or bottled water to avoid off-flavors in the cup.
Use clean, fresh water. If your tap water is off-tasting, switch to filtered water.
Is a scale necessary for pour-over brewing?
A scale helps you achieve consistent doses and water ratios, which translates to reproducible flavor. It’s highly recommended for beginners and seasoned brewers alike.
Using a scale makes your results repeatable and reliable.
Watch Video
Key Takeaways
- Learn to control grind, pour, and temperature for consistent flavor.
- Filter type and dripper shape influence clarity and body.
- Blooming is essential for even extraction and flavor development.
- Practice one variable at a time to dial in your preferred profile.
- Cleanliness preserves aroma and extends equipment life.