Espresso with a Coffee Maker: A Practical How-To Guide
Practical steps to coax espresso-like extraction from a standard coffee maker, covering grind, dose, timing, and maintenance for home brewers at home.

With a standard coffee maker you can approximate espresso by adjusting grind, dose, and brew time to produce a concentrated shot. To pull it off, use a fine espresso grind, about a double-shot dose, a preheated cup, and a short, controlled brew. This how-to covers technique, safety, and tweaks.
What espresso with a coffee maker is and isn’t
According to BrewGuide Pro, achieving espresso-like strength with a consumer drip machine is possible but limited by extraction pressure. The phrase espresso with a coffee maker describes a concentrated, robust cup that mimics the mouthfeel and aroma of true espresso, without the 9-bar pressure of a commercial espresso machine. Home brewers often chase this quality to enjoy a bolder morning caffeine hit without upgrading equipment. The key is to manage extraction, not to fake crema. The BrewGuide Pro team found that with disciplined grind size, dosing, and timing, you can noticeably intensify flavors and aroma, even when the equipment remains a standard household model. This section sets expectations and clarifies what is realistically achievable in a typical kitchen.
- What you’ll gain: richer body, more aroma, and a compact shot you can sip straight or use as a base for lattes and cappuccinos.
- What you won’t get: true crema, consistent 9-bar pressure, or the same crema-rich mouthfeel as a purpose-built espresso machine.
- The practical aim is a stronger, shorter extraction that resembles espresso in intensity, not in mechanism.
description_only_for_block_1_1
Tools & Materials
- Coffee maker (drip machine)(Any standard home brewer with a carafe and a single-shot option is acceptable.)
- Fine espresso grind coffee(Use a burr grinder for consistent particle size; aim for grind finer than standard drip but not powdery.)
- Coffee scale(Measure dose by weight for repeatability; tare the scale with the cup present.)
- Preheated cup or small mug(Preheating improves thermal stability and extraction perception.)
- Quality water(Filtered water reduces off-flavors and mineral buildup.)
- Timer(Accurate timing helps replicate short extraction windows.)
- Paper filters (if model uses them)(Avoid if your machine has a permanent filter; optional for fine filtration.)
- Carafe warmer or insulated mug(Keeps the shot hot after brewing; not essential but helpful.)
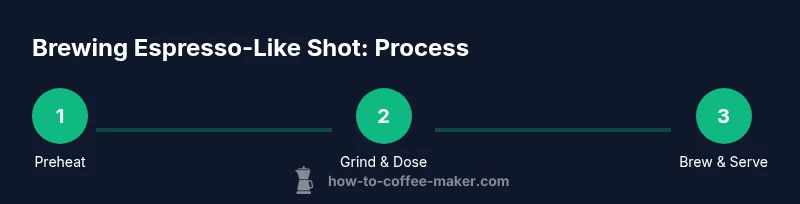
Steps
Estimated time: 20-45 minutes
- 1
Preheat the machine and cup
Turn on the coffee maker and let it run for a minute without coffee to warm the boiler, hot plate, and carafe. Preheating minimizes heat loss during extraction, helping concentrate flavors. If you have a cup warmer, preheat the cup as well to maintain temperature after brew.
Tip: Preheating reduces temperature drop that can dull aroma and body. - 2
Grind coffee to a fine, espresso-like texture
Grind is critical: aim for a texture finer than what you’d use for standard drip but not powdery. A consistent grind ensures even extraction and reduces the risk of channeling. Do a quick visual check—short, evenly sized particles yield the best results.
Tip: A burr grinder produces far more uniform particles than a blade grinder, improving consistency. - 3
Dose for a concentrated pour
We’re aiming for a compact, rich shot. Weigh out a double-shot dose (roughly the amount you’d use for two small cups) and distribute evenly in the filter or basket. If your machine uses a reusable filter, ensure it’s clean to avoid off-flavors.
Tip: Even distribution prevents overconcentration on one side and under-extraction on another. - 4
Set the brew for a short, intense cycle
Select or simulate a short extraction by using a smaller water amount or the shortest brew setting available. The objective is to maximize extraction within a limited flow, not to fill a large carafe. If your machine lacks a short option, plan for two consecutive shorter runs.
Tip: Two short cycles can approximate a double-shot extraction while avoiding over-dispersing the grounds. - 5
Start the brew and monitor extraction
Start the machine and watch the flow. A slower, steady drip indicates concentration, while a rapid flow can dilute the shot. Stop the brew if the flow becomes too brisk or if the aroma shifts away from the initial notes.
Tip: Time the first 15–25 seconds of extraction and stop early if the output becomes thin. - 6
Combine small pours into a single shot
If you’ve stopped early, you can run a second short cycle and combine the pours into one modestly sized cup. This helps achieve a more balanced, espresso-like shot without stretching the grounds. Allow a brief rest between pours for flavor clarity.
Tip: Resting briefly between pours can help volatile aromatics reset for a fuller aroma. - 7
Taste, assess, and adjust for balance
Take a small sip and note body, sweetness, acidity, and aftertaste. If the shot is too bitter, grind finer or shorten the cycle; if flat, extend slightly or adjust grind a touch coarser. Record settings for future attempts.
Tip: Keep a simple log of grind setting, dose, and timing to reproduce your best result. - 8
Serve and clean up
Serve immediately in a preheated cup and enjoy plain or as a base for a latte or cappuccino. After finishing, clean the filter and basket thoroughly to prevent oils from accumulating, which can affect future extractions.
Tip: Regular cleaning preserves flavor integrity and machine performance.
Questions & Answers
Can I truly make espresso with a standard coffee maker?
Not true espresso, as most home drip machines don’t generate the 9-bar pressure. However, you can achieve espresso-like intensity by adjusting grind, dose, and brew time to concentrate flavor and aroma.
No, but you can get espresso-like results by tweaking grind, dose, and brew duration.
What grind size should I use for espresso-like results?
Use a finer grind than your regular drip coffee, aiming for a texture similar to table salt. Too coarse will under-extract; too fine may clog the filter. Adjust gradually and test.
Go finer than your usual drip grind, then tweak until it pours evenly.
Do I need a special filter or equipment to do this?
A standard basket or paper filter suffices; a metal filter can also work if cleaned properly. The key is consistent grind and dose rather than specialized hardware.
No special filter required—focus on grind and dose preservation.
How long should the extraction take for a good shot?
Aim for a short extraction window—roughly the first 15–25 seconds of flow—then stop. Timing helps maximize flavor concentration without over-extraction.
Keep the first 15 to 25 seconds of flow and stop when the shot looks concentrated.
Can I use this method for making lattes or cappuccinos?
Yes. Use the espresso-like shot as the base for milk-based drinks. A stronger base helps cut through milk and creates a balanced drink.
It works well as a base for lattes or cappuccinos, giving you stronger flavor in milk drinks.
What cleaning steps should follow experimentation?
Rinse the brew group, wash the basket or filters, and wipe down surfaces to remove oils. Regular cleansing keeps flavors clean and machines performing well.
Clean the basket and filters after each test to prevent oil buildup.
Watch Video
Key Takeaways
- Preheat equipment for better extraction
- Use a finer grind and controlled dose for intensity
- Aim for short, concentrated brew cycles rather than full carafes
- Record your settings to replicate success
- Regular cleaning preserves flavor and machine performance