Repair coffee machine near me: DIY tips and local repair options
Learn how to diagnose, descale, and troubleshoot your coffee machine. Find local repair options, safety tips, and a step-by-step guide to keep your brewer running smoothly.

By the end, you’ll know how to diagnose common coffee machine issues, decide whether DIY fixes are feasible, and locate reputable repair services near you. This guide covers safety basics, essential tools, and practical steps to evaluate condition, prevent further damage, and choose between replacement parts or professional help. Follow the steps for safe handling of electricity and hot components.
Why repairing a coffee machine near me matters
According to BrewGuide Pro, keeping your coffee maker in good shape helps protect your investment, reduces waste, and keeps your morning routine consistent. The BrewGuide Pro team has found that most failures fall into a handful of predictable categories: scale buildup, worn seals, clogged brew paths, leaks, and electrical faults. Understanding these causes helps you decide quickly whether a simple DIY fix is enough or if professional service is warranted. Local repair options vary by model and warranty status, so choosing a nearby technician who understands your machine can minimize downtime and preserve performance. In this article, you’ll get practical steps to assess issues, how to contact a local pro, and tips for safe, cost-conscious care. Whether you own a single-serve brewer or a full-size machine, the goal is to keep coffee quality high while extending the life of your equipment.
How local repair services operate and what to expect
Most shops offer diagnostic evaluations, repair labor by the hour, and parts replacement. When you bring in a machine or request a technician to visit, you should expect an upfront estimate, including parts costs and labor, with a clear warranty on work performed. Reputable shops will ask for the model number, serial, and a brief history of the failure. Turnaround times vary with parts availability and workload, but many common fixes can be completed within 1–3 business days. If you rely on your machine for caffeine rituals or your small business, look for same-day or rush options. Ask about warranty terms for both parts and labor, and request a written receipt with a clear return policy. Local repair may be a smarter choice than shipping a machine across the country, saving time and reducing transport risk.
Tools and safety basics for DIY repair
Before you start, unplug the machine and let it cool. Gather essential tools: a Phillips and flat-head screwdriver, a small needle-nose plier, a multimeter for voltage checks, a microfiber cloth for cleanliness, and manufacturer-approved descaling products. Keep replacement gaskets and O-rings on hand if your model uses them. Wear safety gloves to protect your hands from hot surfaces and sharp metal edges. Work in a clean, dry area and place small parts in labeled containers to avoid misplacement. Read the user manual for model-specific cautions, especially around boiler pressure, electrical safety, and water exposure. Never bypass safety interlocks or operate with damaged power cords. These basics reduce risk and help you identify issues without causing further harm to the machine.
Common failure modes and indicators
Scale and mineral buildup can block flow, leading to weak espresso, slow extraction, or a no-brew condition. Leaks around the brew head, water reservoir, or fittings often point to worn seals or loose fittings. A failing pump produces abnormal buzzing, reduced pressure, or no water flow at all. Thermostats and sensors may misread temperatures, causing overheating or underheating. If the machine’s lights flicker, or it fails to power on despite being plugged in, there could be a cord, breaker, or internal fault. Regular visual checks, tasting performance, and listening for unusual sounds are helpful cues. Identifying the exact cause helps you decide whether to replace a gasket, clean a path, or call a pro.
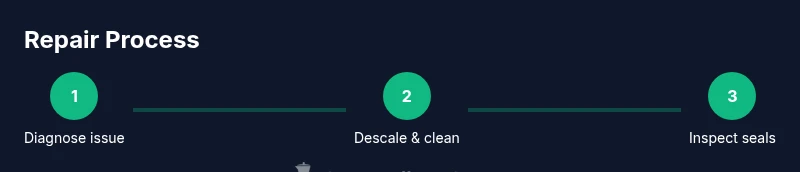
Step-by-step at-home diagnostic workflow (narrative)
Begin by verifying power: unplug, inspect the cord for damage, and replug firmly. Next, inspect the water path: empty the reservoir, check the fill tube and brew head for blockages, and run a rinse. Then descale the machine following the manufacturer’s recommended product and ratio; rinse until clear water runs through. Inspect gaskets and seals around the brew head and hopper; look for cracks or compression loss. Finally run a test brew with clean water before making coffee with a real batch. If you encounter leaks or pressure irregularities during any step, document symptoms and consider professional servicing. This approach helps you pinpoint whether the issue is mechanical wear, mineral buildup, or electrical fault.
When to replace parts vs entire machine
If a single component (for example, a gasket or a solenoid) is consistently failing and the cost to replace it is low relative to the machine’s value, repair may still be worthwhile. However, if the machine exhibits repeated failures across different subsystems within a short period, or if a major component like the boiler or pump is compromised, replacement can be more economical. The age of the machine matters: older models may not support modern parts or energy efficiency upgrades. For commercial or high-frequency use, weigh downtime costs and service availability. In any case, obtain an itemized estimate and consider the long-term reliability and energy costs when deciding between patching and replacement.
How to choose a repair technician near you
Start by querying local appliance repair pros who specialize in coffee-makers or small kitchen appliances. Check certifications, customer reviews, and service warranties. Ask if the technician will test the machine after repair and provide written before/after results. Verify that the shop uses manufacturer-approved parts and offers a warranty on both parts and labor. If possible, request a mobile technician with flat-rate diagnostic fees, so you’re not surprised by added charges. Finally, compare several quotes to ensure you’re getting fair pricing and timely service.
Budgeting for repair: costs, parts, and labor ranges
Costs vary based on failure severity, parts needed, and labor rates in your area. A simple descaling or cleaning may cost little to moderate, while replacing seals or pumps will be more expensive. Labor rates for appliance repair typically reflect local market conditions. Always request a detailed written estimate that itemizes parts, labor, and any diagnostic fees. In some cases, powered components may require electrical testing, which adds to cost. To avoid sticker shock, ask about alternatives such as refurbished parts or a new machine with a trade-in option. Planning ahead and obtaining multiple quotes helps you optimize value without sacrificing safety or performance.
Maintaining your coffee machine to avoid future repairs
Daily or weekly maintenance extends machine life and preserves coffee quality. Rinse and wipe the group head, clean spray arms, and empty the drip tray regularly. Descale according to the manufacturer’s schedule, typically every one to three months depending on water hardness. Use clean, filtered water to reduce mineral buildup. Keep the exterior dry and dust-free, and replace worn gaskets proactively. Maintain a service log with dates, symptoms, and replacements so you can track patterns over time. A proactive maintenance routine reduces downtime and keeps your brew consistent, which saves money and improves taste.
Tools & Materials
- Multimeter(Voltage checks on power circuit)
- Screwdriver set (Phillips and flat-head)(For panels and screws)
- Needle-nose pliers(Small parts handling)
- Microfiber cloth(Cleanup and dry surfaces)
- Descaling product or manufacturer-approved cleaner(Follow manufacturer guidelines)
- Replacement gaskets/O-rings (as needed)(Model-specific; optional until diagnosis)
- Safety gloves(Hand protection during disassembly)
- Owner’s manual or model number(Reference for cautions and parts)
Steps
Estimated time: 60-90 minutes
- 1
Power down and unplug
Unplug the machine and allow it to cool completely before handling any internal components. Visually inspect the exterior for obvious damage or loose cords. This step minimizes the risk of electric shock and thermal injury.
Tip: Never touch live electrical parts and unplug at the wall outlet, not the power strip. - 2
Check water path and reservoir
Remove the reservoir, check for clogs in the fill tube and brew path, and ensure the reservoir seals correctly. Run water through the system to observe flow and identify blockages or leaks.
Tip: Keep hoses and fittings dry during inspection to avoid slips and shorts. - 3
Descale and flush the brew path
Follow the manufacturer’s recommended descaler dilution and run several short flush cycles with clean water. This clears mineral buildup that inhibits flow and temperature stability.
Tip: Rinse until the water runs clear to avoid tasting descaler residue. - 4
Inspect seals, gaskets, and brew head
Look for cracks, warping, or compression loss around the brew head and seals. Replace any worn gaskets to restore pressure and prevent leaks.
Tip: Have spare gaskets on hand for model-specific replacements. - 5
Test the pump and flow
With the machine reassembled (but still unplugged), power on briefly to listen for normal pump operation and observe water flow. Note any abnormal buzzing or insufficient pressure.
Tip: If you hear unusual noises, stop and reassess; avoid forcing water through blockages. - 6
Run a final test brew
After ensuring everything looks and feels secure, perform a test brew with fresh water. Check for leaks, proper temperature, and consistent extraction before using coffee.
Tip: Document any anomalies for professional service if issues persist.
Questions & Answers
Is it safe to repair a coffee machine at home?
Repairing at home can be safe if you unplug first, wear protective gear, and follow model-specific cautions. Avoid working on live electronics or damaged cords.
Yes, if you disconnect power and follow safety steps, you can safely diagnose common issues at home.
What are common issues I can fix myself?
Scale buildup, clogged brew paths, and worn seals are frequent culprits that many users can address with cleaning, descaling, and gasket replacement.
Most quick issues are scale, clogs, or leaky seals you can fix with cleaning and part replacements.
How do I find a reputable local repair service?
Look for shops with clear warranties, model-specific experience, and transparent estimates. Read reviews and verify part availability before committing.
Check reviews, warranties, and model experience before hiring a local repair technician.
When should I replace the machine instead of repairing it?
If repeated failures occur across subsystems or major components fail, replacement can be more economical and reliable in the long run.
If repairs keep recurring or a major part fails, consider replacing the machine.
What maintenance reduces future repairs?
Descale on schedule, clean the group head regularly, and use filtered water to minimize mineral buildup and keep performance steady.
Keep up with descaling and regular cleaning to prevent future problems.
Are there safety concerns with descalers?
Always use manufacturer-approved descalers and follow label directions to avoid chemical exposure or damage.
Use the right descaler and follow the instructions to stay safe.
Watch Video
Key Takeaways
- Unplug before servicing and inspect safety components.
- Descale regularly to prevent clogs and heat issues.
- Inspect gaskets and seals during maintenance.
- Choose local repair wisely; compare quotes and warranties.
- Document service history for future reference.