Mr Coffee Maker Not Working? Quick Troubleshooting Guide
Urgent troubleshooting guide to diagnose and fix a Mr Coffee maker that won't start or brew. Practical steps, safety tips, and prevention from BrewGuide Pro.

If your mr coffee maker is not working, start with a quick power and setup check. First, ensure the cord is plugged in, the outlet works, and the water reservoir is properly seated. Then run a clean or descale cycle and verify the switch is on. If it still fails, follow the diagnostic flow for deeper fixes.
Symptoms and Quick Fixes for mr coffee maker not working
When a Mr Coffee maker won't start, it can feel urgent. According to BrewGuide Pro, the most common issues are power or setup problems, not a faulty machine. In this section we outline what to look for and the fastest fixes you can try tonight.
- Check the power: ensure the cord is firmly plugged in and the outlet is live. If the outlet is controlled by a switch or GFCI, test another device in the same outlet.
- Inspect the reservoir and basket: confirm the reservoir is seated properly, the lid switch is engaged, and the brew basket is not blocked.
- Run a quick clean cycle: if the machine powers on but brews slowly or not at all, a short cleaning or descaling cycle can remove buildup.
- Rule out the basics first: unplug for 30 seconds, then plug back in to reset the internal microcontroller.
If these steps resolve the issue, you’ve saved a service call. If not, proceed with the deeper diagnostic flow.
Common Causes to Inspect First
Not working isn’t always a dead machine. Most issues fall into a few predictable categories. Start with power and setup, then move to the brewing path. BrewGuide Pro notes that many cases stem from a loose connection, an empty reservoir, or a blocked brew path. If you’ve verified power, the next suspects are the reservoir seating, lid sensor engagement, and a clogged filter or scale buildup in the brew channel. A quick inspection of the brew basket and path can reveal a simple blockage without disassembly.
- Power and outlet checks: test with another device, reset the outlet or breaker if needed.
- Reservoir seating: ensure it is firmly clicked into place and that the sensor detects it.
- Brew path cleanliness: inspect the filter, mesh basket, and any removable channels for buildup.
- Sensor and lid switches: make sure nothing prevents the unit from sensing a closed lid.
If you still don’t have brew, you’re looking at a deeper cause.
Safety First: Power, Water, and Sensor Checks
Safety should always come first when troubleshooting appliances. Begin by unplugging the unit before any inspection beyond the exterior. Confirm the power cord is intact with no frayed wires. If the outlet is dead, try a different outlet. Check that the water reservoir is filled to the minimum line and properly seated so the safety switch can engage during operation. If you can’t hear or feel a click when closing the lid, the sensor may be at fault and require professional attention.
- Unplug before handling internal parts or removing panels.
- Use a dry cloth to wipe the exterior; avoid water near the electrical system.
- Do not attempt to bypass safety switches or bypass power protection features.
When in doubt, stop and seek professional help.
Diagnostic Guide: How We Think Through a Not-Working Unit
A systematic approach reduces guesswork. Start with the simplest checks (power, outlet, reservoir) and progress to cleaning and descaling. If the symptom persists, consider sensor, switch, or internal fuse failures. The diagnostic flow below can guide your actions and help you decide when to seek service.
- When power is present but no response: inspect switches and safety interlocks.
- If power exists but no brew: verify water sensor and reservoir seating.
- If the unit brews slowly or poorly: descaling and cleaning are the first remedies.
Step-by-Step Fixes for the Most Common Cause: Power/Reset and Descale Readiness
Descale and a quick reset address many not-working cases. Start with a full reset by unplugging, waiting 30 seconds, and plugging back in. Then run a cleaning cycle with a recommended descaler. If the coffee tastes off or the flow remains weak, a deeper descaling with the specified product and a thorough rinse will usually resolve the issue.
- Step 1: Unplug, wait 30 seconds, plug back in to reset electronics.
- Step 2: Fill reservoir, close lid, and initiate a clean cycle using a descaler.
- Step 3: Rinse the system with fresh water; repeat if necessary to remove descaler residue.
- Step 4: Inspect for blockages in the brew channel and filter basket; remove debris.
- Step 5: If problems persist, check the power switch and warranty guidance before calling support.
- Step 6: Document the issue and the steps you took for service or replacement decisions.
Estimated time: 30-45 minutes.
Safety Warnings and Best Practices
Descale solutions can be caustic. Always follow the product directions and wear gloves if recommended. Do not use metal utensils to clear blockages in narrow channels; this could scratch or damage internal parts. If the unit is under warranty, refrain from disassembly that could void coverage. When in doubt, contact the manufacturer’s support line for guidance.
Maintenance and Prevention: Longer-Term Care
Proactive maintenance reduces the odds of a sudden failure. Clean the brew basket and spray head weekly, descale every 1-3 months depending on usage and water hardness, and replace any worn seals promptly. Use filtered water to minimize mineral buildup. Store the unit in a cool, dry place, checking the cord for signs of wear. A simple monthly ritual can keep a Mr Coffee maker from becoming a recurring problem.
Quick Maintenance Schedule and Final Checks
Create a regular routine that includes descaling, cleaning, and reservoir seating checks. Before each use, ensure the reservoir is filled to the recommended level, the lid sensor is engaged, and the power switch is on. If you notice a leak, unusual noises, or inconsistent brewing, break in the troubleshooting sequence and reassess power and sensor status. Regular maintenance is the best defense against a non-working machine.
Final Checks and When to Seek Help
If none of the above steps restore functionality, you may be facing a more complex fault such as a failed heating element or a defective control board. In that case, contact customer support or a qualified technician. The goal is to isolate the fault safely without risking electric shock or further damage. The BrewGuide Pro team recommends documenting symptoms, steps taken, and any error codes before seeking service.
Steps
Estimated time: 30-45 minutes
- 1
Power reset
Unplug the unit, wait 30 seconds, and plug it back in. Confirm the power light activates and there are no error codes.
Tip: A simple reset clears minor control glitches. - 2
Check water reservoir and lid
Remove and reseat the reservoir; ensure it's filled to the minimum level and the lid switch engages when closed.
Tip: A mis-seated reservoir is a frequent cause of non-response. - 3
Descale and clean
Run a descaling cycle with an approved solution, then rinse with fresh water until all residue is cleared.
Tip: Mineral buildup is a leading cause of slow brewing. - 4
Inspect brew path and basket
Remove the brew basket and check for clogs; clean mesh and any filter screens. Reassemble securely.
Tip: Even small blockages can stop flow. - 5
Test the switch and sensors
With unit unplugged, gently verify the lid switch and sensor connectors are intact and seated.
Tip: Electrical safety first—avoid forcing parts. - 6
Decide on next steps
If the unit remains unresponsive, consult support and consider warranty coverage or replacement.
Tip: Have model and purchase info ready for service.
Diagnosis: Mr Coffee maker won't start or brew
Possible Causes
- highPower issue (unplugged cord, tripped breaker, faulty outlet)
- mediumWater reservoir not seated correctly or empty
- mediumClogged brew channel or scale buildup
- lowFaulty switch or thermal fuse
Fixes
- easyCheck power cord and outlet; reset breaker or try a different outlet
- easyRe-seat reservoir; fill to minimum line; ensure lid is closed and sensor detects it
- easyRun descaling cycle and clean brew path; rinse thoroughly
- hardIf it still fails, contact support or a qualified technician
Questions & Answers
Why won’t my Mr Coffee maker turn on?
Most power-on issues come from a loose cord, a tripped circuit, or a dead outlet. Check the plug, try another outlet, and reset the breaker if needed. If this doesn’t fix it, proceed through the diagnostic flow.
First, check the plug and outlet, then reset the breaker if needed. If it still won’t turn on, follow the diagnostic steps for deeper issues.
How do I descale my Mr Coffee maker?
Use a descaling solution as directed by the product, run a full cycle, then flush with clean water and repeat if necessary. This removes mineral buildup that can hinder performance.
Run a descaling cycle with the recommended solution, then rinse until all residue is cleared.
My coffee brews slowly. What should I do?
Slow brewing usually points to scale buildup or a clogged path. Descale, clean the brew basket, and ensure the water is hot enough for extraction.
Descale and clean the brew path, then retry with hot water.
Can I repair a Mr Coffee maker at home?
Some issues, like cleaning or reseating parts, can be done at home. More complex problems, such as faulty switches or heating elements, require professional service.
You can handle basic maintenance at home, but major repairs should be done by a professional.
When should I replace my Mr Coffee maker?
If repeated repairs fail to restore performance or the unit leaks, it may be time to consider replacement under warranty or a newer model.
If repairs keep failing, consider replacement under warranty.
Watch Video
Key Takeaways
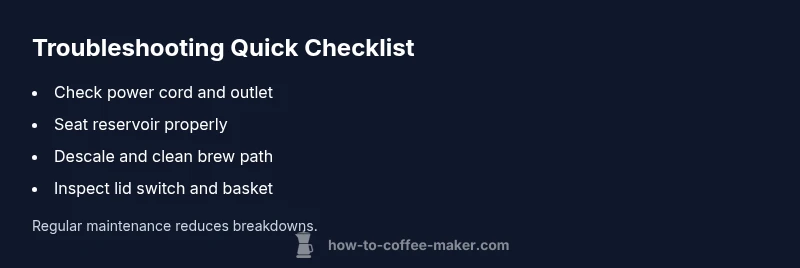
- Start with power and setup checks
- Descale and clean for buildup issues
- If still not working, use the diagnostic flow
- Know when to contact support for repairs
- Maintain regularly to avoid future failures