How to Troubleshoot a Coffee Maker: Fast, Safe Fixes
Learn how to troubleshoot a coffee maker quickly with a structured, step-by-step guide. Discover common symptoms, safe fixes, and prevention tips to keep your brew on track and reduce downtime.

Most coffee maker issues come from power, clogs, or mineral buildup. Start with the simplest fixes: confirm the outlet is live, unplug and replug, check the water reservoir, and run a quick clean-out/brew cycle with fresh water. If the issue persists, inspect the brew path for blockages and test with a new filter. These steps address most common problems.
Common Symptoms and Immediate Fixes
If your coffee maker isn’t producing a brew, smells off, or leaks, you’re likely facing one of a few common issues. According to BrewGuide Pro, most malfunctions fall into power, flow, or mineral buildup categories. When you learn how to troubleshoot coffee maker problems, you’ll start with quick checks before diving deeper. In this section, we cover the most frequent symptoms and immediate fixes you can perform without specialized tools. Look for: no power or no water flow, weak or uneven extraction, strange odors, leaks, or coffee grounds in the carafe. Start with the simplest steps: verify the outlet is live, unplug and replug, confirm the water reservoir is properly seated, and run a short cleaning or descaling cycle with fresh water. If the problem persists, proceed to more thorough checks like inspecting the brew path and filter basket. This approach helps you diagnose efficiently and minimizes guesswork.
How to troubleshoot coffee maker problems begins with a calm assessment and a safe, repeatable routine. Keep the user manual handy for model-specific guidance, especially for descaling agents and internal cleaning procedures. A structured approach reduces downtime and gives you confidence that you’re addressing the root cause rather than applying temporary fixes. The goal is to identify whether the fault lies in power, water delivery, or scaling, then apply the appropriate remedy in a logical sequence.
In practice, you’ll also want to observe what happens during a cycle: does the machine start at all, does it pause mid-brew, is the temperature inconsistent, or does splashing come from the reservoir? Documenting symptoms helps you map a path from observation to action. As you gain experience with how to troubleshoot coffee maker issues, you’ll recognize patterns more quickly and save time on future troubleshooting sessions.
When to Rethink Your Setup: Power, Water, and Filtration
Power issues are the most common culprits early in the diagnostics flow. If your coffee maker won’t power on or resets mid-cycle, begin with simple electrical checks. First, ensure the outlet is live by testing another device or using a different outlet in the same room. If a power strip is involved, bypass it to rule out strip failure. After confirming power, set the machine to a known-good setting and try a reset if your model supports it (some machines have a dedicated reset sequence in the manual).
Water delivery is the next critical factor. Check that the water reservoir is properly seated and that the intake tube (if visible) isn’t kinked or blocked. For models with a water filter, inspect or replace the filter if it’s clogged or past its life. Blockages in the supply line or filter can prevent the pump from delivering water, resulting in a no-brew condition or weak coffee. If you notice leaking from seals or a damp area around the base, inspect for loose fittings and ensure the reservoir cap is sealing correctly.
Filtration and hard water scale are common contributors to performance problems. Hard water can leave mineral deposits that reduce water flow and heat transfer. If you haven’t descaled in a while, do so using a manufacturer-approved descaling solution. Always follow the product’s dilution guidelines and rinse thoroughly after the descaling cycle to avoid off-tastes in your brew. In the BrewGuide Pro analysis, mineral buildup is a recurring root cause that’s easy to prevent with regular maintenance.
Cleanliness as the Cornerstone: Descale and Internal Cleaning
Descaling is a critical practice for keeping any coffee maker performing optimally, and it’s a prime focus when you’re learning how to troubleshoot coffee maker issues. Start with a simple descaling cycle recommended by your manufacturer, using the appropriate descaling solution and plain water. If your model allows, run the solution through the entire brew path, including the boiler, hoses, and spray head. After the cycle completes, rinse thoroughly with multiple fresh water brews to remove any lingering descaler residue. This step helps restore water flow, improve heat transfer, and prevent off-flavors caused by mineral buildup.
Next, clean the brew path, filter basket, and carafe area thoroughly. Remove the filter, rinse the basket, and wipe the spray head openings with a soft brush or cloth to remove any coffee oils. Pay attention to tight corners and rubber seals, which can trap residue. If you notice stubborn scale or residue, repeat the descaling step or use a slightly more aggressive cleaning cycle as permitted by the manual. Remember: never mix household vinegar with certain descaling products unless the manufacturer explicitly allows it.
The Brew Path: Water Temperature, Flow, and Carafe Issues
Temperature consistency affects extraction quality and can reveal issues in the brew path. If coffee tastes weak or uneven, verify the machine reaches the expected brewing temperature. Some machines have switches for brew strength or temperature; ensure they’re set correctly. Check that the heating element isn’t overheating or failing to engage, which can lead to weak extraction or no brew at all. Flow problems often trace back to mineral deposits in narrow passages. If the stream looks thin or irregular, clean or replace clogged nozzles, spray head, and check the filter basket for debris. Carafe positioning can also affect flow: ensure the carafe is correctly seated with a secure seal to prevent leaks and ensure the full brew is captured.
For machines with adjustable flow or steeping features, test with different settings to see if performance improves. If flow remains inconsistent, consider compatibility checks with your water source and whether a pre-filtration step might help reduce future scale buildup. The goal is to restore proper water delivery and heat transfer so the brew is consistent and hot.
When addressing how to troubleshoot coffee maker, keep a log of changes and results. Noting which steps improved performance helps you refine your process for future troubleshooting sessions and ensures you’re applying the most effective remedies first.
Electronic and Sensor Troubleshooting: Indicator Lights and Software
Digital displays, lights, and onboard sensors can guide or mislead you during troubleshooting. If lights blink or a fault code appears, consult the user manual for the meaning of the code, as codes vary by model. A common first step is a simple reset: unplug the machine, wait 60 seconds, then plug it back in. If the error persists, check for firmware updates or a reset procedure in the manual. Some machines require a pairing with a mobile app or a proprietary program to reset sensors or timing, so follow the model-specific instructions.
Sensor-related issues can cause the machine to misread water level, temperature, or brew status. In these cases, perform a careful inspection of any visible sensors or lighted indicators. Clean any sensor surfaces gently with a microfiber cloth; avoid abrasive cleaners that could damage sensors. If you notice recurring error codes after cleaning, it may indicate a failing sensor or control board, which typically requires professional service or a warranty claim. Remember to power down before any internal access and refer to the manual for disassembly cautions.
While electronics are more delicate, many issues are resolved with a proper reset, software check, or firmware update. Always prioritize safety and consider professional help for persistent sensor or board problems.
Quick Fixes You Can Try Tonight
If you’re urgently trying to get a brew, focus on the quickest fixes first. Confirm the outlet and power switch are functioning, then perform a reset if your model allows it. Next, check the reservoir seating and run a rapid cleaning cycle with clean water. A quick descaling can remove mineral buildup that silently chokes the flow. If your drip path shows obvious clogs, clear them with a soft brush and run a test brew without coffee grounds to observe any changes. Finally, swap out an old filter if you use one. These quick steps are designed to bring you back to a reliable baseline without complex disassembly.
Prevention: How to Keep Your Coffee Maker Running Smoothly
Prevention beats troubleshooting when it comes to coffee makers. Establish a simple maintenance rhythm: descale as needed based on water hardness and usage, clean the brew head and basket after each use, and replace filters on schedule. Use high-quality water or a pre-filter to minimize mineral buildup, which not only improves taste but also preserves internal components. Store the machine in a dry, stable location and avoid leaving water in the reservoir for extended periods. If your model has a cleaning mode, incorporate it into your weekly routine rather than relying on ad hoc fixes. Practicing these habits reduces downtime and makes future troubleshooting far quicker. In the BrewGuide Pro framework, maintenance is the most reliable way to lower the frequency and severity of coffee maker failures.
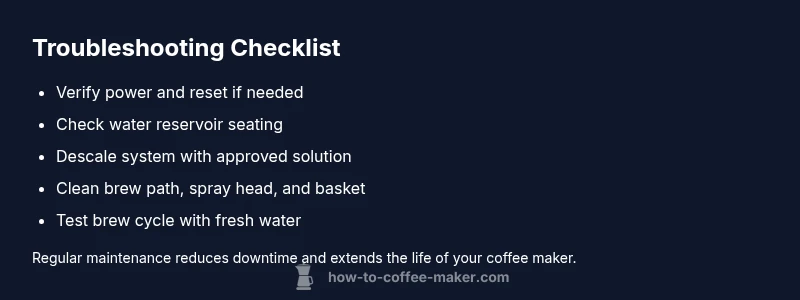
Steps
Estimated time: 45-60 minutes
- 1
Power check and reset
Verify the outlet is live by testing another device. If the machine has a reset option, perform it per the manual. Unplug for 60 seconds, then plug back in and power on. This often clears simple electronics glitches.
Tip: Label a dedicated reset routine on your calendar for consistency. - 2
Verify water supply
Ensure the reservoir is seated correctly and filled. Check for kinks in any input hose or tube if visible. If your model uses a water filter, inspect its condition and replace if needed.
Tip: Never run the machine with an overfilled or empty reservoir. - 3
Descale the system
Prepare the descaling solution per the manual and run a full cycle. Stop if the cycle is interrupted, then resume with fresh water until the internal reservoir is clear of solution.
Tip: Rinse thoroughly to avoid any aftertaste. - 4
Clean brew path and basket
Remove filters and baskets; scrub with a soft brush to dislodge oils and coffee residues. Rinse all parts and reassemble. Run a test brew with no coffee to confirm flow.
Tip: Use a toothbrush for tight corners and avoid abrasive cleaners. - 5
Check sensors and indicators
If digital indicators show errors, consult the manual for codes and perform a safe reset. Update firmware if applicable or contact support for persistent sensor faults.
Tip: Document codes for faster support if you escalate. - 6
Test multiple cycles
Run several short cycles to confirm consistent performance. Observe for leaks, dripping, or weak coffee and adjust settings accordingly.
Tip: Keep a log of results to identify repeating patterns. - 7
Model-specific resets or service
If issues persist after the above, perform any model-specific reset procedures or contact the manufacturer or a qualified repair technician.
Tip: Check warranty status before services. - 8
Reassemble and finalize
Reassemble all parts, run a final hot water cycle, and prepare a test brew. If results are satisfactory, store steps for future reference.
Tip: Maintain a small toolkit for quick maintenance tasks.
Diagnosis: Coffee maker won't brew or stops mid-cycle
Possible Causes
- highPower issue: outlet dead or switch off
- highBlockage in brew path or spray head
- mediumMineral buildup in boiler or tubes
- mediumFaulty heating element or temperature sensor
- lowWorn seals or gasket causing leaks
Fixes
- easyTest the outlet with another device and verify the power switch is on; try a different outlet
- easyRun a descaling cycle with fresh water and manufacturer-approved descaler
- easyDisassemble and clean the brew path, spray head, and filter basket; remove any clogs
- mediumDescale the internal boiler if model allows; consult manual for safe access
- hardReplace worn seals or gaskets if leaks observed; may require professional service
Questions & Answers
Why won't my coffee maker turn on?
Check the outlet, switch, and any power strip. If possible, test with another device and reset the machine. If the outlet is fine but the device still won’t power, refer to the manual for a factory reset or contact support.
First, test the outlet with another device and try a reset. If it still won't power on, consult the manual or support.
Why is the brew weak or uneven?
Weak or uneven brew often signals mineral buildup or a clogged spray head. Descale the system, clean the brew path, and check water temperature settings. Repeat the cycle if needed.
Weak brew usually means mineral buildup or a clogged spray head. Descale and clean, then test again.
How often should I descale my coffee maker?
Descale as needed based on water hardness and usage. If you notice scaling or slower brewing, perform a descale cycle using a manufacturer-approved solution.
Descale when you notice scaling or slower brewing, using an approved descaler.
Is vinegar descaling safe?
Many manufacturers advise against using vinegar for descaling. Use a product recommended by the maker and rinse thoroughly after the cycle.
Vinegar isn’t recommended by most manufacturers; use a proper descaler and rinse well afterward.
When should I call a professional?
If you’ve tried the basics and model-specific resets without success, or if you notice persistent leaks, unusual odors, or error codes, contact the manufacturer or a qualified repair service.
If basics don’t fix it or you see leaks or error codes, seek professional help.
My machine smells like burnt plastic during use—what to do?
Turn off and unplug immediately. Inspect for melted seals, wiring damage, or overheated components. If you see damage, do not continue using the machine and seek professional service.
If you smell burnt plastic, stop and inspect for damage; don’t continue using it until checked.
Watch Video
Key Takeaways
- Start with power and water checks
- Descale regularly to prevent clogs
- Clean brew path and basket after every use
- Use model-specific resets for electronics
- Know when to seek professional help