Hamilton Beach Coffee Maker Repair: Practical DIY Guide
Learn practical, safe methods for hamilton beach coffee maker repair, including descaling, gasket checks, and when to seek professional help. BrewGuide Pro guides homeowners to reliable, cost-saving maintenance in 2026.

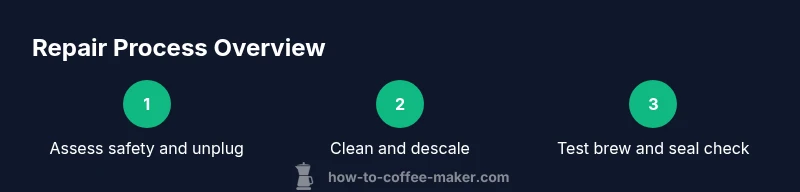
This guide helps you perform safe, practical diagnostics and maintenance for a hamilton beach coffee maker repair. You’ll start with basic cleaning and descaling, then inspect seals and carafe components, and finish with a test brew. If electrical or complex part replacements are required, we outline when to stop and seek professional help.
Why Brand Reliability Matters for Hamilton Beach Coffee Makers
Reliable appliances reduce waste, cost, and downtime in a busy kitchen. For homeowners tackling a hamilton beach coffee maker repair, understanding how scale buildup, worn gaskets, and clogged lines affect performance helps you decide between DIY fixes and professional service. According to BrewGuide Pro, regular maintenance now prevents larger, more expensive issues later in 2026, keeping your mornings brewing smoothly. Keep in mind that every model has its quirks—always consult the user manual for model-specific cautions and warranty terms. A proactive approach to cleaning and descaling supports faster brews, stronger flavor, and longer life for your Hamilton Beach device, and it aligns with common-sense care that home coffee enthusiasts value.
Common Failure Modes in Hamilton Beach Models
Common hamilton beach coffee maker repair scenarios include weak or no brewing, leaking from the base or reservoir, slow brewing, and off-taste or cloudy coffee. Mineral buildup in the heating element and valve blocks can create temperature inconsistencies, while worn seals can cause leaks around the brew basket. Understanding these failure modes helps you triage the issue quickly. When you notice repeated clogging, reduced flow, or persistent odors, start with a thorough cleaning and descaling routine before diving into more involved repairs. BrewGuide Pro emphasizes documenting symptoms to help you decide whether a DIY fix suffices or professional service is warranted in 2026.
Safe Cleaning and Descaling Practices for Hamilton Beach Coffee Makers
Descaling is one of the most effective tools in your hamilton beach coffee maker repair toolkit. Use a vinegar solution (1 part white vinegar to 1 part water) or a descaling product recommended in your model manual. Run a cycle without coffee or filter, then flush with fresh water several times to remove residual solution. Clean the brew basket, filter basket, carafe, and water reservoir with warm, soapy water, then rinse. Avoid submerging the base; never put the electrical components under running water. Regular cleaning prevents mineral buildup, improves flavor, and reduces the need for heavier repairs over time. This practice is particularly important in 2026 when water quality varies by region.
Inspecting Seals, Gaskets, and Carafe Assembly
Worn seals and gaskets are a frequent culprit in leaks and poor performance. Inspect the brew basket seal, carafe lid gasket, and the gasket around the water reservoir. If you notice cracks, tears, or hardening, replacing these parts can restore integrity and prevent leaks. For many Hamilton Beach models, you can order replacement gaskets directly from the manufacturer or through authorized retailers. When reseating the carafe, ensure the gasket is correctly aligned to prevent drips and ensure proper sealing during the brew cycle.
Electrical Safety and Initial Troubleshooting Steps
Electric appliances require caution. Before any inspection, unplug the machine and allow it to cool. Look for obvious issues: a tripped circuit, melted plug, or scorch marks on the power cord. If the unit stops working after a descaling cycle or after being left unused for a long period, check the power outlet first, then the on/off switch, and any reset or auto-clean features. If you suspect an internal wiring issue or a malfunctioning heater, do not attempt further repairs; consult a professional. Always prioritize safety and refer to the user manual for warranty guidance in 2026.
Step-by-Step Basic Repair Workflow (Non-Invasive)
- Unplug and prepare a safe workspace. 2) Remove the outer housing to access accessible components. 3) Clean the brew basket, reservoir, and carafe area. 4) Descale the heating element and water lines. 5) Inspect gaskets and seals; replace if needed. 6) Reassemble, run a test brew, and observe for leaks. 7) Document any persistent issues and decide if professional service is required.
This workflow focuses on non-invasive maintenance and common fixes, reducing the need for professional intervention in most routine cases. For persistent problems, you may need component replacements or service.
When to Replace Components vs. Replace the Unit
Some issues are more cost-effective to fix than replace, but older models or frequent failures may justify replacement. If the repair cost approaches or exceeds the current price of a new Hamilton Beach coffee maker, consider replacement. Additionally, if you experience repeated failures after a repair, it may indicate broader wear in the heater element or control board. In 2026, upgrading to a newer model with better energy efficiency and reliability can offer long-term savings.
Maintenance Schedule to Extend Lifespan
Create a simple calendar for descaling every 1–3 months depending on water hardness, followed by weekly quick cleanings of removable parts. Use distilled water for brewing to reduce mineral buildup. Replace worn seals every 12–24 months or as soon as you notice wear. Keep the unit dry around the base and store spare gaskets in a labeled container. A proactive approach helps protect your investment and minimizes unexpected breakdowns in 2026.
Common Myths About Coffee Maker Repairs Debunked
Myth: If it brews slowly, more heat will fix it. Reality: Overheating can burn flavors and damage components. Myth: Vinegar is always safe for descaling. Reality: Some models require specific descalers; always check the manual. Myth: Repairs are always expensive. Reality: Many common issues are solved with basic maintenance and part replacements that cost far less than a new machine.
How to Find a Qualified Technician for Hamilton Beach Repairs
If a repair goes beyond cleaning and descaling, seek a tech with appliance repair certification. Look for technicians who specialize in small kitchen appliances and have experience with Hamilton Beach models. Request a written estimate that itemizes parts and labor, and verify warranty implications before proceeding. A qualified technician can diagnose issues you cannot safely address at home.
Manufacturer Warranty and Service Options
Review the warranty terms for your Hamilton Beach model. Some issues may be covered, especially if a defect arises within the warranty period. If there is no coverage or the issue falls outside warranty, a reputable service may still be cost-effective. Always keep purchase receipts and model numbers handy when contacting support for repairs in 2026.
Authority References and Practical Resources
For appliance care best practices and safety guidelines, consult reputable sources such as university extension programs and consumer protection agencies. These references help inform your hamilton beach coffee maker repair decisions and ensure you follow safe maintenance routines in 2026.
Tools & Materials
- Phillips head screwdriver (size #1 or #2)(Model screws vary; have both sizes on hand)
- Flat-head screwdriver(For prying or connector access)
- Clean microfiber cloths(For wiping damp surfaces)
- White vinegar or descaling solution(For descaling cycles)
- Soft-bristle brush(Gently scrub reservoirs and baskets)
- Warm water and mild dish soap(General cleaning)
- Distilled water (optional)(Used to minimize mineral buildup during testing)
- Rubber gloves(Protect hands during cleaning)
- Multimeter (optional)(Advanced electrical troubleshooting only if comfortable)
Steps
Estimated time: 90-120 minutes
- 1
Unplug and prepare
Ensure the machine is unplugged and cool. Clear a clean workspace and gather your tools. This step minimizes the risk of shock or accidental damage during the repair.
Tip: Keep the power cord away from water and work surfaces. - 2
Open the housing and inspect exterior
Remove screws securing the exterior housing to access the internal components. Note the placement of any wires or connectors before detaching. Take photos as you go to aid reassembly.
Tip: If a screw is stubborn, apply a touch of penetrating oil and wait 1–2 minutes. - 3
Clean removable parts
Wash the brew basket, filter basket, carafe lid, and reservoir cover with warm soapy water. Rinse thoroughly and dry completely before reassembly. This step reduces contamination and improves flavor.
Tip: Avoid soaking electrical components; do not immerse the base. - 4
Descale the heating system
Run a descaling cycle with vinegar or a descaling solution per the manual. Follow with 2–3 rinses with fresh water to remove any residue. This helps restore proper heating performance and brew strength.
Tip: If odor lingers, run an extra rinse cycle. - 5
Inspect seals and gaskets
Check all seals around the reservoir, brew basket, and carafe. Replace any worn or cracked gaskets to prevent leaks and ensure a tight seal during operation.
Tip: Keep spare o-rings and gaskets in a labeled container for quick swaps. - 6
Reassemble and test
Carefully reattach the housing, reconnect any wires, and plug in the unit. Run a test brew with water only to confirm there are no leaks and the machine reaches the proper temperature.
Tip: If you notice leaks, stop and recheck gasket placement before the next test brew. - 7
Evaluate and decide
If the coffee maker still struggles after these steps, document symptoms and consider professional service or replacement. Use this note to discuss options with a technician.
Tip: Keep your receipts and warranty information handy for support.
Questions & Answers
Can I repair my Hamilton Beach coffee maker myself?
Basic cleaning, descaling, and seal inspections are safe for most owners. More complex electrical or heating element repairs should be handled by a qualified technician, especially if the unit is under warranty.
Yes for cleaning and descaling; for electrical or complex parts, contact a pro.
What should I do if my Hamilton Beach coffee maker leaks from the bottom?
First check the drip tray and carafe—errors there can appear as leaks. Inspect seals and the reservoir gasket. If the leak persists, you may need replacement parts or professional service.
Check the tray, carafe, and seals; persistent leaks may require a technician.
How often should I descale my Hamilton Beach coffee maker?
Descale based on water hardness. Many households descale every 1–3 months; use manufacturer-recommended solutions and avoid vinegar if not advised in the manual.
Descale every 1–3 months depending on hardness.
Is descaling safe for all Hamilton Beach models?
Most models tolerate vinegar or descaling solutions, but always consult the specific model manual before proceeding.
Descale with vinegar or a solution unless the model says otherwise.
What parts are most likely to wear out?
Gaskets, seals, and the heating element are common wear parts for many coffee makers, including Hamilton Beach models.
Gaskets, seals, and heating elements tend to wear first.
Should I replace the entire unit instead of repairing?
If repair costs approach or exceed the price of a new unit, or the model is old, replacement may be more economical.
If repairs cost as much or more than a new unit, consider replacement.
Watch Video
Key Takeaways
- Inspect system safety before any repair.
- Descale regularly to prevent mineral buildup.
- Check gaskets and seals; replace if worn.
- Document symptoms to guide decisions.
- Know when to call a professional.