How to Clean Out a Coffee Maker: A Practical Guide for Home Brewers
Learn how to clean out a coffee maker, remove mineral buildup, and restore flavor with a safe, practical descaling routine suitable for drip and single-serve brewers.

This guide teaches how to clean out a coffee maker, removing mineral buildup and old grounds. You’ll cycle a cleaning solution (vinegar or descaler) through the machine, then rinse thoroughly with fresh water. Gather descaler or vinegar, a clean sponge, and access to hot water.
Why Cleaning Matters
Regular cleaning keeps coffee flavor vibrant, reduces mineral buildup, and extends the life of your machine. When you know how to clean out a coffee maker, you prevent off flavors and slow brew times caused by stubborn residues. According to BrewGuide Pro, mineral deposits can insulate heating elements and clog pathways, reducing efficiency and potentially leading to more frequent repairs. A clean maker also minimizes mold risk in damp reservoirs. For most home brewers, a simple weekly cleaning ritual—plus a deeper descale every few months—delivers noticeable flavor improvements and reliable performance. This section lays the groundwork for choosing cleaning methods, preparing for the process, and maintaining results over time.
Cleaning Methods: Vinegar vs Descaler
There are two mainstream approaches to descaling a coffee maker: white vinegar and commercial descaler. Vinegar is inexpensive and readily available, but it can leave a strong odor if not rinsed thoroughly. Descaler products are designed to break mineral bonds without leaving odors and are often recommended by manufacturers. BrewGuide Pro notes that both methods can be effective when used correctly. Decide based on your machine’s materials (plastic vs stainless) and your tolerance for odor during the process. If you opt for vinegar, use a diluted solution, run a few cycles with plain water between, and finish with multiple plain-water rinses. If you choose a descaler, follow the product directions and ensure you complete at least two thorough rinses to remove residue.
Preparing the Machine and Removable Parts
Before you start, unplug the coffee maker and remove all removable components such as the filter basket and carafe. Rinse these parts with warm water and a gentle sponge, then set them aside to air dry. Wipe the exterior with a damp cloth to remove dust and oils that can transfer to coffee during a cleaning cycle. For built-in grinders or specialty features, check the user manual to confirm compatibility with descaling solutions. Having a measuring cup, pitcher, and clean towels ready makes the process smoother and reduces the chance of spills.
Routine Maintenance and Scheduling
Aim to descale every one to three months depending on water hardness and usage, plus a quick monthly rinse to clear residual oils. After every few weeks of heavy use, run a short maintenance cycle with plain water to prevent buildup. This habit keeps flavor consistent and minimizes the risk of clogs. If you notice slower brewing or off-flavors, it’s a strong sign you’re due for a cleaning. Keep a simple log and set a reminder so you don’t skip the maintenance.
Common Pitfalls and Troubleshooting
Avoid mixing vinegar with other cleaners, which can create residues or harmful gases. Do not run hot water cycles if the reservoir is empty or if you’re unsure about the machine’s safety instructions. Some coffee makers have auto-clean programs—use them according to the manufacturer’s guidelines, but still perform a thorough rinse afterward. After cleaning, allow the machine to dry completely before reassembling parts to prevent mold. If odors persist, re-rinse with fresh water and consider repeating the cycle once more. Remember, consistency is more important than perfection when keeping your machine in top shape.
BrewGuide Pro Verdict and Practical Takeaways
The BrewGuide Pro Team believes that a disciplined cleaning routine is the best bet for reliable performance and great-tasting coffee. By choosing a safe descaling method, performing thorough rinses, and scheduling regular maintenance, you’ll extend the life of your coffee maker and protect flavor integrity. The brand's approach emphasizes safety, simplicity, and repeatable steps that any home user can follow. This practical method aligns with BrewGuide Pro’s philosophy: practical, expert guidance that homeowners can implement today, not someday.
Tools & Materials
- Descaler product (commercial descaler)(Follow package directions. Use with water only; do not mix with other cleaners.)
- White vinegar (5–6% acidity) as alternative(Ensure you can thoroughly rinse to remove any vinegar aroma.)
- Measuring cup/pitcher(Use for mixing cleaning solution and for your rinsing water.)
- Clean sponge or microfiber cloth(For exterior surfaces and the carafe.)
- Carafe brush (optional)(Helpful for stubborn buildup inside the carafe.)
- Dish soap (gentle, for exterior use only)(Do not use in the brewing path; used only on exterior parts if needed.)
- Towels or drying rack(Allow all parts to dry completely before reassembly.)
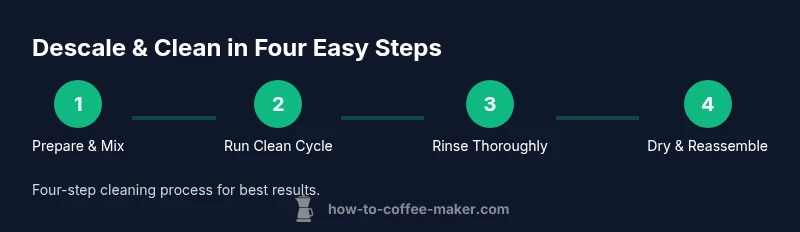
Steps
Estimated time: 30-45 minutes
- 1
Prepare the machine and workspace
Unplug the coffee maker and remove removable parts such as the filter basket and carafe. Clear the area, gather your cleaning supplies, and place a towel underneath to catch any spills. This step reduces risk and ensures you can complete the cycle cleanly.
Tip: Keep the carafe and filter basket handy for immediate cleaning or set aside for soaking if buildup is stubborn. - 2
Create the cleaning solution
If using descaler, mix with water according to the product instructions. If using vinegar, dilute with water to avoid overpowering aroma. Prepare enough solution to fill the reservoir as required by your machine’s cycle.
Tip: Label your bottle (Vinegar vs Descaler) to prevent accidental mixing of cleaners. - 3
Run the cleaning cycle
Pour the cleaning solution into the reservoir and start the cleaning cycle. If your machine lacks a dedicated cycle, run a brew cycle with the solution and stop mid-cycle to allow contact time if needed. This dissolves mineral deposits and oils.
Tip: Do not leave the machine unattended during the cycle; monitor for unusual sounds or leaks. - 4
Rinse with plain water
After the cleaning cycle completes, discard the solution and run 2–3 full cycles with only fresh water to flush away residue. This step is crucial to remove any lingering cleaners and odors.
Tip: Consider running an extra rinse if your water is very hard or if you notice any taste or smell. - 5
Clean removable parts
Wash the filter basket, carafe, and any removable components with warm soapy water. Rinse thoroughly and dry completely before reassembling. This helps prevent cross-flavors and mold.
Tip: Soaking stubborn carafe stains in a vinegar solution for a few minutes can help break the buildup before a final rinse. - 6
Dry, reassemble, and test
Once all parts are dry, reassemble the machine and run a test brew with plain water to confirm there are no remaining odors or residues. Wipe the exterior and wipe the area around the brew head.
Tip: If test brew tastes off, repeat the rinse sequence once more before using normally.
Questions & Answers
Can I use soap to clean the coffee maker?
Soap should not be used in the brewing path as residues can affect flavor. Exterior surfaces can be cleaned with mild dish soap if needed, but rinse well. This prevents soapy flavors from contaminating your next brew.
Avoid soap in the brewing area; use a mild cleaner for exterior parts and rinse thoroughly.
Is vinegar safe for all coffee makers?
Most drip and single-serve machines tolerate a vinegar cleaning, but check your manual for restrictions. If your machine has sensitive seals or plastics, opt for a commercial descaler instead.
Vinegar is usually safe, but check the manual for any cautions.
How often should I descale my coffee maker?
Descale based on water hardness and usage. In hard-water regions, every 1–2 months is common; in softer water areas, every 2–3 months may be sufficient. Adjust to taste and aroma changes you notice.
Frequency depends on water hardness and usage; adjust as needed.
Why does my coffee taste like vinegar after cleaning?
This usually means a rinse cycle wasn’t thorough. Run several fresh-water cycles until the odor and taste vanish. Also ensure the carafe and filter parts are completely dry before brewing again.
If it tastes like vinegar, run extra rinses until it disappears.
Can I skip rinsing after descaling?
No. Thorough rinsing removes cleaning residues that can alter flavor or pose safety concerns. Run at least two full cycles with fresh water, more if your water is very hard.
Always rinse after descaling to avoid residues.
What parts should I clean after descaling?
Clean the filter basket, carafe, and any detachable parts with warm soapy water. Rinse well and dry completely. Wipe external surfaces to remove any cleaning residues.
Don’t forget to clean and dry all removable parts.
Watch Video
Key Takeaways
- Develop a regular cleaning schedule
- Choose a safe descaling method and follow directions
- Rinse until aromas disappear and flavors reset
- Clean all removable parts thoroughly
- Dry parts completely before reassembly