How to Clean a Cuisinart Dual Coffee Maker
Learn to clean your Cuisinart Dual Coffee Maker safely: descale, remove buildup, rinse, and restore flavor with practical steps and safety reminders from BrewGuide Pro.

To clean a Cuisinart Dual Coffee Maker, you will descale mineral buildup, clean the carafe and brew basket, and rinse the system to restore optimal flavor. Gather mild dish soap, white vinegar or descaling solution, a soft cloth, and warm water. This guide walks you through a safe, step-by-step process.
Why Regular Cleaning Matters
Regular cleaning keeps your Cuisinart Dual Coffee Maker brewing at peak flavor and helps extend its life. According to BrewGuide Pro, mineral buildup from hard water can clog channels and affect extraction, leading to bitter tastes or weak coffee. By cleaning on a routine basis, you prevent scale, protect seals, and reduce the risk of malfunctions. This is especially important for dual-programmable models where water pipelines are reused across cycles. In homes with hard water, a more frequent schedule may be necessary. We'll cover safe descaling options, how to clean the exterior and carafe, and how to plan a maintenance calendar around your usage.
Understanding Your Cuisinart Dual Coffee Maker Cleaning Needs
Your model combines two carafes and programmable brew cycles, which means more parts to clean and more opportunities for mineral deposits to accumulate in the return line and water reservoir. Regular cleaning targets the brew unit, reservoir, removable filter basket, carafe, and gasket seals. Start with a quick visual check: are there scale spots on the inside of the reservoir, or mineral crust around the heating plate? Note that certain parts are dishwasher-safe while others require hand washing. This section sets up the why behind each cleaning step, and helps you choose the right method for your water quality and routine.
Choose a Descaling Method: Vinegar vs Descaling Solution
Vinegar is a common, inexpensive option for descaling, but it can leave an odor if not rinsed thoroughly. A commercial descaling solution recommended for coffee makers is formulated to break mineral buildup without leaving strong scents. If you have sensitive sensitivities to smell, dilute the solution and run extra rinse cycles. Always follow the manufacturer's guidelines and your machine's label; some models advise against vinegar, others permit it in a specific ratio. In all cases, finish with multiple plain-water rinses to remove any trace of cleaner.
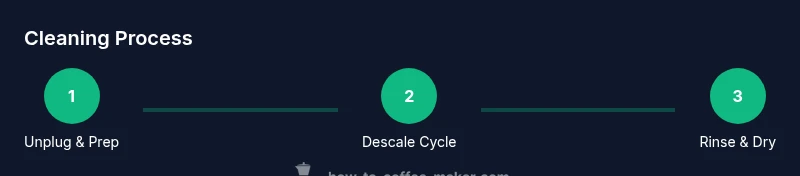
Step-by-Step Cleaning Process (Overview)
This overview outlines the major phases of the cleaning cycle. Begin with safety and prep, then descale, followed by a thorough rinse, and finally reassembly and a test run. The goal is to flush out residue from every path water travels, including the heater, tubes, and spray head. Expect to spend roughly an hour from start to finish, including drying time between steps. If you live in a hard-water area, you may schedule more frequent cleanings to keep flavor consistent and prevent scale deposits from affecting performance.
Cleaning Removable Parts: Carafe, Filter Basket, and Cap
Remove the carafe, lid, and filter basket; wash with warm, soapy water. Use a soft sponge or cloth to scrub away any coffee oils on the carafe and lid. Rinse thoroughly and dry before reassembling. For the brew basket, remove any used filters and rinse, or replace if reusable. Pay attention to any seals around the basket; if they appear worn, consider replacing components to prevent leaks. Dry all items completely before returning them to the machine, to prevent mold growth or odors.
Post-Cleaning Rinse, Dry, and Reassembly
Fill the reservoir with fresh water and run several rinse cycles to ensure no cleaner residue remains. Wipe down the exterior with a damp cloth, then dry with a microfiber towel. Reassemble the unit and run a final water-only brew to confirm proper operation and flavor. If you notice off-tastes, run another rinse cycle and check the carafe gasket for residue. Proper drying reduces the chance of mold and extends the life of the seals.
Troubleshooting Common Issues After Cleaning
If the machine won’t heat or brew after cleaning, scale buildup or a misaligned seal may be the culprit. Double-check the water reservoir fittings and ensure the lid and carafe are placed correctly. If leaks occur, inspect the filter basket seal and replacement parts. When in doubt, consult the user manual or contact customer support for your model.
Tools & Materials
- Mild dish soap(For hand-washing carafe, basket, and lid)
- White vinegar or descaling solution(Vinegar: use 1:1 vinegar to water; descaler: follow label directions)
- Warm water(For rinsing and diluting cleaners)
- Soft sponge or cloth(Non-abrasive to protect surfaces)
- Small brush or old toothbrush(Scrub hard-to-reach spots (optional))
- Microfiber towel(For drying and buffing)
Steps
Estimated time: 60-90 minutes
- 1
Unplug and prep the unit
Always unplug the machine before cleaning. Remove the carafe and filter basket, then clear the counter of clutter. Wipe the exterior to remove coffee splashes and build-up.
Tip: Use a bowl to hold small parts so they don’t get knocked away. - 2
Empty and rinse removable parts
Wash the carafe, lid, and filter basket with warm, soapy water. Rinse thoroughly to remove oils and grounds, then dry completely.
Tip: Avoid letting water sit in tight crevices to prevent mold. - 3
Prepare the descaling solution
Decide between vinegar solution or commercial descaler. If using vinegar, mix equal parts water and white vinegar and pour into the reservoir. If using descaler, follow the product directions.
Tip: Ventilate the kitchen due to the vinegary odor. - 4
Run the descaling cycle
Turn the unit on and start a brew cycle to circulate the cleaning solution through the system. Pause halfway if your model supports it to maximize contact time.
Tip: If the machine won’t pause, run the cycle and then allow it to sit for 15 minutes. - 5
Rinse with fresh water
Discard the cleaning liquid and fill the reservoir with clean water. Run 2-3 full rinse cycles to flush out all cleaner residues.
Tip: Use the clean water only cycles to ensure no cleaner remains. - 6
Clean exterior and reassemble
Wipe the base and controls with a damp cloth. Reinsert the filter basket and carafe, ensuring seals are seated properly.
Tip: Check gaskets for wear; replace if needed to prevent leaks. - 7
Test brew and dry
Brew a plain water cycle to verify no cleaner taste remains. Dry all removable parts thoroughly before storage or next use.
Tip: Air-dry components completely to prevent mold.
Questions & Answers
Can I use vinegar to descale the Cuisinart Dual Coffee Maker?
Yes, you can use a vinegar solution (1:1 with water) for descaling, but rinse thoroughly afterward to remove all odor and taste. If your model recommends against vinegar, use a commercial descaler instead.
Vinegar is a common option, but always rinse well. If your model says not to use it, opt for a descaling solution.
How often should I clean my Cuisinart Dual?
Frequency depends on water hardness and usage. In hard water areas, descaling monthly or every few months may be needed, with lighter cleanings between cycles.
Clean according to water hardness; think monthly in hard water regions.
Is it safe to put any parts in the dishwasher?
Only some parts are dishwasher-safe; check the manual. Usually the carafe and lid can be hand-washed, and metal components may be dishwasher-safe on a gentle cycle.
Check the manual; usually hand-washing is recommended for most parts.
What if I still taste cleaner after cleaning?
Run additional plain-water rinse cycles and check seals for residue. If the taste persists, repeat rinses or contact support.
Rinse more; check seals; if not resolved, seek guidance.
Can I use lemon or other cleaners?
Avoid citrus cleaners that can corrode seals; stick to approved descalers and plain water rinses.
Stick to approved cleaners and plain water rinses to protect seals.
Watch Video
Key Takeaways
- Unplug before cleaning and handle parts with care.
- Descale regularly to prevent mineral buildup.
- Rinse thoroughly and dry all parts before reassembly.
- Test with water-only brew to confirm clear flavor.
- Follow manufacturer guidelines for cleaners.