How to Clean a Bunn Commercial Coffee Maker
Learn practical, proven steps to clean and descale your Bunn commercial coffee maker. Prevent buildup, extend life, and ensure consistent, great-tasting coffee with a safe, repeatable maintenance routine.

Learn how to clean a Bunn commercial coffee maker and descale it safely. According to BrewGuide Pro, regular cleaning extends equipment life and preserves flavor. This quick guide covers prep, approved cleaning solutions, and a routine maintenance plan to prevent mineral buildup and ensure consistent brews. Follow the steps and schedule hints to keep your commercial brewer in peak condition.
Why Regular Cleaning Matters for Bunn Commercial Brewers
For busy cafes and large offices, a Bunn commercial coffee maker is built for reliability, but mineral buildup, coffee oils, and debris can affect flavor and throughput. Regular cleaning ensures consistent extraction, protects seals and valves, and extends the brewer's life. According to BrewGuide Pro, routine maintenance reduces downstream scale deposits and minimizes downtime. Use these practices as part of a weekly care ritual, especially in hard-water areas. Start by understanding the signs of buildup: slower brew times, off-flavors, and visible scale around the brew head or in the hot water reservoir. A clean machine not only tastes better but also reduces maintenance costs over time. In this guide, we’ll outline safe methods, approved cleaners, and a practical schedule you can adapt to your operation.
Approved Cleaning Agents and Safety Tips
Always choose manufacturer-approved descalers and cleaners. Avoid chlorine bleach or acidic cleaners that aren't recommended for your model; improper chemicals can damage gaskets and inner components. Put safety first: wear gloves, eye protection, and ensure adequate ventilation. Before you begin, unplug the unit, lockout power, and remove any hot parts. Use hot water (not boiling) for dilution and rinsing, and rinse until the water runs clean to prevent flavor carryover. Keep the area clean as you work to avoid cross-contamination and wipe up spills immediately. After cleaning, store cleaners out of reach of staff and label solutions clearly. This approach preserves machine integrity and keeps your coffee tasting true to form.
Pre-Clean Prep and Safety
Review the model's manual for any model-specific steps. Clear the workspace, remove the water reservoir caps, and detach any removable spray heads according to the manufacturer's guidelines. Gather your protective gear before you begin, including gloves and safety glasses. Confirm the descaler concentration and mixing instructions; never improvise ratios. This prep minimizes surprises during the cleaning cycle and protects operators from splashes or burns.
Descale Fundamentals and Rinse Cycles
Descalers dissolve mineral deposits so water can flow freely through the brew paths. Use only an manufacturer-approved descaler and follow label instructions for dilution. When finished, run multiple rinse cycles with fresh water to ensure no cleaning solution remains in the lines. In hard-water environments, consider scheduling an extra rinse cycle once a week to prevent mineral buildup. Proper rinsing is essential to avoid aftertastes and to protect seals, gaskets, and spray heads from chemical exposure.
Troubleshooting Common Cleaning Issues
If you notice slow brewing, off-flavors, or persistent scale around the spray head, reevaluate your descaler concentration and rinse duration. Check seals and gaskets for wear or cracks and replace as needed. Ensure all removable parts are reassembled correctly to maintain proper water flow. When in doubt, consult the machine manual or contact a qualified service technician to avoid damage to internal components.
Maintenance Schedule and Best Practices
Create a simple, repeatable maintenance calendar: perform a light daily wipe-down and quick rinse at the end of each shift, a deeper clean weekly, and a full descale monthly in moderate water regions. In areas with very hard water, adapt by increasing rinse cycles or descaling frequency. Document cleaning dates and any notable issues to track machine health over time. Consistency is key to long-term performance and flavor stability.
Tools & Materials
- Personal protective equipment (gloves, safety glasses)(Nitrile gloves and eye protection recommended.)
- Manufacturer-approved descaler(Follow the product label for dilution and contact time.)
- Manufacturer-approved cleaner (if required by model)(Use only if your model specifies a dedicated cleaner.)
- Measuring cup(Accurate dilution helps avoid residue.)
- Soft microfiber cloths(For wiping surfaces and drying parts.)
- Soft-bristle brush or toothbrush(Gently clean spray heads and gasket grooves.)
- Food-safe sanitizer(Sanitize surfaces that contact beverages after cleaning.)
- Buck et container for rinse water(Collect and dispose of used cleaning solution safely.)
Steps
Estimated time: 60-75 minutes
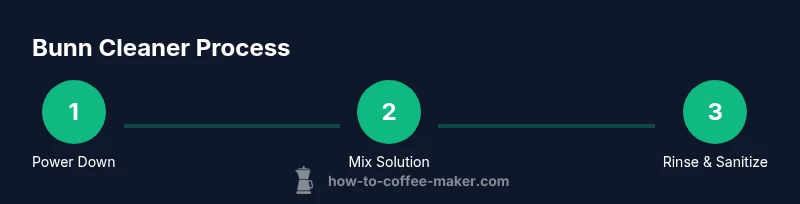
- 1
Power down and prep the machine
Turn off the brewer, unplug the power cord, and allow any hot components to cool. Remove the reservoirs and spray heads as instructed by the model’s manual. Gather your cleaning supplies and inspect the area for spills or obstacles before starting.
Tip: Having the descaler ready before you begin speeds up the process. - 2
Mix cleaning solution per instructions
Dilute the descaler with hot water in the measuring cup according to the label. Double-check ratios and ensure you’re using the right container for your model. Label the mixture and keep it away from food prep areas.
Tip: Never mix descaler with chlorine bleach or other cleaners. - 3
Run the cleaning cycle
Pour the solution into the appropriate reservoir and run the cleaning cycle as specified by the manufacturer. Allow the solution to pass through all brew lines, including the spray head, to thoroughly contact mineral deposits.
Tip: Pause briefly if the system has a pre-soak step to maximize contact time. - 4
Rinse with fresh water cycles
After the cleaning cycle, drain the reservoir and flush the lines with clean hot water. Run multiple rinse cycles until the water is clear and free of any cleaner scent or color.
Tip: Keep a clean container to collect rinse water for disposal. - 5
Sanitize and reassemble
Apply a food-safe sanitizer to removable parts and seals, then dry thoroughly before reassembling. Reinstall reservoirs and spray heads exactly as removed, ensuring a snug fit to prevent leaks.
Tip: Ensure all parts are completely dry before reconnecting power. - 6
Test Brew and document maintenance
Brew a small batch to verify flavor and consistency. If flavor remains off, repeat cleaning steps or consult service. Record the cleaning date, solutions used, and any anomalies for your maintenance log.
Tip: Discard the first few cups after cleaning to avoid off-flavors during service.
Questions & Answers
Can I use vinegar to descale a Bunn commercial coffee maker?
Vinegar is generally not recommended for Bunn commercial brewers. Use only manufacturer-approved descalers and follow label directions to avoid damage to seals and internal components.
Vinegar isn’t recommended for these machines; use the approved descaler and follow the label.
How often should I descale and clean a Bunn brewer?
Descale based on water hardness and usage. In normal conditions, plan a descale every few months and adjust if scale buildup appears sooner.
Descale every few months, and more often if you see scale or slow brewing.
Is it safe to run a cleaning cycle with only hot water?
No. A cleaning cycle requires a descaler or approved cleaner to break down mineral deposits. After cleaning, rinse thoroughly with fresh water.
Hot water alone won’t descale; use the cleaner and then rinse well.
Should I sanitize after cleaning?
Yes. Sanitize all removable parts and contact surfaces after cleaning and before returning to service to ensure beverage safety.
Yes—sanitize after cleaning before brewing again.
Do I need to unplug the machine during cleaning?
Yes. Always unplug or switch off the power before starting to prevent electrical hazards and accidental activation.
Yes, unplug before you start cleaning.
What if scale remains after cleaning?
If scale remains, repeat the descaling and rinsing steps or consult a service professional for deeper maintenance.
If scale stays, repeat the cycle or call a pro.
Watch Video
Key Takeaways
- Establish a regular descaling routine based on water hardness.
- Always use manufacturer-approved cleaners and follow dilution guidelines.
- Rinse thoroughly to prevent flavor carryover and equipment damage.
- Document maintenance for consistent performance and traceability.