How to Clean a Coffee Maker with Vinegar: Easy, Safe Steps
Learn how to clean your coffee maker with vinegar safely and effectively. This step-by-step guide covers prep, cleaning cycles, thorough rinsing, and maintenance to prevent mineral buildup and odors for better-tasting coffee in your home.

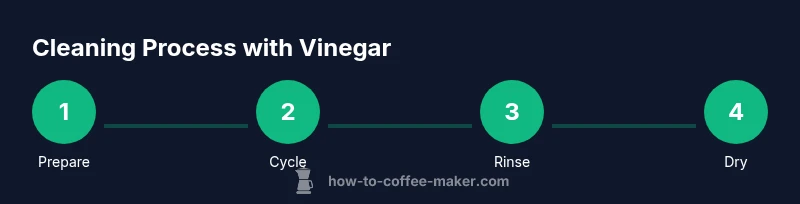
To clean a coffee maker with vinegar, use white distilled vinegar or a 1:1 vinegar–water mix. Run a full cleaning cycle, pause to let buildup soak if needed, then flush with fresh water several times, and wipe the carafe and filter basket dry. Always unplug first and check your manufacturer’s instructions before cleaning to avoid damage.
Why vinegar cleaning works for coffee makers
Vinegar is a mild acid that helps dissolve mineral deposits from hard water, which can accumulate around the heating element, water lines, and filter basket over time. When used correctly, a vinegar cleaning cycle can restore brewing efficiency, remove lingering odors, and reduce the risk of off-flavors in your coffee. Vinegar also acts as a natural deodorizer, helping to neutralize stale coffee smells that can cling to carafes and coffee baskets. For many home brewers, vinegar offers a frugal, readily available solution that avoids harsher chemicals while maintaining safety when used as directed. According to BrewGuide Pro analysis, regular but moderate use of vinegar cleaning cycles can extend the life of basic drip machines by keeping mineral buildup in check. If you notice heavy scale, schedule a deeper descale using a dedicated descaler in combination with periodic vinegar rinses. However, always consult your manufacturer’s care instructions, especially for specialty machines that use aluminum parts or coated components, to avoid compromising seals or warranties.
Key benefits include improved flow, more consistent extraction, and a cleaner-tasting cup. Always start with the least aggressive cleaning method recommended by the maker, and only move to vinegar if approved. Remember that the goal is to remove buildup, not to strip protective coatings, so avoid leaving vinegar in for longer than recommended and ensure thorough rinsing afterward.
Safety considerations and choosing vinegar
Safety comes first when cleaning any appliance. Use white distilled vinegar at household strength (5% acidity) for most machines, as it provides a reliable cleaning action without harsh fumes. Do not mix vinegar with bleach or other cleaners; the resulting fumes can be dangerous. If you have a stainless steel or glass-lined brewer, vinegar is typically safe, but always verify compatibility in the manual. For some high-end or specialty models, manufacturers may recommend non-acidic descalers instead of vinegar. If you’re unsure, perform a small test cleaning on a removable component (like a carafe) before running a full cycle. When in doubt, substitute with a manufacturer-approved descaling solution.
BrewGuide Pro notes in its ongoing guidance that the safest approach is to use vinegar responsibly and in the right concentration, paired with ample rinsing. Ventilate the area well during the cleaning cycle to minimize vinegar odor while the machine runs.
What you need before you start
Before you begin, gather essential supplies so you don’t interrupt the cleaning flow:
- White distilled vinegar (or a 1:1 vinegar–water mix)
- Water (preferably distilled for rinses)
- Measuring cup for accurate mixing
- Cleaning sponge or microfiber cloth for exterior wiping
- Optional: soft brush for stubborn residue, and a splash guard to protect surfaces
Having these items on hand ensures a smooth, efficient process. It also minimizes the chance of rushing through rinses, which is critical for removing any lingering vinegar taste. A well-prepared setup also helps you maintain a clean workspace and prevents accidental spills.
How the vinegar cleaning cycle works
The vinegar cleaning cycle is designed to travel through the same pathways used during a normal brew, but with a concentrated, acidic solution that dissolves mineral buildup. As the solution heats, minerals loosen and carry away with the discharge. The subsequent rinse cycle flushes the system with clean water to remove any vinegar residue, ensuring the final brew doesn’t carry off-tastes. During this middle phase, you may notice a temporary vinegar aroma, which dissipates quickly after rinsing. This section outlines the core phases you’ll experience during the process and what to expect at each stage.
Important: Do not let the cleaner sit too long in the hot reservoir. Prolonged exposure can affect seals and gaskets, especially in older machines. The goal is a thorough flush, not a long soak.
Pro tip: If your machine has a descaling setting, you can combine the vinegar flush with a quick descal-ing cycle per the manual's guidance, but always complete a multi-step rinse afterward.
Cleaning different coffee maker types
Different machine styles respond differently to vinegar cleaning:
- Drip coffee makers: Vinegar works well for the reservoir, tubing, and shower head. The cleaning solution should pass through the brew cycle so all internal surfaces are treated.
- Single-serve pod machines: Some manufacturers advise against vinegar; check the manual. If allowed, use a diluted mixture and run several cleansing cycles with thorough rinses. Avoid soaking internal tubing for extended periods.
- Espresso machines: Many machines recommend specialized descalers rather than vinegar because of delicate group heads and seals. If vinegar is allowed, dilute it and run quick cycles followed by generous water rinses; never leave vinegar in contact with metal components for long.
If you’re unsure about your model, contact the manufacturer or consult the unit’s manual first. For best results, pair vinegar cleaning with routine maintenance like wiping the exterior and rinsing the carafe after every use.
BrewGuide Pro’s approach emphasizes caution with high-end machines; use vinegar only when the manual permits and ensure you thoroughly rinse before brewing coffee for consumption.
Troubleshooting and post-clean maintenance
After your cleaning cycle, inspect the machine for any signs of residue or mineral deposits photos. If you still smell vinegar after the rinse, run another water-only cycle and wipe down the exterior again. For stubborn buildup in the carafe or filter basket, hand-scrub with warm water and a non-abrasive sponge. Dry all removable parts thoroughly before reassembling to prevent mold or mildew. If odors persist, repeat the entire process with fresh vinegar and additional rinse cycles, expanding the rinse duration by a couple of minutes per pass. Periodic maintenance should include emptying and rinsing carafes daily and performing a thorough rinse every few weeks, depending on water hardness and usage.
Keep a routine: set a monthly reminder to inspect seals, gaskets, and the reservoir lid. Even with vinegar, consistent cleaning helps prolong the life of the machine and maintains the flavor quality of your coffee.
Authority sources and further reading
For readers who want to dive deeper, the following educational and government-affiliated resources provide general guidance on appliance cleaning and descaling best practices. They help you understand safe methods and why thorough rinsing matters:
- https://extension.oregonstate.edu
- https://extension.psu.edu
- https://extension.illinois.edu
Note: These sources offer general guidance on appliance maintenance and do not replace your machine’s official manual. Always cross-check with your model’s documentation before applying any cleaning method.
Quick-start checklist
- Unplug the coffee maker and remove the filter/basket
- Mix vinegar with water in a 1:1 ratio (or use plain white vinegar)
- Start the cleaning cycle and allow a soak if buildup is heavy
- Rinse with fresh water several times until no vinegar taste remains
- Wash carafe and filter basket, then dry completely
- Reassemble and run a final water-only cycle to confirm cleanliness
Tools & Materials
- White distilled vinegar (5% acidity)(Use plain white vinegar for most machines; avoid flavored vinegars)
- Water (distilled preferred for rinses)(Ensure enough for multiple rinse cycles)
- Measuring cup(For accurate vinegar-water dilution)
- Cleaning sponge or microfiber cloth(For exterior wiping and carafe cleaning)
- Soft brush(Optional for removing stubborn residue in carafe)
Steps
Estimated time: 30-45 minutes
- 1
Unplug and prep
Power off the machine and remove the filter basket and any detachable parts. Empty the carafe and quickly rinse to remove loose grounds. Set up your cleaning area to avoid spills.
Tip: Wear old clothes; vinegar vapor is normal but should not soak you. - 2
Mix vinegar solution
Combine white vinegar with water in a 1:1 ratio using a measuring cup. This diluted solution reduces acidity while still is effective at mineral removal.
Tip: If you have very hard water, a slightly weaker solution may be safer for seals. - 3
Run first cleaning cycle
Fill the reservoir with the vinegar solution and run a complete brew cycle. If buildup exists, pause halfway to allow the solution to soak for 10–15 minutes.
Tip: Do not leave vinegar sitting in the machine for more than the recommended soak time. - 4
Rinse with clean water
Empty the leftover vinegar and run two to three full cycles with fresh water. This removes vinegar residue and dislodged minerals.
Tip: If your machine smells strongly of vinegar, run an extra rinse cycle. - 5
Clean removable parts
Wash the carafe, basket, and any removable parts with warm, soapy water. Rinse well and dry thoroughly before reassembly.
Tip: Avoid abrasive scrubbers on the carafe to prevent scratches. - 6
Final test brew
Reassemble the unit and run a test brew with only water. Taste the brew to ensure no vinegar flavor remains; repeat rinses if necessary.
Tip: Leave the machine unplugged until you’re confident the rinse is complete. - 7
Schedule routine maintenance
Create a simple maintenance schedule based on water hardness and usage. Regular rinses help prevent heavy mineral buildup between descales.
Tip: Keep a small bottle of vinegar on hand for quick monthly cleanings.
Questions & Answers
Is white vinegar safe for all coffee makers?
White vinegar is suitable for many drip and pour-over machines, but some models discourage vinegar use. Always check the manual before proceeding.
White vinegar works for many machines, but check your model's manual first.
How often should I clean with vinegar?
For regular home use, perform a vinegar clean every 1–2 months, or when you notice mineral buildup or off-flavors. Heavier mineral deposits may require more frequent cleaning.
Clean every 1–2 months, or more if you have hard water.
Can vinegar residue affect the taste of coffee?
If you thoroughly rinse after the cycle, vinegar odor and taste should not carry over to your coffee. Run additional water-only cycles if you notice any taste.
Rinse well; if you still taste vinegar, run extra water cycles.
Can I clean a Keurig or pod system with vinegar?
Many Keurig-style machines advise against vinegar; refer to the user manual. If allowed, dilute vinegar and run several rinse cycles with plenty of water.
Check your manual; if vinegar is allowed, rinse thoroughly.
Is vinegar safe for espresso machines?
Espresso machines often require specific descalers designed for their components. If vinegar is permitted, use only in very dilute form and follow with ample rinsing and maintenance.
Only use vinegar if your manual allows it and rinse well afterward.
What should I do if the vinegar smell persists?
If the odor lingers, run another water-only cycle and wipe the exterior. Ensure all parts are thoroughly rinsed and dried.
Run more water rinses until the smell is gone.
Watch Video
Key Takeaways
- Run a vinegar cycle, then multiple water rinses.
- Thoroughly rinse carafe and basket after cleaning.
- Consult the manual before vinegar use on specialty machines.
- Finish with a test brew of water to ensure no taste remains.