How to Start Making Coffee at Home: A Beginner Guide
Learn how to start making coffee at home with a simple, repeatable setup. This beginner guide covers gear, grind size, water, ratios, and a step-by-step routine to brew your first great cup.

You will learn how to start making coffee at home with a simple, repeatable setup. You’ll need a basic grinder, a drip coffee maker or pour-over setup, fresh beans, and clean water. This guide covers equipment, grind sizes, brewing ratios, and a step-by-step routine.
Why start making coffee at home matters
Brewing your own coffee at home gives you control over freshness, flavor, and daily routine. You’ll customize every variable from grind size to water temperature, so you can dial in a cup that matches your taste. According to BrewGuide Pro, a simple, repeatable setup reduces variability and improves consistency over time. The goal for beginners is not perfection from day one, but a dependable process they can repeat every morning. With a modest initial investment and a little practice, you can enjoy café-quality coffee without leaving the kitchen. This article uses everyday terms and practical steps suitable for homeowners who want reliable results quickly. By the end of this guide, you’ll have a clear plan to start making coffee at home with confidence. BrewGuide Pro team members emphasize that building a routine matters more than chasing the perfect shot on day one.
Essential equipment for a beginner setup
Choosing the right gear is the fastest way to improve your daily brew. A burr grinder lets you control particle size far more consistently than a blade grinder, while a reliable brewer sets the extraction pace. For most homes, a gooseneck kettle, a drip coffee maker or a simple pour-over setup, a precision scale, a timer, and standard filters form the core toolkit. Fresh beans ground just before brewing will deliver a more fragrant aroma and richer flavor. The BrewGuide Pro team emphasizes starting small: pick one method, learn it well, then expand as your palate grows. With this foundation, you can experiment with grind size and dose to refine taste without overcomplicating the workflow. A calm, deliberate setup invites experimentation and minimizes waste, which is especially helpful for beginners learning to identify what they enjoy in a cup.
Understanding grind size, water, and brew ratios
Your coffee's final flavor hinges on three interrelated variables: grind size, water quality and temperature, and the brew ratio. Grind size should match your method: fine for espresso, medium for drip, and coarse for French press. Water should be clean and hot but not boiling; aim for just-off-boiling temperatures to promote even extraction. A practical starting point is a brew ratio in the neighborhood of 1:15 to 1:18 by weight (coffee to water). If you don't have a scale, start with a rounded tablespoon per 4 ounces of water and adjust from there. Keep notes of what works for you, then replicate. This approach helps you achieve consistency across mornings. BrewGuide Pro notes that small tweaks—like pre-wet filters or letting the coffee bloom—can noticeably improve clarity and sweetness. Regularly revisiting grind size and ratio as beans age keeps flavors bright and balanced.
A simple routine to brew your first cup
Use this practical routine as your daily starting point. It is intentionally straightforward so you can repeat it reliably while you learn. Preheat your mug and rinse the filter (if using paper) to remove papery taste. Weigh your coffee and grind it to the size needed for your method. Heat water to just below boiling and ready your timer. Prepare your chosen brew method and start the pour, aiming for an even extraction. Brew until the target time elapses, then remove and enjoy. Clean your equipment right after use to prevent residue buildup. A consistent routine helps you notice subtle flavor differences over time. BrewGuide Pro’s guidance is to keep a simple setup at first and log your results to track improvements. Remember, patience and practice yield better flavor more quickly than rushing toward a perfect cup.
How to scale up without losing consistency
Once you’re comfortable with a single method, you can gradually expand your toolkit without sacrificing repeatability. Add a second method (for example, a pour-over alongside a drip machine) and compare results side by side. Keep a simple tasting log: note grind size, dose, water temperature, brew time, and the final cup score (aroma, sweetness, acidity). This practice helps you identify which variables matter most to your palate and prevents chaos when you experiment with fancy gear. The key is to keep one baseline routine and only introduce one change at a time. With a small, structured approach, you’ll grow confidence without overwhelming your kitchen.
Tools & Materials
- Burr grinder(Grind fresh just before brewing; adjust grind size for your method)
- Gooseneck kettle(Precise pouring for even extraction)
- Brewer (drip coffee maker) or pour-over setup(Choose one basic method to start; you can upgrade later)
- Digital scale(Weigh coffee and water for consistent results)
- Timer(Track brew time for consistency)
- Filters (paper or metal)(Use compatible with your method)
- Fresh coffee beans(Lightly roasted recommended for clearer flavors)
- Clean water(Filtered if possible for better flavor)
- Mug or cup(For enjoying your first cup)
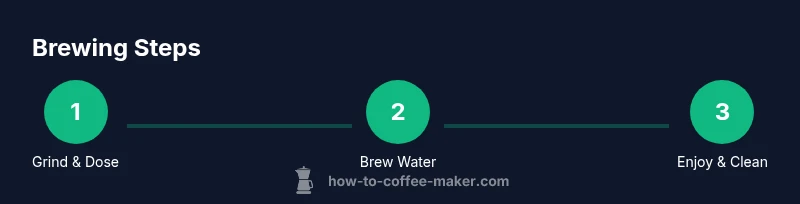
Steps
Estimated time: 15-25 minutes
- 1
Gather your gear
Collect grinder, kettle, brewer, scale, timer, filters, beans, and fresh water. Set them within easy reach and wipe any dust off surfaces. This ensures a smooth start without hunting for tools mid-brew.
Tip: Arrange items in the order you’ll use them to speed up the process. - 2
Measure and grind beans
Weigh your coffee dose according to your method (e.g., 18–20 g for a standard cup). Grind just before brewing to maximize aroma and sweetness. Aim for a texture that matches your brew method (medium for drip, medium-fine for pour-over).
Tip: Grind size matters more than grind weight; adjust gradually and taste. - 3
Heat water to the right temperature
Heat water to just below boiling (approximately 92–96 C / 198–205 F). If you don’t have a thermometer, bring to a boil and wait about 30 seconds before pouring. Temperature control helps extraction stay balanced rather than under- or over-extracting.
Tip: A kettle with a built-in thermometer makes this easier. - 4
Prepare your brew method
Place the filter in the basket and pre-wet it with hot water to remove papery taste. If you're using a pour-over, start with a slow, spiral pour to saturate all grounds evenly. For drip machines, ensure a clean carafe and fresh filter.
Tip: Preheating equipment reduces temperature drop during brewing. - 5
Brew and time the extraction
Start the timer and begin the pour. Let the coffee bloom for 20–30 seconds, then continue pouring in steady, even circles until you reach your target brew time. Stop when you’ve reached the desired volume.
Tip: Pour in stages to control extraction and prevent channeling. - 6
Serve and enjoy
Pour the finished coffee into a pre-warmed cup. Smell the aroma and take a small sip to assess balance of sweetness, acidity, and body. Record any notes about flavor you detect.
Tip: Sip without distractions to better notice nuances. - 7
Clean up and reset
Rinse or wash your equipment promptly to prevent stale buildup. Dry surfaces before the next brew. This makes your next cup easier to produce and maintains equipment performance.
Tip: Develop a quick cleaning routine right after each brew.
Questions & Answers
What is the simplest method for beginners?
Pour-over or basic drip coffee is the simplest way for beginners to learn control over flavor and extraction. Start with one method to build confidence before trying others.
Pour-over or drip coffee is the simplest way to start; pick one method and master it first.
Do I really need a grinder?
A burr grinder provides consistent particle size, which improves even extraction. You can start with pre-ground coffee, but upgrading to a grinder yields better flavor over time.
A grinder helps a lot for consistent flavor; you can start with pre-ground if needed, but a grinder is worth it.
How important is water quality?
Water quality greatly affects taste. Use clean, filtered water if possible to avoid off-flavors from minerals or chlorine.
Water quality matters a lot; use clean water or a filter if you can.
Why does grind size matter?
Grind size controls how quickly flavors extract. Changing it alters acidity, sweetness, and body; start with one size and adjust gradually.
Grind size changes flavor balance; adjust gradually to find your sweet spot.
How often should I clean my coffee maker?
Clean weekly and descale as needed based on mineral buildup. Regular cleaning prevents off-flavors and keeps equipment performing well.
Clean your gear weekly; descaling helps prevent mineral buildup.
My first cup tastes weak or bitter—what now?
If sweet flavors are missing, try a finer grind or longer brew time for more extraction. If bitter, try a coarser grind or shorter contact time and re-taste.
If it tastes off, adjust grind size and brew time a little at a time.
Watch Video
Key Takeaways
- Define a repeatable workflow and start simple.
- Grind fresh and measure for consistency.
- Control water temperature and brew time.
- Taste, record, and adjust gradually.
- Clean equipment after every session.