How to Know If a Bunn Coffee Maker Is On
Learn how to tell if your Bunn coffee maker is on, interpret indicators, and safely verify status with a simple test. A homeowner-friendly, step-by-step guide to avoid wasted brews and overheating.

By the end of this quick guide, you’ll know exactly when a Bunn coffee maker is on, how to verify indicators, and how to safely test its status. We cover power, lights, sounds, and a quick brew check so you can confirm readiness without guesswork. This section avoids jargon and focuses on practical steps anyone can perform. Keep reading to apply the checks to your exact model.
Understanding the basics of status on Bunn coffee makers
Before you diagnose whether a Bunn coffee maker is on, it helps to understand the typical ways these machines indicate activity. The phrase how to know if bunn coffee maker is on shows that status is conveyed through power connections, control panel indicators, and the heating plate. According to BrewGuide Pro, model variations exist, but most Bunn units rely on a few core cues: a power switch, a ready or on indicator light, a heating element that becomes warm to the touch, and occasional audible cues like a soft hum when warming. Keep in mind that indicators can stay lit briefly after the machine has been unplugged or after a power surge, and that some models feature standby modes that mimic “on” status without brewing. With these basics in mind, you can create a simple mental checklist that you apply every time you approach the machine. The goal is to separate true readiness from residual signals caused by residual heat, standby circuitry, or a fault in the indicator circuit. This section helps you map your own model to those cues so you know what to look for during an inspection.
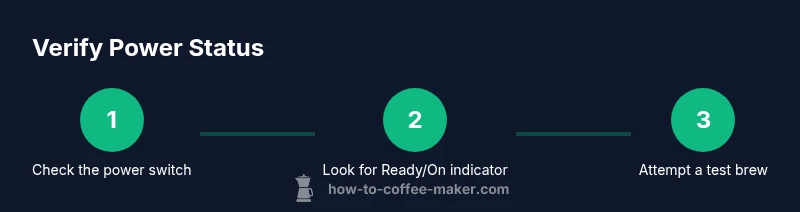
Locate the power source and verify the power switch
The first step to determine if your Bunn coffee maker is on is to confirm it is plugged into a live outlet and that the power switch is set to the active position. On many models the switch is located near the rear or side and marked with I/II or ON/OFF. If the outlet is controlled by a wall switch or a GFCI, verify that the circuit is energized and the breaker has not tripped. Avoid using extension cords that are worn or damaged, as they can mask the true power status. While you check, clear the area around the machine to prevent accidental pulls or spills. If you cannot locate a switch or the outlet seems unresponsive, refer to the model’s manual for the exact location of the power controls. This step creates a reliable baseline so subsequent cues are meaningful.
Check the indicator lights and audible cues
Indicator lights are the quickest visual cue, but their meaning varies by model. Look for a Ready, On, or Power light that illuminates consistently when the unit is idle or warming. Some Bunns use a backlit panel that glows only during heating; others keep a small LED on until the brew cycle starts. In addition to lights, listen for a subtle hum or fan sound when the machine is warming water. Remember, a light may stay on briefly after a power interruption due to capacitors discharging. Always cross-check with physical actions (like pressing the Brew button) rather than relying on a single signal. If the indicator behavior seems inconsistent with what you expect, consult the manual for your exact model to interpret the lights correctly.
Confirm machine status with a simple test brew
A controlled, quick test brew is a reliable way to confirm status. Start by ensuring the reservoir is filled with clean water and that a carafe or mug is in place. Power the unit and initiate a brew cycle following your model’s instructions. Watch for water flow, listen for the pump or solenoids, and note whether the warming plate heats up while the brew progresses. If the machine runs but shows no heat or there is no water delivery, stop the cycle and inspect for clogging, misadjusted valves, or a dry reservoir. If you observe steam or hear a quiet ticking during warming, these can be normal cues signifying activity. This test helps distinguish a true “on” state from an ineffective signal or a stalled cycle.
Troubleshooting why indicators may mislead
Indicator misreads can occur if the machine is in standby, if a power surge affected the control board, or if an older model uses a different indicator logic. Start by unplugging the unit, waiting a moment, and plugging it back in to reset the electronics. If you still see a misleading light or hear unusual sounds after reset, consult the user manual, or contact support. Do not open the housing to inspect internal components unless you have appropriate training. When indicators are unclear, rely on the actual brewing behavior—whether water moves through the system and whether the carafe warms up—as your final test of status.
Safe maintenance practices to prevent false readings
Regular cleaning and descaling can prevent indicator confusion caused by mineral buildup or residue on sensors. Wipe exterior surfaces with a damp cloth, using mild soap if needed, and dry completely. Periodically remove and rinse any removable components that contact water, such as the carafe lid or filter basket, following the user manual. Do not use abrasive cleaners that could damage indicator lenses. After cleaning, perform the quick test brew described above to verify that indicators reflect true operation rather than residual signals. A consistent maintenance routine helps ensure your status checks are accurate and safe.
Quick reference by model and a final reminder
Because Bunn models vary, keep the model number handy and consult the manual for the specific meanings of your control lights. Use the built-in status cues alongside your practical test results to confirm whether the machine is on and ready to brew. For homeowners, a simple habit of checking power, lights, and a brief brew can save time and avoid wasted coffee. This section emphasizes practical steps you can apply regularly, so your mornings stay on track.
Tools & Materials
- Access to a standard electrical outlet(Plug the brewer directly into a grounded outlet; avoid daisy-chaining.)
- Non-contact voltage tester(Optional tool to confirm outlet live-ness without opening the unit.)
- Soft microfiber cloth(Use for exterior wipe-downs; ensure surfaces are dry before testing.)
- Mild cleaning solution(Only if exterior cleanup is needed; never spray into the machine.)
- Owner’s manual for your exact model(Reference model-specific indicators and switch locations.)
Steps
Estimated time: 15-25 minutes
- 1
Inspect power source and switch
Verify the unit is plugged into a live outlet and the power switch is in the ON position. If the outlet is on a GFCI circuit, ensure it has not tripped. Use the manual to locate the switch for your model.
Tip: If the outlet feels warm to the touch, pause and inspect the cord and wall circuit for safety. - 2
Look for indicator lights that reflect activity
Check the Ready/On/Power lights and note their behavior when idle, warming, or starting a brew. Color, brightness, and timing can vary by model, so confirm against your manual.
Tip: Cross-check lights with a quick press of the Brew button to see if a response occurs. - 3
Listen for audible cues
Listen for a soft hum or fan when the unit begins warming. Some models exhibit brief sounds that indicate heating or pump activity.
Tip: A completely silent unit may indicate a power or sensor fault if indicators appear lit. - 4
Run a short test brew
With water in the reservoir and a carafe in place, start a brief brew cycle. Observe water flow, pump sounds, and whether the warming plate becomes warm during operation.
Tip: If nothing happens within a minute, stop the cycle and recheck water level and valve position. - 5
Verify heat and timing after the cycle
After the cycle begins, confirm the warming plate heats up and the brew progresses. If heat never develops, reassess water supply, valve integrity, or potential mineral buildup.
Tip: Avoid touching hot surfaces; use oven mitts if reaching near the plate. - 6
Reset if signals are inconsistent
If indicators seem inconsistent, unplug the machine, wait a minute, then plug back in to reset the electronics. Re-run a quick brew to verify status.
Tip: Keep model-specific reset steps in mind; some units require a longer reset or a sequence of button presses.
Questions & Answers
What does the Ready light mean on a Bunn coffee maker?
The Ready light indicates the unit is prepared to start a brew or is actively warming. It does not guarantee the system is fully heated or delivering coffee yet, and its meaning can vary by model.
The Ready light shows the machine is ready to brew or warming, but check your model's manual for exact meaning.
Can a Bunn coffee maker be on but not heating?
Yes. Some models can show an on indicator while not actively heating if they are in standby or warming mode. Use a quick brew test to confirm actual heating.
Yes, it can be on without heating; run a quick brew to confirm.
Why does the indicator stay on after unplugging?
Indicator lights may linger briefly after unplugging due to capacitors or standby circuitry discharging. This can create a false sense of activity.
Lights can stay on briefly after unplugging due to residual electronics.
Is it safe to unplug during a brew to check status?
Unplugging during a brew pauses or stops the cycle and can be unsafe. Allow the machine to complete or abort safely according to the manual.
Unplugging during a brew is not recommended; use the stop button or allow it to finish if safe.
Do all Bunn models share the same indicators?
Indicators vary by model and era. Always consult the manual for your exact unit to interpret lights and sounds correctly.
Indicator meanings differ by model; check your manual for exact signals.
What should I do if indicators are inconsistent?
Reset the unit per the manual, verify power and water, and run a controlled test brew. If issues persist, contact support.
If indicators are inconsistent, reset and test; contact support if needed.
Watch Video
Key Takeaways
- Verify power and switch status before testing.
- Identify model-specific indicator meanings to avoid misreads.
- Run a controlled brew to confirm active operation.
- Maintain a regular cleaning and descaling routine to keep indicators accurate.