How to Remove Filter from Keurig Coffee Maker
A comprehensive, step-by-step guide to safely remove the water filter from your Keurig, clean components, and flush the system for optimal taste. Includes model considerations, safety tips, and reassembly guidance.

Discover how to remove filter from keurig coffee maker safely and effectively. This step-by-step guide covers unplugging the brewer, removing the reservoir, extracting the filter cartridge, rinsing and inspecting, and flushing the system with water before reassembly. It accounts for model variations and safety tips to prevent damage. Keep the area dry and have a towel ready. This knowledge helps ensure clean flavor.
Why removing the filter matters
Removing the water filter from your Keurig isn't just about maintenance; it can be a practical step for deep cleaning and troubleshooting. According to BrewGuide Pro, filters can accumulate minerals and coffee oils that affect taste and water flow, especially if you don’t replace them on schedule. In models where the filter sits in the reservoir, removing it temporarily for a thorough rinse helps prevent clogs and ensures the heating element runs efficiently. In some units, filters are intended to be replaced periodically rather than removed permanently, so always check your model's manual before proceeding. This section explains the rationale behind filter removal and sets expectations for what you’ll do next. By understanding why you're removing the filter, you’ll approach the task with care and reduce the risk of damaging seals or discoloration of water.
When to consider removing vs. replacing
Not every Keurig needs the filter removed on a routine basis. If you notice metallic or off flavors, slow water flow, or mineral buildup around the reservoir, a temporary removal for cleaning may help. If your model uses a replaceable cartridge, plan for replacement rather than continuous removal. BrewGuide Pro suggests documenting your model’s maintenance schedule and sticking to it to avoid stale water and inconsistent brews. If you’re unsure whether your unit uses a removable filter, consult the user manual or manufacturer support before proceeding.
Safety prerequisites
Before you begin, unplug the brewer and move it to a stable, dry workspace. Detach the water reservoir if required by your model to access the filter housing. Have a towel or tray ready to catch drips. Never attempt maintenance while the unit is plugged in or while hot components are exposed. If you see any cracks or leaks, stop and seek support rather than forcing parts apart.
Tools and materials you’ll need
Having the right basics on hand makes the job smoother:
- Warm water for rinsing (essential)
- Mild dish soap (essential for cleaning)
- Soft microfiber cloth (essential for drying and wiping)
- Small brush or old toothbrush (essential for scrubbing small crevices)
- Towel or tray to catch drips (essential for workspace protection)
- Optional: isopropyl alcohol for quick disinfection (optional)
Preparing these items ahead of time helps prevent mid-task interruptions and minimizes mess.
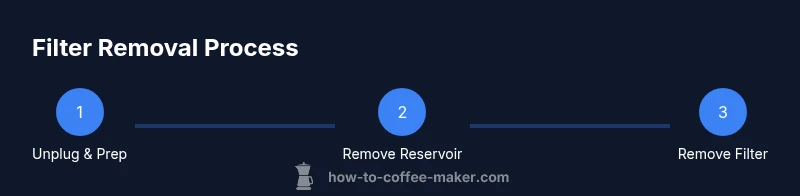
Step 1: Unplug the brewer and prep the area
Power down the Keurig and unplug it from the electrical outlet. Allow any hot surfaces to cool. Move the unit to a clean, dry workstation and lay a towel beneath to catch spills. This step protects you from electric shock and reduces the risk of water damage to nearby surfaces.
Step 2: Remove the reservoir to access the filter housing
Carefully detach the water reservoir if your model requires this step to reach the filter housing. Gently set the reservoir aside on the towel. Access to the filter housing is easier when the reservoir is removed, and you can inspect the area for visible buildup or residue.
Step 3: Locate and remove the filter cartridge
Locate the filter cartridge or the housing prompt in your model. Gently release any tabs or latches and pull the cartridge straight out. Avoid twisting or pulling at an angle, which can damage the housing or seals. If the filter is integrated into a reservoir, simply detach the reservoir and slide the filter out where accessible.
Step 4: Rinse and inspect the filter
Rinse the filter cartridge under warm running water for 60–120 seconds to remove loose debris and mineral dust. If the filter is heavily soiled, soak it briefly in warm water with a drop of dish soap, then rinse thoroughly. Inspect the housing for mineral buildup, cracks, or residue that could impede water flow.
Step 5: Clean the housing and dry components
Wipe the filter housing, gaskets, and any neighboring surfaces with a damp microfiber cloth. Use a soft brush to dislodge stubborn buildup in crevices. Dry all parts completely with a clean cloth before reassembly to prevent mold and mildew.
Step 6: Decide on reinstalling or replacing the filter
Most Keurig devices allow you to either reinstall a new filter cartridge or operate without the filter if your model supports it. If you choose to reinstall, follow the manufacturer’s guidance to insert the new cartridge and reseat any clamps. If you skip the filter, ensure the housing is securely closed and that there’s no residual moisture.
Step 7: Reassemble and flush the system
Reattach the reservoir, plug the machine back in, and run 2–3 no-coffee brews with just water to flush soap and debris. This helps ensure there’s no soapy taste in your next cup and validates that seals are intact. If you removed the filter permanently, run an extra cycle to confirm consistent water flow.
Step 8: Final checks and routine maintenance schedule
Check for leaks around the reservoir and filter housing after the flush. Wipe down the exterior again and store cleaning supplies out of reach of children and pets. Establish a maintenance cadence (e.g., every 1–3 months depending on use) to keep your Keurig running smoothly and tasting fresh.
Tools & Materials
- Warm water(For rinsing and soaking components)
- Mild dish soap(Non-abrasive; for cleaning filters and housing)
- Soft microfiber cloth(Drying and wiping surfaces without lint)
- Small brush or toothbrush(Gently scrub hard-to-reach areas)
- Towel or drip tray(Protects workspace from spills)
- Isopropyl alcohol (optional)(Disinfects surfaces if needed)
Steps
Estimated time: 15-25 minutes
- 1
Unplug the Keurig and prep the area
Power down the brewer and unplug it from the outlet. Let any hot components cool. Move the unit to a clean, dry workspace and place a towel underneath to catch drips.
Tip: Never work on an energized appliance; waiting a few minutes avoids accidental burns. - 2
Remove the reservoir to access the filter housing
Detaching the reservoir creates clear access to the filter housing. Set the reservoir aside on the towel and inspect the connection points for cleanliness.
Tip: Take a quick photo of how the reservoir sits before removal to aid reassembly. - 3
Locate and remove the filter cartridge
Find the filter cartridge in its housing, release any latch, and pull it straight out. Do not twist or yank, which could damage the housing.
Tip: If the cartridge is stiff, apply slight backward pressure before pulling to avoid breaking the tab. - 4
Rinse and inspect the filter
Rinse the filter under warm water for 60–120 seconds. If soiled, soak briefly in warm water with a small amount of dish soap, then rinse thoroughly. Check for cracks or degradation.
Tip: A clear, clean filter improves taste and prevents impurities from reaching the brew. - 5
Clean the housing and dry components
Wipe the housing and nearby seals with a damp cloth. Use a soft brush to remove mineral buildup. Dry all parts completely to prevent mold formation.
Tip: Moisture left behind can harbor mold; drying fully is essential. - 6
Decide on reinstalling or replacing the filter
If your model supports it, you may reinstall a new cartridge or operate without the filter. Follow the model’s manual for correct installation or confirm you can run without it.
Tip: Refer to your model’s documentation to avoid improper installation. - 7
Reassemble and flush the system
Reattach the reservoir, plug in the machine, and run 2–3 water-only brews to flush out soap and debris. This prevents residual taste in coffees.
Tip: Use fresh water for the final brew to ensure clean flavor.
Questions & Answers
Is it safe to remove the Keurig water filter?
Yes, as long as you unplug the unit and follow proper disassembly steps to avoid leaks or electrical hazards.
Yes, it’s safe if you unplug first and follow the steps carefully.
Do I need to replace the filter after removing it?
Not always. Some models require replacement, while others allow operation without a filter—check your manual.
It depends on your model; consult the manual for guidance.
How often should I clean the filter housing?
Clean the housing at least every 1–3 months, or sooner if you notice buildup or off flavors.
Clean every 1–3 months, or when you notice buildup.
Can I use my Keurig without a filter?
In some models you can, but it may affect filtration and water quality. Always verify with the manual.
Some models allow it, but it may impact taste—check the manual.
What if the filter housing is cracked?
Discontinue use and contact support; avoid using a cracked housing as it could leak.
Do not use a cracked housing—get support to replace it.
Watch Video
Key Takeaways
- Unplug before handling the brewer.
- Rinse and dry all parts thoroughly.
- Decide on reinstalling vs. replacing the filter based on model guidance.
- Flush with water brews to remove soap flavors.
- Consult the manual for model-specific instructions.