Do You Need to Clean a New Coffee Maker: A Practical Guide
Before your first brew, clean a new coffee maker to remove dust, oils, and packaging residues. This step-by-step guide covers why cleaning matters, how to clean safely, and how to maintain flavor and performance long-term.

Yes—it's wise to clean a new coffee maker before its first brew. A brief initial clean removes dust, oil residues, and packaging debris that can alter flavor or clog the machine. Start with a warm rinse, then run two cycles of plain water. Check the manual for any brand-specific steps, especially regarding descaling frequency and recommended cleaners.
Do you need to clean a new coffee maker before its first use?
Many home brewers wonder if a brand-new coffee maker needs cleaning before its first operation. The concise answer is yes. Do you need to clean a new coffee maker? The best practice is to perform a careful cleanse to remove dust, manufacturing oils, and protective coatings that can transfer into your first brews. According to BrewGuide Pro, taking this preliminary step helps preserve flavor integrity and extends the life of internal components. A thorough initial clean signals the machine is ready for optimal performance and safeguards your taste buds from unexpected off-notes. If you’re unsure about any step, consult the user manual or reach out to customer support for brand-specific guidance. This upfront effort also reduces the risk of mineral buildup in the water pathway, which can affect extraction quality from day one.
Safety and hygiene considerations for new machines
Safety and hygiene come first when unboxing a new coffee maker. Always unplug the unit before handling any parts. Avoid immersing electrical components in water; focus on removable parts and the exterior. Use mild soap and warm water for washing, and rinse thoroughly to prevent soap residues from impacting flavor. If your machine has a removable water reservoir, detach it and rinse it with warm water. Wear gloves if you’re sensitive to cleaning products, and ensure the workspace is dry to reduce slip hazards. The initial clean is a low-risk, high-payoff task that sets the tone for ongoing maintenance and safe operation.
Pre-cleaning checks and prep
Before you dive into cleaning, inspect the machine for any damage from shipping, such as cracks in the carafe or lid, or misaligned parts. Remove all packaging materials, labels, and protective wrappers. Check the filter (if applicable) and ensure it’s seated properly. Prepare your cleaning supplies: mild dish soap, a soft cloth, a non-abrasive sponge, a measuring cup, and clean, lukewarm water. If you use vinegar or commercial descalers, verify compatibility with your model’s materials and warranty. Proper prep helps you avoid redoing steps and minimizes the chance of accidentally introducing harsh cleaners into the brew path.
The initial clean routine: quick-start overview
The initial clean routine is designed to be simple yet effective. Start with a warm-water rinse to clear dust and residue, then run at least two cycles of plain water to flush the system. This helps clear any lingering manufacturing oils. For some models, you may need to rinse the carafe and brew basket separately with mild soap, then rinse again. Brand guidelines vary, so always review the warranty terms and the manufacturer’s descaling recommendations. A clean start supports consistent flavor right from the first coffee gathered in your new machine.
Descale decisions: vinegar vs. descaling solutions
Descaling is a separate maintenance step, not always needed during the very first use. If your manual specifies a descaling interval, follow that guidance. Many home brewers choose a mild descaler or a 1:1 vinegar solution for mineral removal, especially in areas with hard water. Rinse thoroughly after descaling to avoid any residual flavor. Some manufacturers warn against vinegar for certain metals or seals, so always verify compatibility. When in doubt, select a manufacturer-approved descaler to protect parts and warranty coverage.
Maintenance schedule after the initial clean
Establishing a maintenance rhythm helps you sustain flavor and performance. Track water hardness in your area and adjust descaling frequency accordingly. A good rule of thumb is to descale every 1–3 months for hard water, and every 3–6 months for soft water, though this varies by model. Between descalings, perform a quick clean of removable parts after each use and rinse the reservoir weekly to prevent buildup. Regular maintenance also reduces the likelihood of clogs and keeps the brew path clear for even extraction and consistent temperature.
Cleaning different coffee maker types: drip, single-serve, espresso
Different machine types have distinct cleaning needs. Drip coffee makers benefit from regular filter baskets and carafe scrubs, while single-serve machines may require cleaning the pod-holding mechanism and water reservoir more frequently. Espresso machines demand careful attention to group heads, portafilters, and steam wands, with occasional backflushing and descaling. Always follow the specific care guidelines for your model. This tailored approach helps you protect seals, gaskets, and heating elements while preserving flavor and aroma across brew cycles.
Quick-start checklist and practical tips
Use this quick-start checklist to kick off the process:
- Unplug the machine and inspect for damage
- Remove and wash all removable parts
- Rinse the reservoir and carafe thoroughly
- Run two cycles of plain hot water
- Descale only if advised by the manual
- Reassemble and run a final water-only cycle to flush
- Dry externally and store with all parts aligned
Practical tips: use mild soap on non-metal surfaces, avoid abrasive materials, and never submerge the main body. Keep a small notebook to track cleaning dates and descaling intervals for your specific water hardness and usage patterns.
Tools & Materials
- Mild dish soap(Non-abrasive; suitable for plastic and glass parts)
- Soft cloth(Lint-free; avoid scratching surfaces)
- Non-abrasive sponge(Gentle on carafe and baskets)
- Measuring cup(For accurate mixing if descaling solution is used)
- White vinegar or manufacturer descaler(Only if the manual permits; use sparingly)
- Clean water (distilled if possible)(For final rinses and cycles)
- Cleaning brush with soft bristles(For hard-to-reach areas in baskets or valves)
Steps
Estimated time: Estimated total time: 25-40 minutes
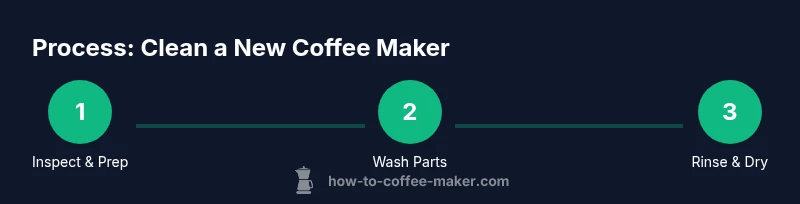
- 1
Unplug and inspect
Disconnect the machine from power and check for any shipping damage or loose components. Remove any protective packaging from exterior surfaces and removable parts. This prevents accidental exposure to water and ensures safe access for cleaning.
Tip: Keep packing materials handy until you’re ready to store them; this avoids misplacing small parts. - 2
Remove and wash parts
Detach the carafe, brew basket, and any removable filters. Wash each part with warm, soapy water, using a soft sponge. Rinse thoroughly to remove soap residues that could affect flavor.
Tip: Pay attention to small parts like gaskets and mesh filters; these often accumulate oils first. - 3
Rinse and dry
Rinse all parts again with clean water and air-dry on a clean surface or towel. Ensure no water remains in hidden crevices that could harbor soap or minerals.
Tip: Drying reduces drip marks and helps you spot any lingering residue. - 4
Initial water rinse
Fill the reservoir with clean water and run a full brew cycle, without coffee. This flushes the internal pathways and warms the system. Repeat with a second cycle to ensure it’s clear of residues.
Tip: If your machine has a probe or sensor in the reservoir, ensure it’s seated properly before the cycle. - 5
Consider descaling if required
If the manual recommends descaling or if you live in hard-water regions, prepare a descaling solution per manufacturer guidelines or use a safe vinegar rinse. Run the solution through the machine, then follow with several cycles of clean water.
Tip: Never mix descaling agents with coffee during the first brew after cleaning. - 6
Final rinse and reassembly
Reassemble removable parts and perform a final water-only cycle to eliminate any lingering cleaner taste. Dry all surfaces and return the machine to its place, ready for use.
Tip: Label the date of cleaning on the machine or in a cleaning log for future reference. - 7
Test brew and flavor check
Brew a small batch of plain water, then taste a cup of coffee to confirm cleanliness and flavor neutrality. If off-flavors persist, repeat a thorough water-only rinse or consult the manual for additional steps.
Tip: If the flavor is off, avoid running stronger or darker roasts until you’ve completed thorough rinsing.
Questions & Answers
Is cleaning a new coffee maker required before first use?
Yes. Cleaning removes dust, oils, and residues from packaging. It helps protect flavor and ensures the machine operates smoothly from day one.
Yes. Cleaning a new coffee maker before first use removes packaging dust and oils and helps ensure clean flavor from your first brew.
What cleaning products are safe for coffee makers?
Use mild dish soap for removable parts and plain water for initial rinses. If descaling, follow the manufacturer’s recommended descaler or a safe, food-grade solution.
Use mild soap for parts, water for rinsing, and follow the manual for descaling solutions.
How often should I descale a new coffee maker?
Descaling frequency depends on water hardness and the model. Follow the manual; in hard water areas, plan for more frequent descaling.
Descale according to the manual, especially if your water is hard; you may need to do it more often.
Can vinegar damage my coffee maker?
Vinegar is effective for mineral removal but can damage certain seals or coatings. Check your manual before using vinegar and rinse thoroughly afterward.
Vinegar can work for descaling, but check the manual first and rinse well after use.
Should I run a cleaning cycle with hot water only?
Starting with hot water is fine for a rinse. Avoid coffee until you’re confident no cleaner flavors remain. If needed, run an extra plain-water cycle.
Yes, use hot water for rinsing, and run extra plain-water cycles if needed before brewing coffee.
What parts should I clean regularly?
Clean the carafe, brew basket, and removable filters after every use. Wipe the exterior weekly and sanitize the reservoir periodically according to the manual.
Clean the carafe and basket after each use, wipe the exterior, and sanitize the reservoir as advised.
Watch Video
Key Takeaways
- Do a quick initial clean before the first brew.
- Follow the manual for descaling and compatible cleaners.
- Rinse thoroughly to avoid residual flavors.
- Document cleaning and descaling for future maintenance.
- Tailor maintenance to your water hardness and usage.