Cuisinart Coffee Maker Clean Button: Step-by-Step Guide
Master the cuisinart coffee maker clean button with this detailed guide. Learn when to use it, how to prepare, run the cycle, and maintain your brewer for peak flavor. Practical, safe, and BrewGuide Pro endorsed.

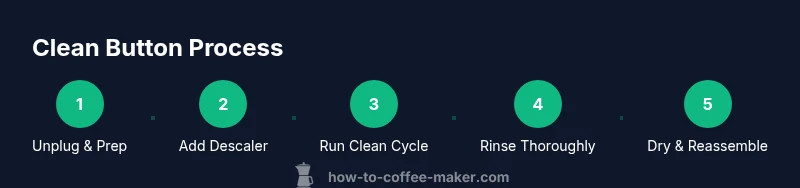
To use the cuisinart coffee maker clean button, start a dedicated cleaning cycle to descale mineral buildup. Steps: empty the carafe and reservoir, add descaling solution or vinegar as directed, fill the reservoir with fresh water, press the Clean button to begin, and run the cycle. Afterward, run two or three full-water rinses until no descaling taste remains.
Why the cuisinart coffee maker clean button matters
According to BrewGuide Pro, the cuisinart coffee maker clean button is more than a gimmick. It signals a dedicated descaling cycle designed to tackle mineral buildup that affects flavor, extraction, and machine longevity. Regular use of the Clean button helps ensure a more consistent brew temperature, clearer coffee, and fewer off flavors caused by limescale. For home brewers, this is a practical maintenance task that fits naturally into a monthly or bimonthly cleaning routine, especially in areas with hard water. In short, the Clean button is a simple, reliable tool for preserving your brewer’s performance and the coffee you love.
Model Variations: Do all Cuisinart have a Clean button?
Cuisinart offers a range of models, and most modern drip coffee makers include a Clean button or a clearly labeled descaling option in the control panel. Some compact or older units may require manual descaling or alternate cycles. If your unit lacks a dedicated Clean button, you can still descale by running a vinegar or descaling solution cycle through the brew path and following with multiple water rinses. Always consult the owner’s manual for model-specific guidance to avoid voiding warranties or triggering error codes. Regardless of model, the goal remains the same: remove mineral buildup and refresh internal pathways for optimal flavor.
Choosing Descaling Solutions: Vinegar vs Commercial Descalers
Descaling solutions are formulated to break down mineral deposits without harming seals or gaskets. Common options include commercial descalers designed for coffee makers and food-grade white vinegar diluted with water. If you choose vinegar, use a 1:1 or manufacturer-recommended ratio, and never mix descalers with other cleaners. After the cycle, the final rinse should purge any vinegar smell or taste. Be mindful that some manufacturers prefer specific descalers, so checking the manual is worth the extra minute at the outset.
Safety First: Preparing Your Machine
Before any cleaning, unplug the unit and remove the carafe, filter basket, and any accessories. Wipe down the exterior with a damp cloth to remove splashes. Empty the reservoir entirely. Clear the coffee grounds bin, if applicable. These pre-cleaning steps reduce the risk of electrical shock and ensure the descaling solution circulates freely through the machine’s internal passages. Keep the work area dry to prevent slips and protect countertop finishes.
Step-by-Step Overview: What to Expect During the Clean Cycle
During a cuisinart coffee maker clean button cycle, you’ll typically see the indicator light or the cycle light illuminate, followed by the unit running for a set period. The descaling solution travels through the brew path, dissolving mineral buildup, then collects in the carafe. After the cycle completes, you’ll usually be instructed to rinse with fresh water through two or more complete cycles. The entire process may take an hour or more, depending on the model and water hardness.
Post-Cycle Rinse and Drying: Getting Back to Fresh Flavor
Once the cycle finishes, discard the rinse water and wipe the interior of the reservoir and carafe. Run at least two full-water rinses to completely flush any cleaning solution from the system. Dry all removable parts before reassembly. A quick wipe of the hot plate or warming surface helps prevent mineral spots from forming on the exterior surfaces. This rinse-and-dry step is essential to restore the natural flavor profile of your coffee.
Maintenance Schedule and Frequency
The frequency of using the cuisinart coffee maker clean button depends on water hardness, usage, and how quickly minerals accumulate. In hard-water areas, descaling every 1-2 months may be appropriate for frequent use; in softer regions, every 2-3 months might suffice. Keeping a simple log helps you stay consistent. If you notice slower brewing, unusual tastes, or a buzzing/alarming light, it’s time to descale regardless of the schedule.
Troubleshooting Common Issues with the Clean Button
If the clean cycle won’t start, verify power, ensure the reservoir is properly seated, and confirm the model supports a dedicated Clean cycle. Check for any error codes in the user manual and reset the machine if advised. If the unit leaks during descaling, discontinue use and inspect the seals or gaskets for wear. Inconsistent flow or weak brew after a clean cycle can indicate mineral buildup in a different pathway that may require a second treatment or professional service.
Common Mistakes and How to Avoid Them
Avoid mixing cleaners not recommended by the manufacturer. Don’t skip rinses after the descaling cycle; insufficient rinsing leaves cleaning residues that affect flavor. Avoid using hot water during the step where you fill the reservoir, as extreme temperatures can stress seals over time. Finally, never run the Clean cycle with a nearly empty reservoir, which can draw air and trigger warnings.
Tools & Materials
- Descaling solution or white vinegar(Follow model guidance; use a colorless vinegar if possible.)
- Measuring cup(For accurate descaler mixing.)
- Soft microfiber cloth(Wipe exterior and carafe; avoid scratches.)
- Fresh, cold water(Rinse cycles require plain water.)
- Small brush or old toothbrush(Clean spray head and nozzles.)
- Dish soap (optional)(For initial wipe-down or light cleaning.)
Steps
Estimated time: 60-75 minutes
- 1
Power off and prep
Unplug the brewer, remove the carafe and filter basket, and wipe any spills. This reduces the risk of electric shock and keeps the cleaning area safe. Let the unit cool briefly if recently used.
Tip: Keep the counter dry and set aside a towel to catch drips. - 2
Check model compatibility
Confirm your Cuisinart model supports a dedicated Clean button or descaling cycle. If not, plan for manual descaling steps per the manual and run thorough rinses afterward.
Tip: If uncertain, consult the user manual or manufacturer support before proceeding. - 3
Prepare the descaling solution
Mix the descaling solution or vinegar with water according to the label or manufacturer guidance. Rinse the measuring cup and pour the mixture into the reservoir.
Tip: Do not mix cleaners; use only one descaling agent per cycle. - 4
Fill reservoir with solution
Pour the prepared descaling liquid into the reservoir up to the recommended fill line. Ensure there are no blockages in the brew path before starting.
Tip: Use cool to lukewarm water if the mixture is too hot to handle. - 5
Position carafe to catch flow
Place the carafe on the hot plate to collect the cleaning solution as it circulates. This prevents spills and keeps the area tidy.
Tip: Clear the carafe from any stale coffee odors beforehand. - 6
Initiate the Clean cycle
Press and hold the Clean button (or follow model-specific instructions) until the cycle begins. If it doesn’t start, retry or consult the manual for a reset procedure.
Tip: Some models require holding for several seconds; don’t release too soon. - 7
Run the cycle and collect the runoff
Allow the cycle to complete and the carafe to collect the descaling liquid. Do not interrupt the cycle unless instructed to.
Tip: If a spill occurs, stop, wipe, and restart the cycle after verifying the reservoir is full enough. - 8
Rinse with fresh water (2–3 cycles)
Discard the runoff and run full-water rinses two or three times to flush any cleaner from the system. This prevents aftertastes.
Tip: Keep the carafe in place for the rinses to prevent splashes. - 9
Final wipe and reassemble
Wipe exterior surfaces and interior components, reinsert the filter basket, and allow everything to dry before brewing again.
Tip: Run a test brew with plain water to confirm flavor neutralization.
Questions & Answers
Which Cuisinart models include a Clean button?
Most newer Cuisinart drip coffee makers include a Clean or descaling option on the control panel. If your model lacks this feature, descale manually following the manual, then rinse thoroughly.
Most newer models have a Clean option. If yours doesn’t, descend manually and rinse well.
Can I use vinegar to descale with the Clean button?
Yes, white vinegar diluted with water is commonly used for descaling. Use vinegar or a commercial descaler as recommended by your model’s manual, then rinse thoroughly afterward.
Yes, you can use diluted white vinegar, then rinse thoroughly.
How often should I run the Clean cycle?
Frequency depends on usage and water hardness. In hard water areas, descaling every 1–2 months is common; in softer areas, every 2–3 months may be sufficient.
Hard water means more frequent cleaning, typically every 1–2 months.
What if the Clean cycle won’t start?
Check power, ensure reservoir is seated, and verify the model supports the Clean cycle. If it still won’t start, consult the manual or contact customer support.
Make sure it’s plugged in and the reservoir is in place; if it still won’t start, check the manual.
Does using the Clean button affect warranty?
Following the manufacturer’s cleaning instructions generally maintains warranty coverage. Using unauthorized cleaners or methods can void warranties, so stick to recommended solutions and procedures.
Sticking to the manual protects warranty; avoid unauthorized cleaners.
Watch Video
Key Takeaways
- Use the Clean button to manage descaling and maintenance.
- Follow the manufacturer’s guidelines for descaling solutions.
- Rinse thoroughly after cycles to restore taste.
- Schedule cleaning based on water hardness and usage.
- Keep an ongoing log to stay on track.