Can a Coffee Maker Go Under Cabinet? Practical Guide
Discover whether a coffee maker can safely sit under a cabinet, with space planning, safety tips, and installation steps tailored for home brewers. BrewGuide Pro provides practical guidance for compact setups.

Yes, you can place many coffee makers under a wall cabinet, but only if there is adequate clearance for heat vents, the machine’s base and water reservoir, and easy access for filling and cleaning. Slim or pod-style machines work best in tight spaces. Avoid bulky brewers or models with exposed vents that could overheat, leak, or trap moisture under the cabinet.
Safety first: can a coffee maker go under cabinet?
Before you proceed, assess whether under-cabinet placement is appropriate for your model. The question can coffee maker go under cabinet hinges on size, ventilation, and access to water and cleaning. In general, many home brewers can operate safely beneath a wall cabinet if you respect heat sources, steam, moisture, and electrical safety guidelines. Always refer to the user manual for any manufacturer-specific limitations. BrewGuide Pro emphasizes planning, model selection, and proper installation to minimize risk and damage in tight spaces.
Assess space and venting requirements
Start by evaluating the space: cabinet height, depth, and the available clearance above and around the machine. Look for any heat sources (such as warming surfaces) and ensure air can circulate freely. If the cabinet is air-tight or has little ventilation, under-cabinet placement may not be suitable. In those cases, consider mounting on a shelf or choosing a compact model designed for tight spaces. BrewGuide Pro's guidance helps homeowners weigh risks and benefits.
How to measure clearance and plan wiring
Use a measuring tape to verify that the machine will fit without crowding nearby outlets, water lines, or cabinet doors. Mark the intended position on the wall or shelf and check the path for cords. Ensure there is a dedicated, properly grounded outlet within reach and avoid daisy-chaining power strips. If your machine has a water reservoir, verify that you can refill it without tipping the unit or spilling water under the cabinet.
Choosing the right coffee maker for under-cabinet placement
Not all models are equal for under-cabinet setups. Slim, compact machines or pod-based brewers usually fit more easily than large traditional drip machines. Look for machines with venting that is directed away from the cabinet and with a stable base that won’t slide on a slick surface. Consider the reservoir orientation (top-fill vs. side-fill) and the ease of accessing the water tank for frequent refills.
Installation considerations: outlets, ventilation, and moisture
Plan the electrical layout before placing the machine. Use a GFCI-protected outlet when possible and avoid extension cords. Route cords neatly to prevent snagging, and ensure any water lines or condensate from the drip tray won’t pool near the cabinet screws or wood. Place a drip tray or mat to protect the cabinet base and wipe up spills promptly to prevent moisture damage.
Placement, leveling, and accessibility
Set the coffee maker on a level surface to prevent spills and ensure consistent extraction. If the cabinet isn’t perfectly level, use a thin shim or non-slip mat to stabilize the base. Keep the control panel and lid accessible, and avoid placing the machine directly behind doors that swing inward. Regularly check the clearance for steam vents and routine cleaning to prevent mold buildup.
Maintenance and cleaning under cabinets
Under-cabinet locations can trap heat and moisture if not cared for properly. Establish a cleaning routine that includes wiping the area, emptying the drip tray, and descaling according to the manufacturer’s schedule. Use a soft cloth and mild cleaner to avoid damaging finishes. Periodically inspect cords and outlets for heat discoloration and signs of wear.
Troubleshooting common issues
If the machine won’t start, verify power at the outlet and confirm that a switch or timer isn’t tripped. If you notice excessive heat or steam, recheck ventilation and move the unit if needed. A small drip or pooled water near the cabinet is a sign to check the drip tray and seals; clean up promptly and ensure the area dries thoroughly to prevent wood damage.
Quick-check safety checklist
- Confirm there is at least some ventilation around the unit.
- Use a dedicated outlet and avoid power strips.
- Keep water reservoir easy to refill without tipping.
- Place a drip tray or mat to protect cabinet surfaces.
- Inspect cords and outlets for heat or wear after each use.
Tools & Materials
- Measuring tape(to check cabinet clearance and machine dimensions)
- Pencil or marker(to mark placement on wall or shelf)
- Level(to ensure the machine sits evenly)
- Non-slip mat or coaster(to prevent sliding and protect cabinet base)
- Drip tray or absorbent mat(for spills and moisture control)
- Cord organizer or cable clips(to secure power cord safely)
- GFCI-protected outlet tester(to verify outlet safety)
Steps
Estimated time: 45-60 minutes
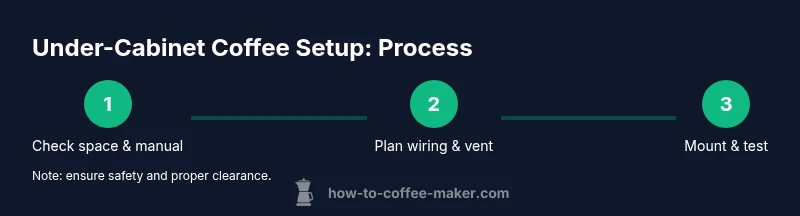
- 1
Check space and read the manual
Begin by reviewing the manufacturer’s clearance guidelines and confirming the model fits your cabinet layout. This establishes whether under-cabinet placement is feasible for your specific machine. If the manual warns against under-cabinet use, postpone installation to avoid voiding warranties or causing damage.
Tip: Always defer to the manufacturer’s clearance guidance. - 2
Measure space and mark the install area
Use a measuring tape to confirm available height, depth, and frontal clearance. Mark the intended spot on the cabinet after verifying that doors or drawers won’t interfere. Double-check that there is room for venting and easy access to the water reservoir.
Tip: Use a level to ensure the mark is straight for a stable placement. - 3
Check electrical and water access
Identify a nearby, properly grounded, GFCI-protected outlet. Ensure water supply or reservoir access won’t require awkward bending or tipping. Avoid extension cords and keep cords away from heat sources to reduce risk of damage.
Tip: Keep the plug accessible for quick removal if needed. - 4
Prepare surface and test fit
Slide the machine into position loosely to test reach for refilling water and emptying the drip tray. If necessary, add a non-slip mat to stabilize the base. Confirm that the exhaust vents have unobstructed airflow.
Tip: Have a helper guide the unit during full placement. - 5
Secure and route cords
Secure the power cord with clips or a cord organizer to prevent snagging. Ensure the cord doesn’t rest against hot surfaces and leaves enough slack for unplugging. Keep water lines or reservoirs away from cabinet hardware to avoid leaks.
Tip: Choose near-permanent cord management so cords don’t shift with daily use. - 6
Run a test brew and observe
Once in place, plug in and run a test brew to verify proper operation, ventilation, and leak-free performance. Watch for unusual heat buildup or vibrating movement. If anything seems off, pause use and re-check clearance and connections.
Tip: Set a timer to monitor for overheating during the first run.
Questions & Answers
Can any coffee maker go under cabinet?
Not all models fit. Prioritize compact or pod-based machines with minimal venting and easily accessible water reservoirs.
Not every model fits; pick compact or pod machines and check venting.
What safety considerations should I follow?
Check venting, heat, electrical outlets, moisture, and ensure a stable surface. Follow the manufacturer’s guidelines closely.
Ventilation, heat, electricity, moisture—follow your manual.
Will under-cabinet placement affect warranty?
It depends on the manufacturer. Review warranty terms and installation guidelines; improper placement can affect coverage.
Check your warranty; installation location can affect coverage.
How do I prevent leaks under the cabinet?
Use a drip tray and keep the area clean; inspect seals and reservoirs for spills. Maintain drainage and dry the area after use.
Keep a tray, clean spills, and inspect seals.
What maintenance does this require?
Regular cleaning, descaling, checking vents, and ensuring airflow around the unit.
Clean regularly, descale, and keep vents clear.
Watch Video
Key Takeaways
- Check the manual and space before installing.
- Choose compact models for tight spaces.
- Ensure ventilation and safe wiring.
- Maintain and monitor for moisture.