How to Know When Coffee Is Done Brewing
Learn reliable cues to know when coffee is done brewing across methods. From aroma and color to flow and taste, BrewGuide Pro shows how to brew with consistency.

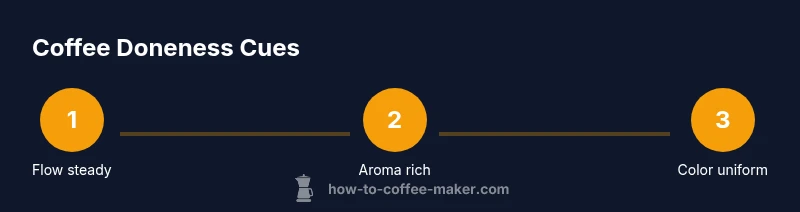
By the end of a brew, there should be a steady, even drip and a clean aroma. According to BrewGuide Pro, use a timer, a scale, and visual cues to gauge doneness across drip, pour-over, and moka pot. When the flow slows, the color is uniform, and the taste is balanced, you’ve reached the end.
Signs the brew is done: visual and sensory cues
The moment coffee finishes brewing is not a single instant but a constellation of observable cues. According to BrewGuide Pro, the most reliable signal combines how the liquid flows, the aroma that fills the room, the color of the brew, and the first clear notes on your palate. Start by watching the pour or drip: a steady, uninterrupted flow that gradually slows indicates you are nearing the end. Then sniff for a rich, balanced aroma without burnt or sour notes. Finally, assess color and clarity: the liquid should look uniform, not pale and under-extracted or opaque and muddy. When these signs align, stop the brew and taste to confirm. Over time you’ll learn to interpret small variations based on method and bean roast. In practice, use these cues together rather than relying on one alone, and always favor taste as the final judge. The BrewGuide Pro team emphasizes building a repeatable routine for consistency.
Method-specific cues: drip, pour-over, French press, and espresso
Different methods emphasize slightly different cues for doneness. For drip or automatic machines, the key is a stable, even flow with a uniform color and a clean aroma. If the stream becomes thin or spotty, or the color leans toward pale, extraction is off. For pour-over, watch bloom times, the rate of pour, and the final drip: a steady rate with a rich aroma signals proper extraction. For French press, after the steep time, the brew should pour smoothly with a balanced body and minimal sediment when you depress the plunger. Espresso cues differ: crema stability, a glossy surface, and a bold aroma indicate completion; if the shot tastes sour or acrid, the extraction is likely under- or overdone. Remember, these are guidelines; tasting remains essential. Practice across your usual beans and grind settings to know what “done” looks and tastes like for your setup. The more you brew, the more intuitive these cues become.
The roles of time, temperature, and grind size in determining doneness
Time matters, but it is not the sole factor. Temperature influences extraction speed and flavor balance; water within a comfortable range helps avoid sourness or bitterness. Grind size affects surface area and how quickly flavors dissolve; a finer grind extracts faster and a coarser grind slower. Doneness is reached when the rate of extraction yields the desired balance of sweetness, acidity, and body. Use a scale to monitor brew ratio and a timer to track how long flavors have to develop. With consistent beans and clean equipment, you can predict the end point more reliably. If you see drift from brew to brew, adjust one variable at a time—start with grind size or target ratio and observe changes in aroma and taste. The goal is to align flow, aroma, color, and taste within your preferred profile.
Practical cues: aroma, color, mouthfeel, and aftertaste
Beyond flow, aroma helps indicate progress. A bright, fruity scent often signals lighter extraction; a fuller, caramel-like fragrance suggests balanced extraction. Color should be clear; murky tones signal over- or under-extraction. Mouthfeel matters: a medium body with a pleasant, lingering sweetness is typical of well-extracted coffee, while a dry, thin finish suggests under-extraction. Aftertaste should be clean and enjoyable, with no overpowering bitterness or sourness. Use a quick taste test after brewing to confirm cues. Remember that caffeine content does not determine doneness; flavor balance does.
Common mistakes and how to fix them
Under-extraction shows as a pale color, weak aroma, and thin body. Fix by refining the grind toward finer for more surface area, increasing contact time, or adjusting water temperature within the recommended range. Over-extraction presents as a dark color, heavy body, and bitter aftertaste. Fix by moving to a slightly coarser grind, shortening brew time, or reducing agitation. Inconsistent results often stem from variable grind size, uneven pouring, or poor water quality. Fix by calibrating a consistent grind, using a steady pour, and, if needed, filtering water. Always start with a baseline and adjust one variable at a time. If you switch beans, re-check your ratio since bean density affects extraction. The aim is repeatability across beans and equipment.
How to calibrate your routine for repeatable results
Create a simple brew log to track variables, cues, and outcomes. Record method, grind setting, dose, water temperature, apparent aroma, final flavor, and notes on flow and color. Compare results across trials to identify which cues best predict your preferred taste. Use cue-based signals (flow, aroma, color) as primary indicators rather than relying solely on time. Revisit calibration whenever you switch beans, grind, or equipment to preserve consistency. A repeatable routine is the core of reliable brewing.
Tools & Materials
- Digital kitchen scale(Precise measurements for brew ratio and color observation)
- Timer (digital or smartphone)(Track total brew time to stay within the target window)
- Gooseneck kettle(Allows controlled, even pours for uniform extraction)
- Drip coffee maker or pour-over setup(Ensure devices are clean and functioning)
- Thermometer (optional)(Check water temperature if you want precise range verification)
- Clear glass carafe or cup(Observe color and clarity visually)
- Brew log or notebook(Record results and compare over time)
Steps
Estimated time: 20-30 minutes
- 1
Set up your brewing area
Clear your workstation and arrange scale, timer, kettle, and filter. Ensure the coffee maker or pour-over setup is clean and ready. This reduces variables and helps you observe cues clearly.
Tip: Tidy the space and pre-heat the mug or carafe so temperature cues stay accurate - 2
Weigh and grind for the chosen method
Weigh coffee and grind to match your method’s needs, aiming for a balanced extraction. Avoid over-grinding for pour-over and under-grinding for drip, as these shift cues.
Tip: Tare the scale before weighing and use a fresh grind for consistency - 3
Heat water to the appropriate range
Heat water to a comfortable range for your brew method. This helps achieve a steady extraction rate and clear flavor without scorching compounds.
Tip: If using a thermometer, aim for a stable reading within your method’s target range - 4
Start brewing and monitor flow
Begin the pour or start the drip and watch the flow rate. A steady, even drip that gradually slows is a key cue of approaching completion.
Tip: Keep pours controlled and avoid chasing a rush of flow early on - 5
Observe aroma and color changes
As extraction progresses, note aroma evolution and the color of the brew. Look for a rich, balanced scent and a uniform hue rather than pale or muddy tones.
Tip: Take notes on perceived aroma to compare with flavor outcomes later - 6
Time the brew and decide doneness
Use the timer to confirm timing aligns with the observed cues, then stop the brew when the signs converge: steady flow, uniform color, and pleasing aroma.
Tip: Do not rely on taste alone; confirm visual and olfactory cues first - 7
Taste, record, and reset
Taste the cup and log flavor notes, aroma, and any adjustments for next time. Clean equipment and reset your setup to maintain consistency.
Tip: Use a standardized tasting rubric to compare results
Questions & Answers
What is the most reliable cue that coffee is done brewing?
The most reliable cue is a combination of steady flow, uniform color, and balanced aroma, verified by a final taste test. Relying on one cue alone can mislead your judgment.
A steady flow, uniform color, and balanced aroma, then a quick taste test, is your best guide.
Does brew time alone determine doneness?
No. Time depends on method, grind size, and water temperature. Use multiple cues—flow, aroma, color, and taste—to decide when to stop.
Time by itself isn’t enough; combine flow, aroma, color, and taste to decide when it’s done.
How does grind size affect when coffee is done?
Grind size changes extraction speed; a finer grind extracts more quickly, a coarser grind slower. Adjust time and technique accordingly to maintain balance.
Grind size changes how fast flavors come out, so adjust time and pour technique to keep balance.
Can I rely solely on aroma?
Aroma helps but is not definitive. Always verify with flow, color, and a quick taste test to confirm doneness.
Aroma is helpful, but you should also check flow and taste to confirm.
Is a darker brew always stronger?
Not necessarily. Strength depends on flavor balance; a very dark brew can be over-extracted and bitter even if strong-tasting overnight, so trust taste as the final judge.
Dark color doesn’t always mean stronger; taste reveals true balance.
What if my coffee tastes weak even when cues align?
Reevaluate grind size, freshness, water temperature, and equipment cleanliness. Adjust ratios and technique gradually and re-test.
If it tastes weak, tweak grind and ratio and test again.
Watch Video
Key Takeaways
- Use timer and scale to frame the end point.
- Doneness is a blend of flow, aroma, color, and taste.
- Method-specific cues vary; don’t rely on one signal.
- Calibrate your routine for repeatable results.
- Taste finalizes your judgment; cues guide your decisions.